Requirements
For correct operation, the Fanvil X7 must be running firmware version 2.4.12.1 or newer.
On your SIP server, create one account each for ESENTA SIAS and for the Fanvil X7 phone.
Storing SIP Credentials in the Fanvil X7
Open the Fanvil web interface and go to Line > SIP.
- Enter the SIP username
- Check Activate to enable the account
- Enter the SIP username here as well
- Enter the SIP password
- Enter the SIP server name here
- Enter the SIP server address here
- Finally, save
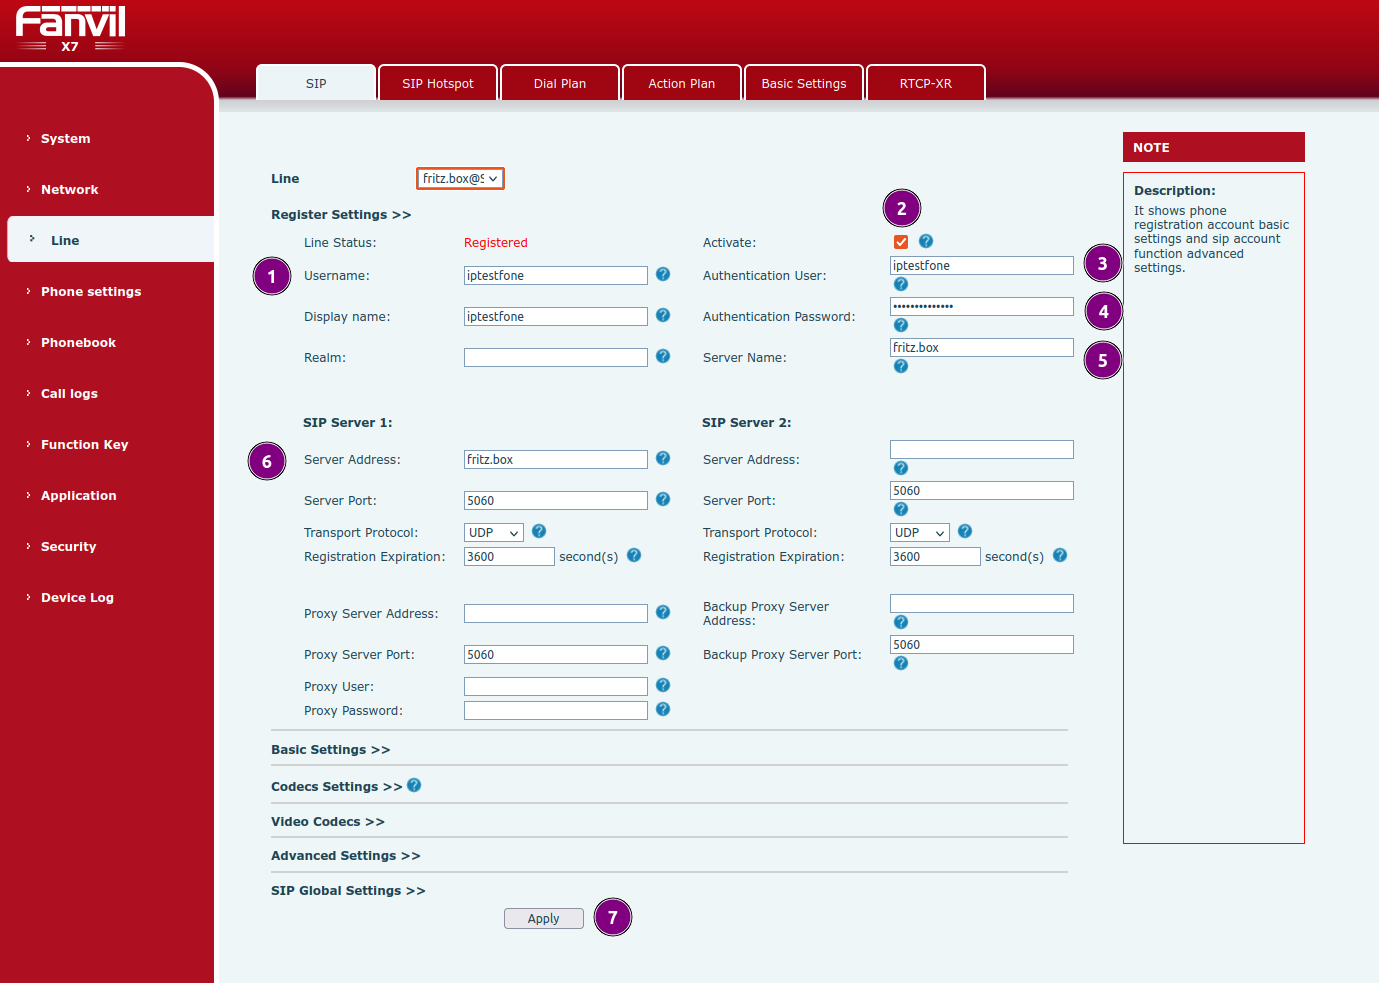
Make sure the connection was successful — after refreshing the page, the Line Status should change to Registered (highlighted in red).
Storing SIP Credentials in ESENTA SIAS
In the ESENTA SIAS web interface, go to SIP Telephony > SIP Server and enter the SIP Server, Username and Password.
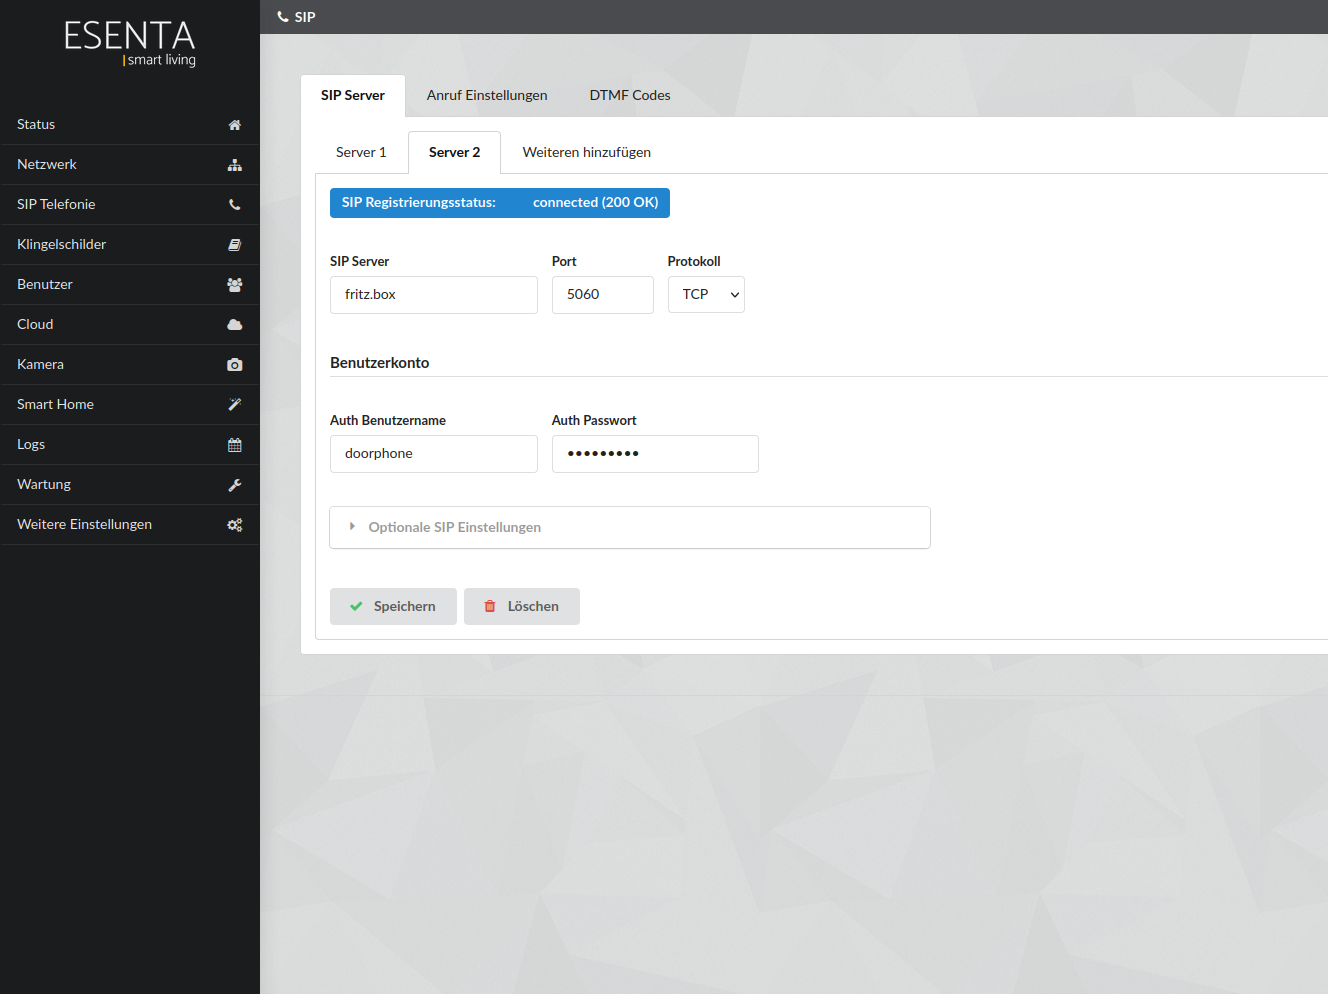
After saving and refreshing the page, the SIP Registration Status should change to connected.
Creating a Call Button in ESENTA SIAS
On the Doorbell Nameplates subpage in the SIAS web interface, enter the SIP address (here: sip:**622@fritz.box) belonging to the SIP account used for the Fanvil X7 phone (sip:[NAME]@[SIP SERVER]).
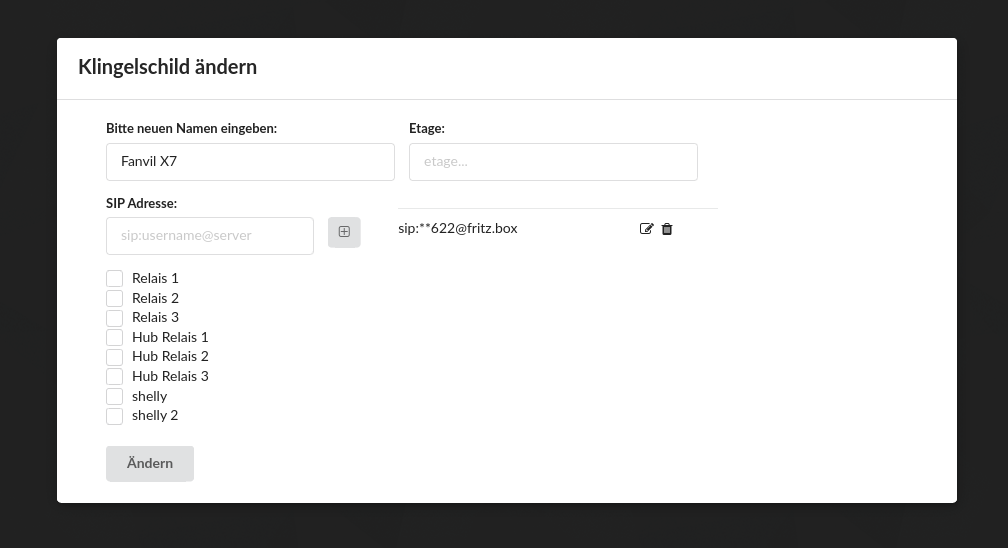
After pressing the corresponding button on the outdoor station's display, the Fanvil X7 should now ring.
Creating a DTMF Code in ESENTA SIAS
To trigger the door opener, set up a DTMF code. Go to SIP Telephony > DTMF Codes and follow these steps:
- Set a numeric opening code
- Select the relay connected to the door opener
- Save
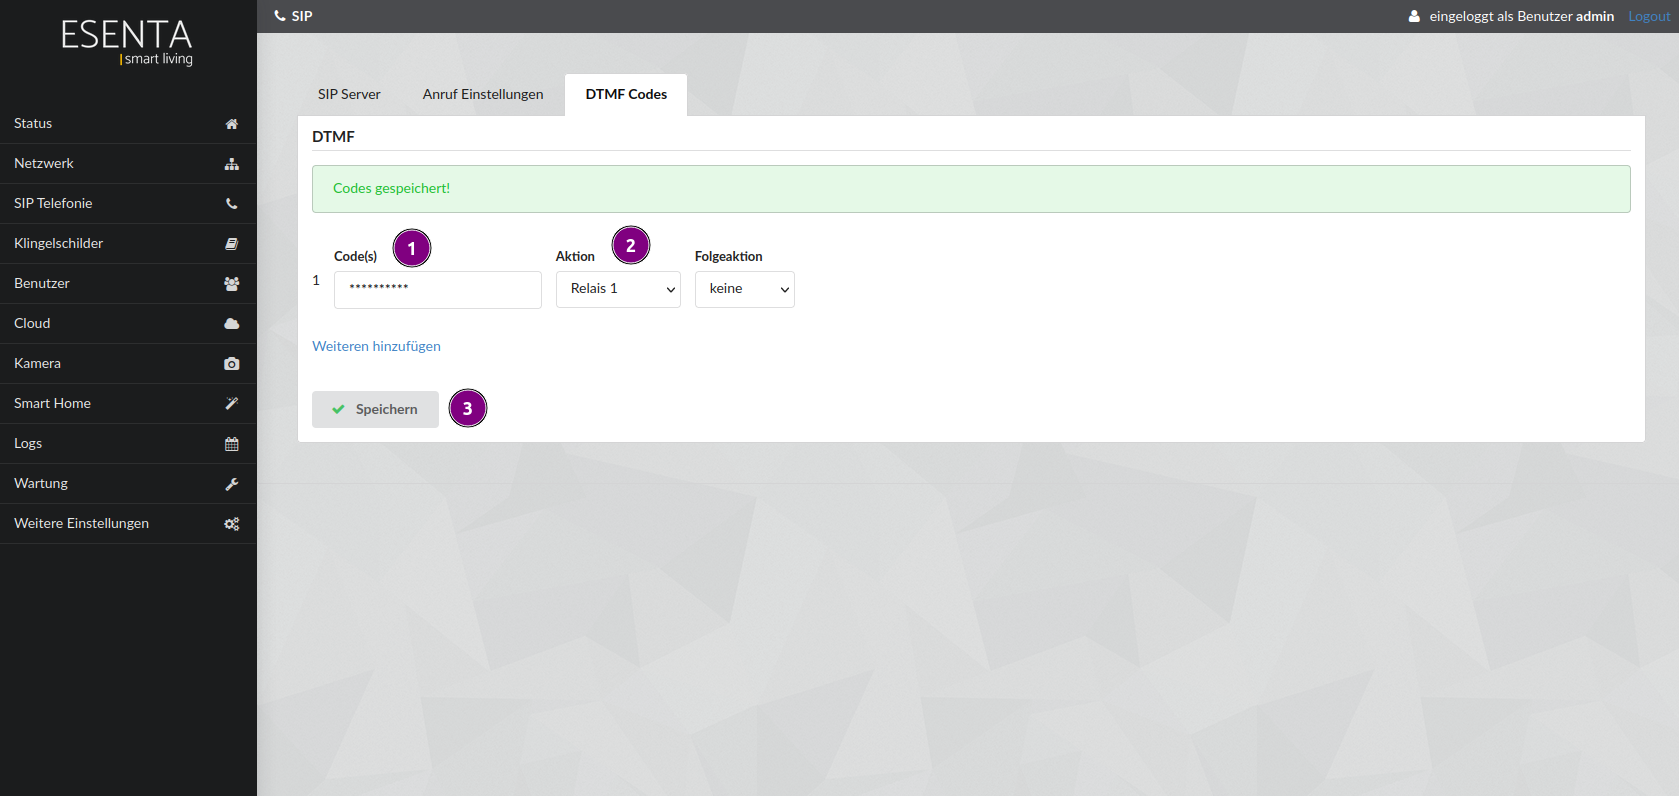
The DTMF code can now be entered on the X7's dial pad during an active call to trigger the door opener.
Video Compatibility Settings on ESENTA SIAS
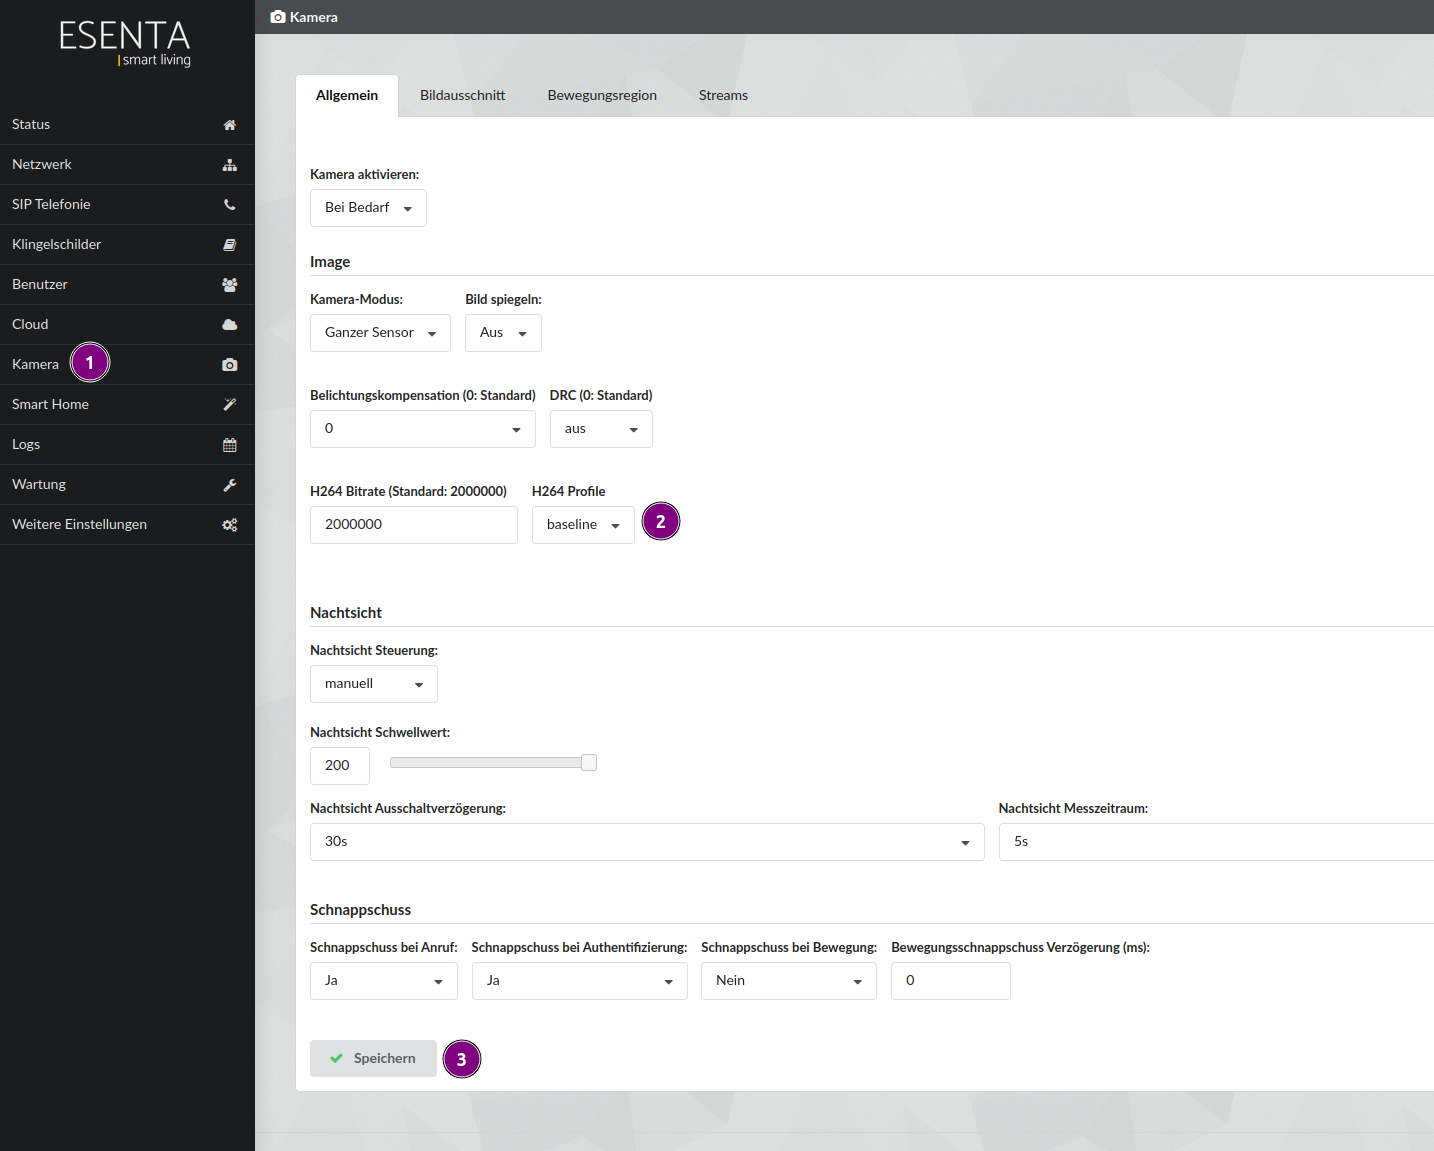
For a video image to be shown on the Fanvil X7, ESENTA SIAS's H264 profile must be changed to baseline.
- Open the SIAS web interface and go to Camera > General
- Select baseline as the H264 Profile
- Then save
Creating a DTMF Key on the Fanvil X7
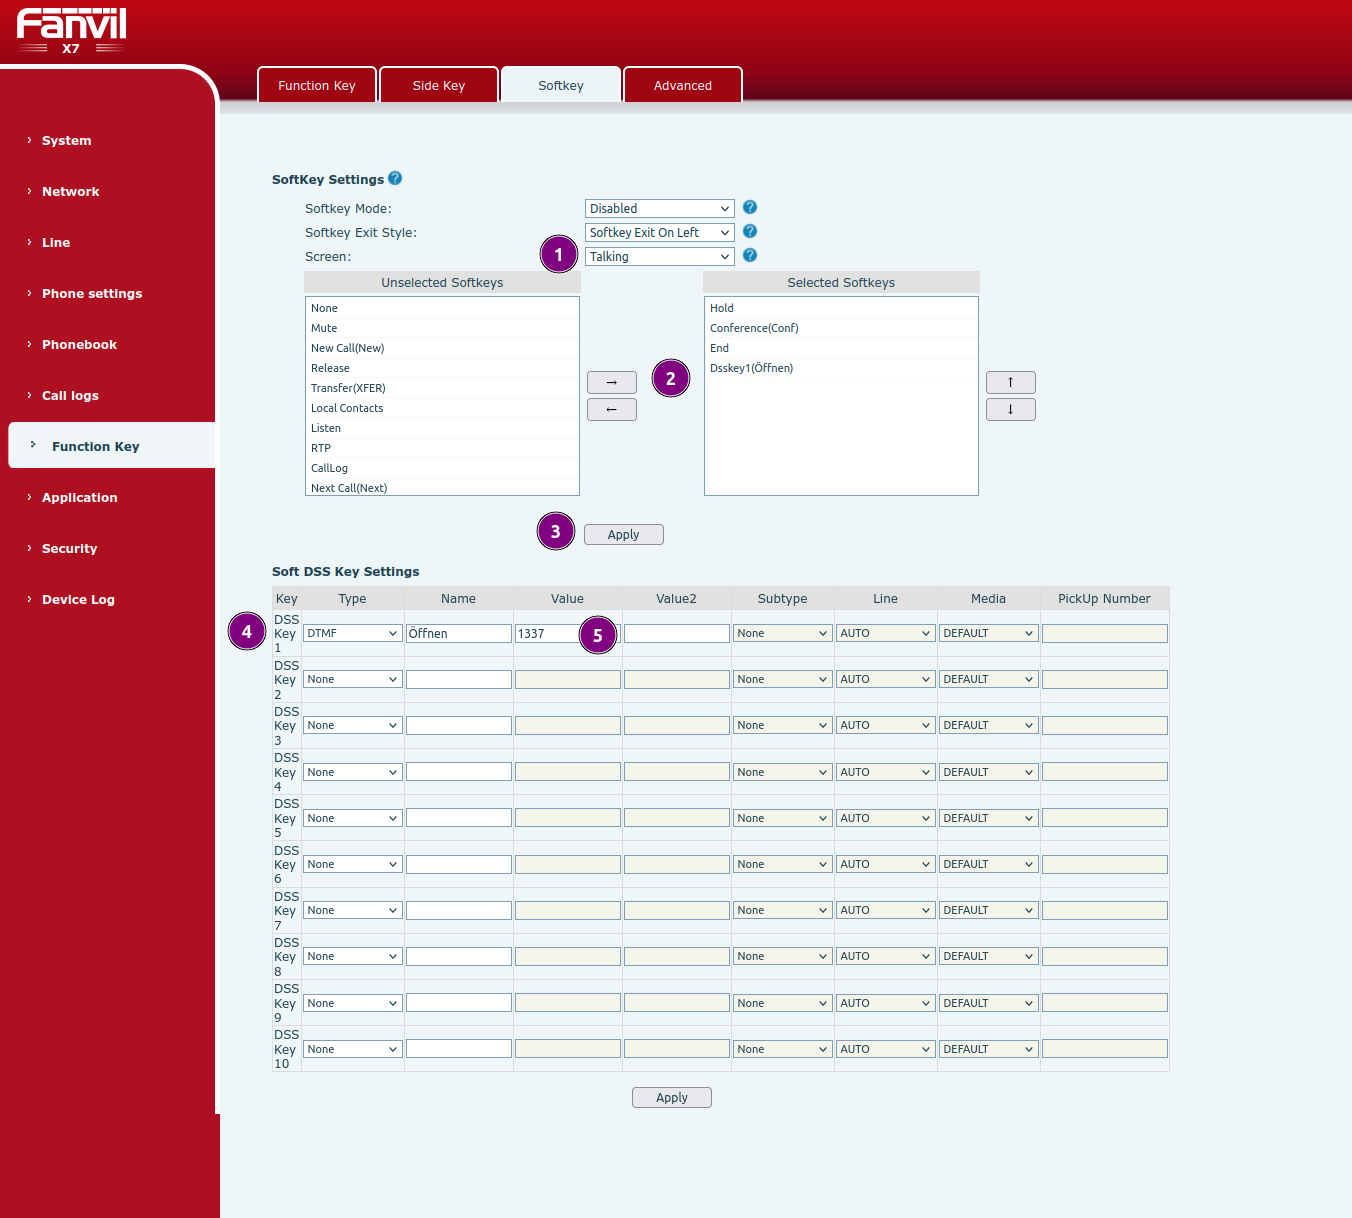
To send a multi-digit DTMF code with a single button press, you can set up a softkey. It is shown during an active call.
Open the Function Key > Softkey page:
- Select Talking as the screen
- Add Dsskey1 to Selected Softkey (remove one first if needed — a maximum of 4 are shown)
- Press Apply
- Select DTMF as the Type for DSS Key 1
- Give the key a name and enter the DTMF code under Value
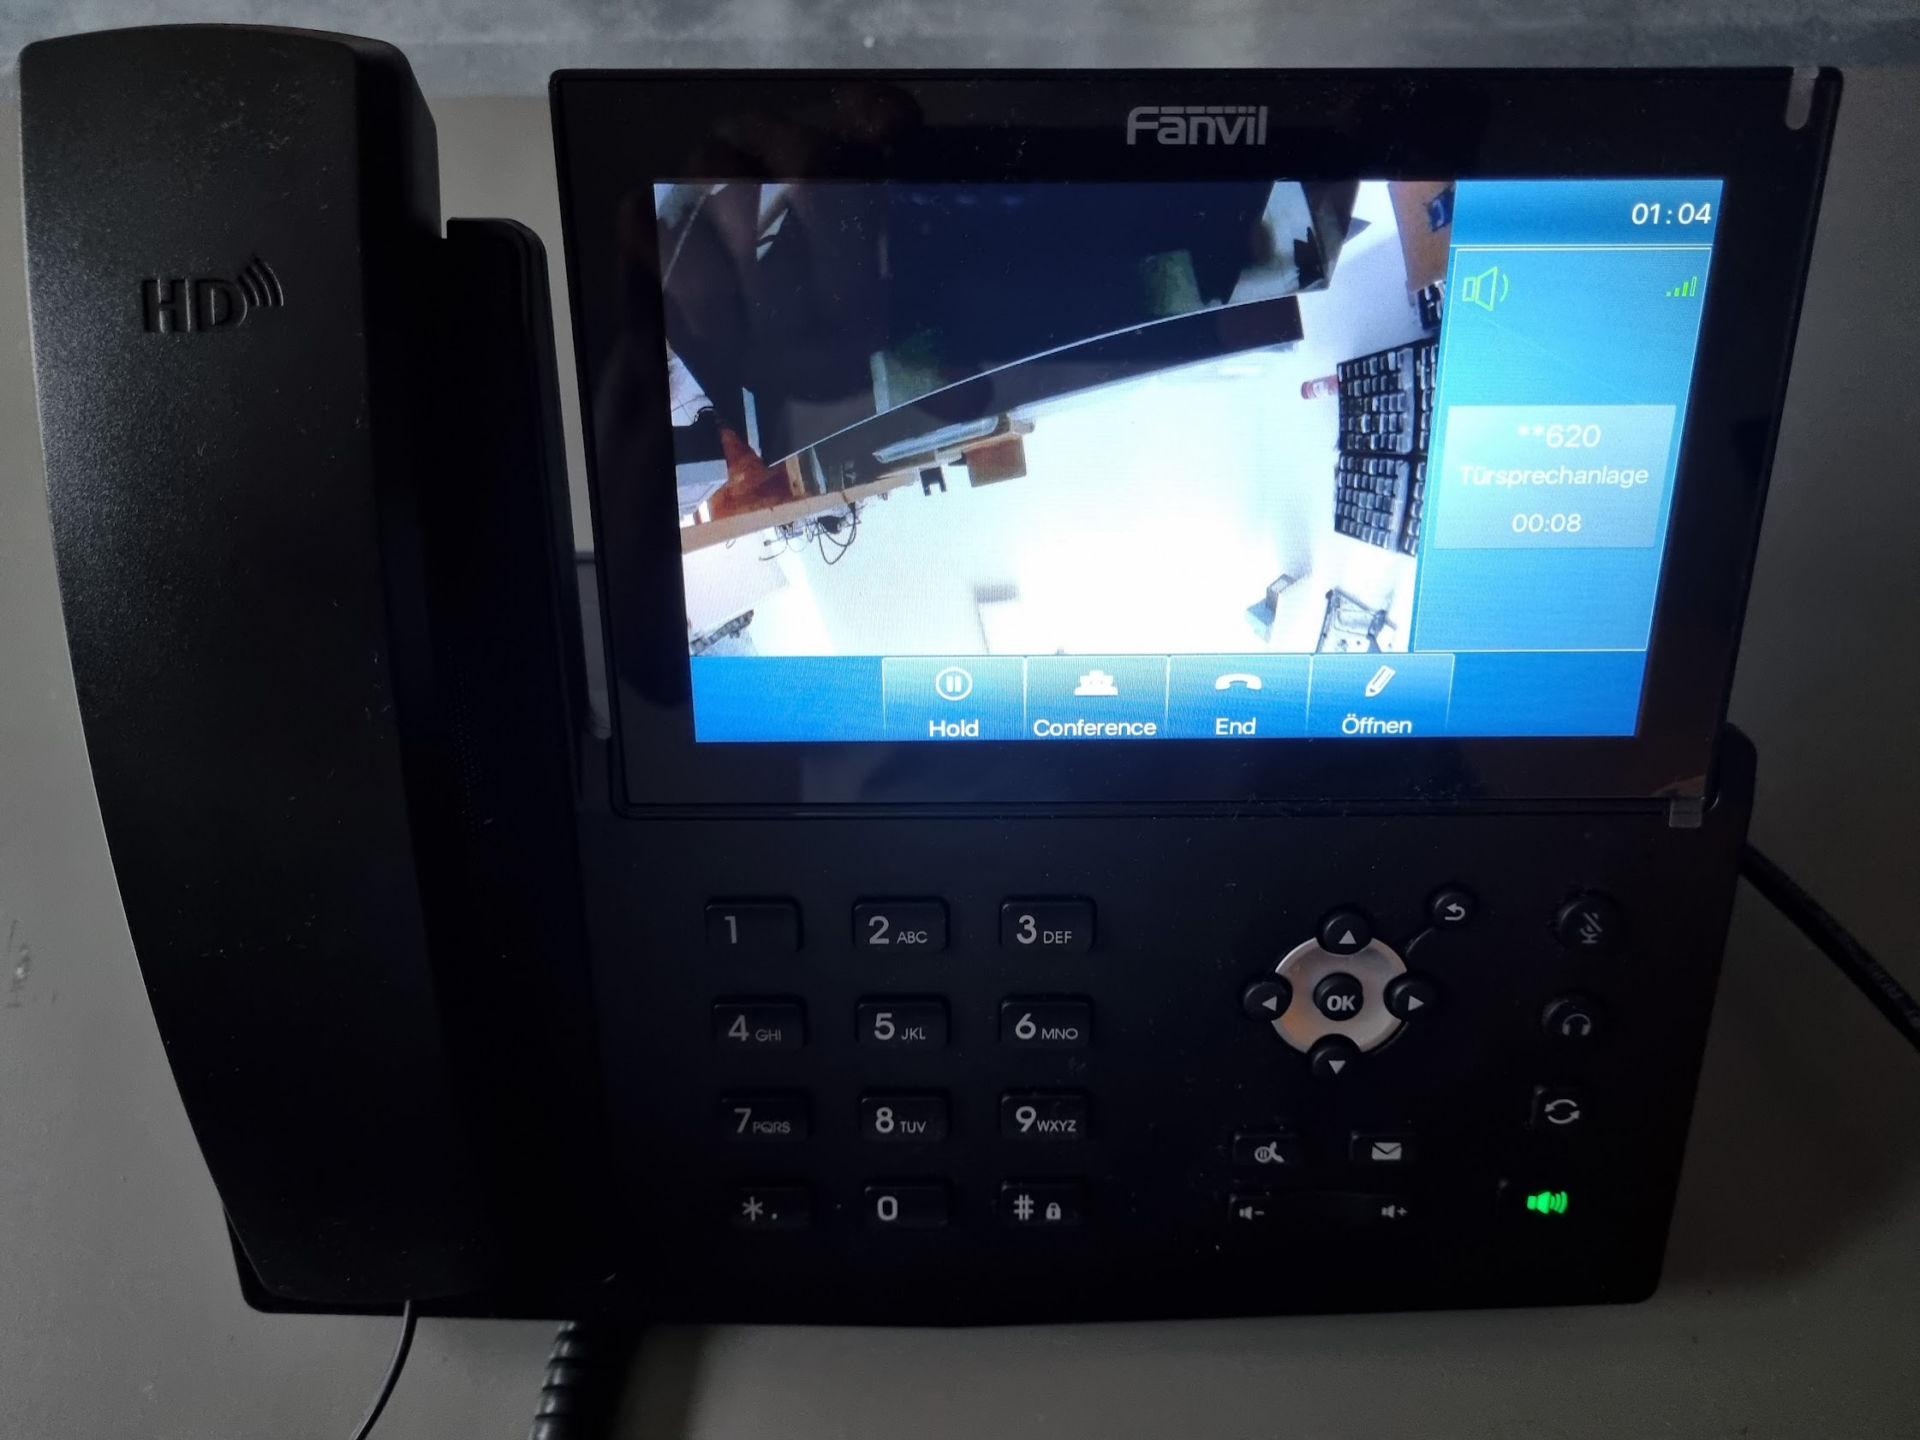
The button is then shown as in the following image:
Setting Up a Video Key on the Fanvil X7
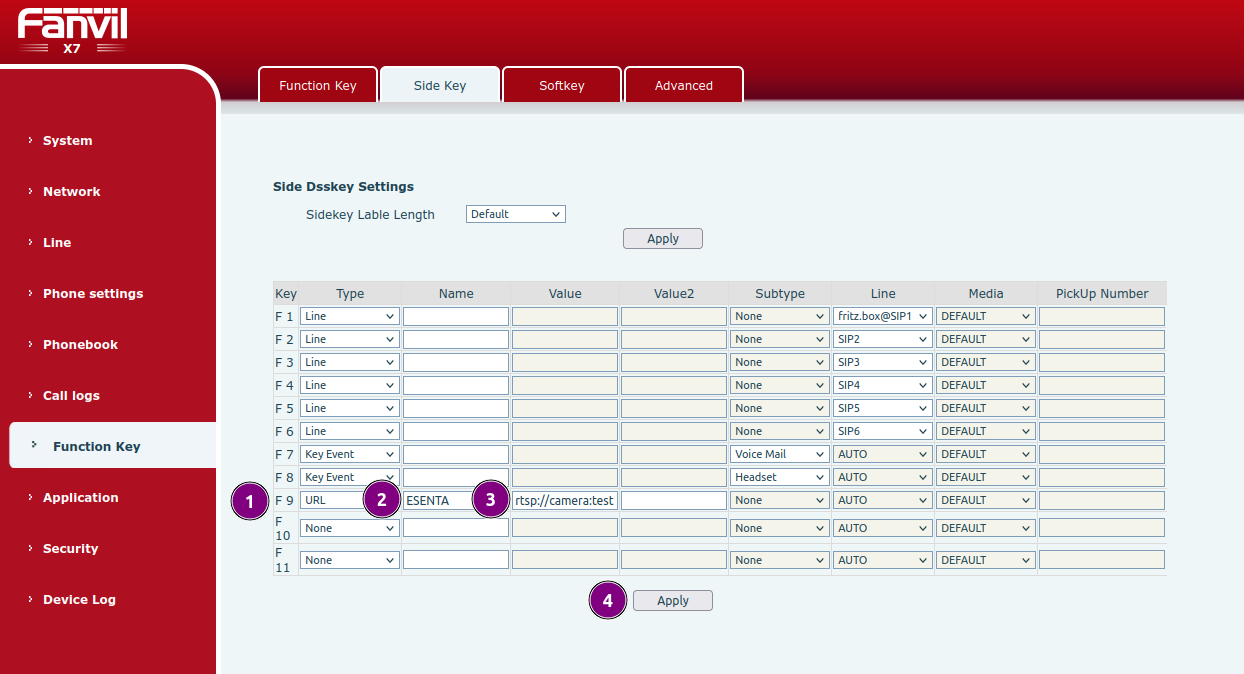
To set up a key that shows the outdoor station's live image, open the Fanvil web interface and go to the Function Key > Side Key subpage.
- For Key F9 (or another key), select URL as the Type
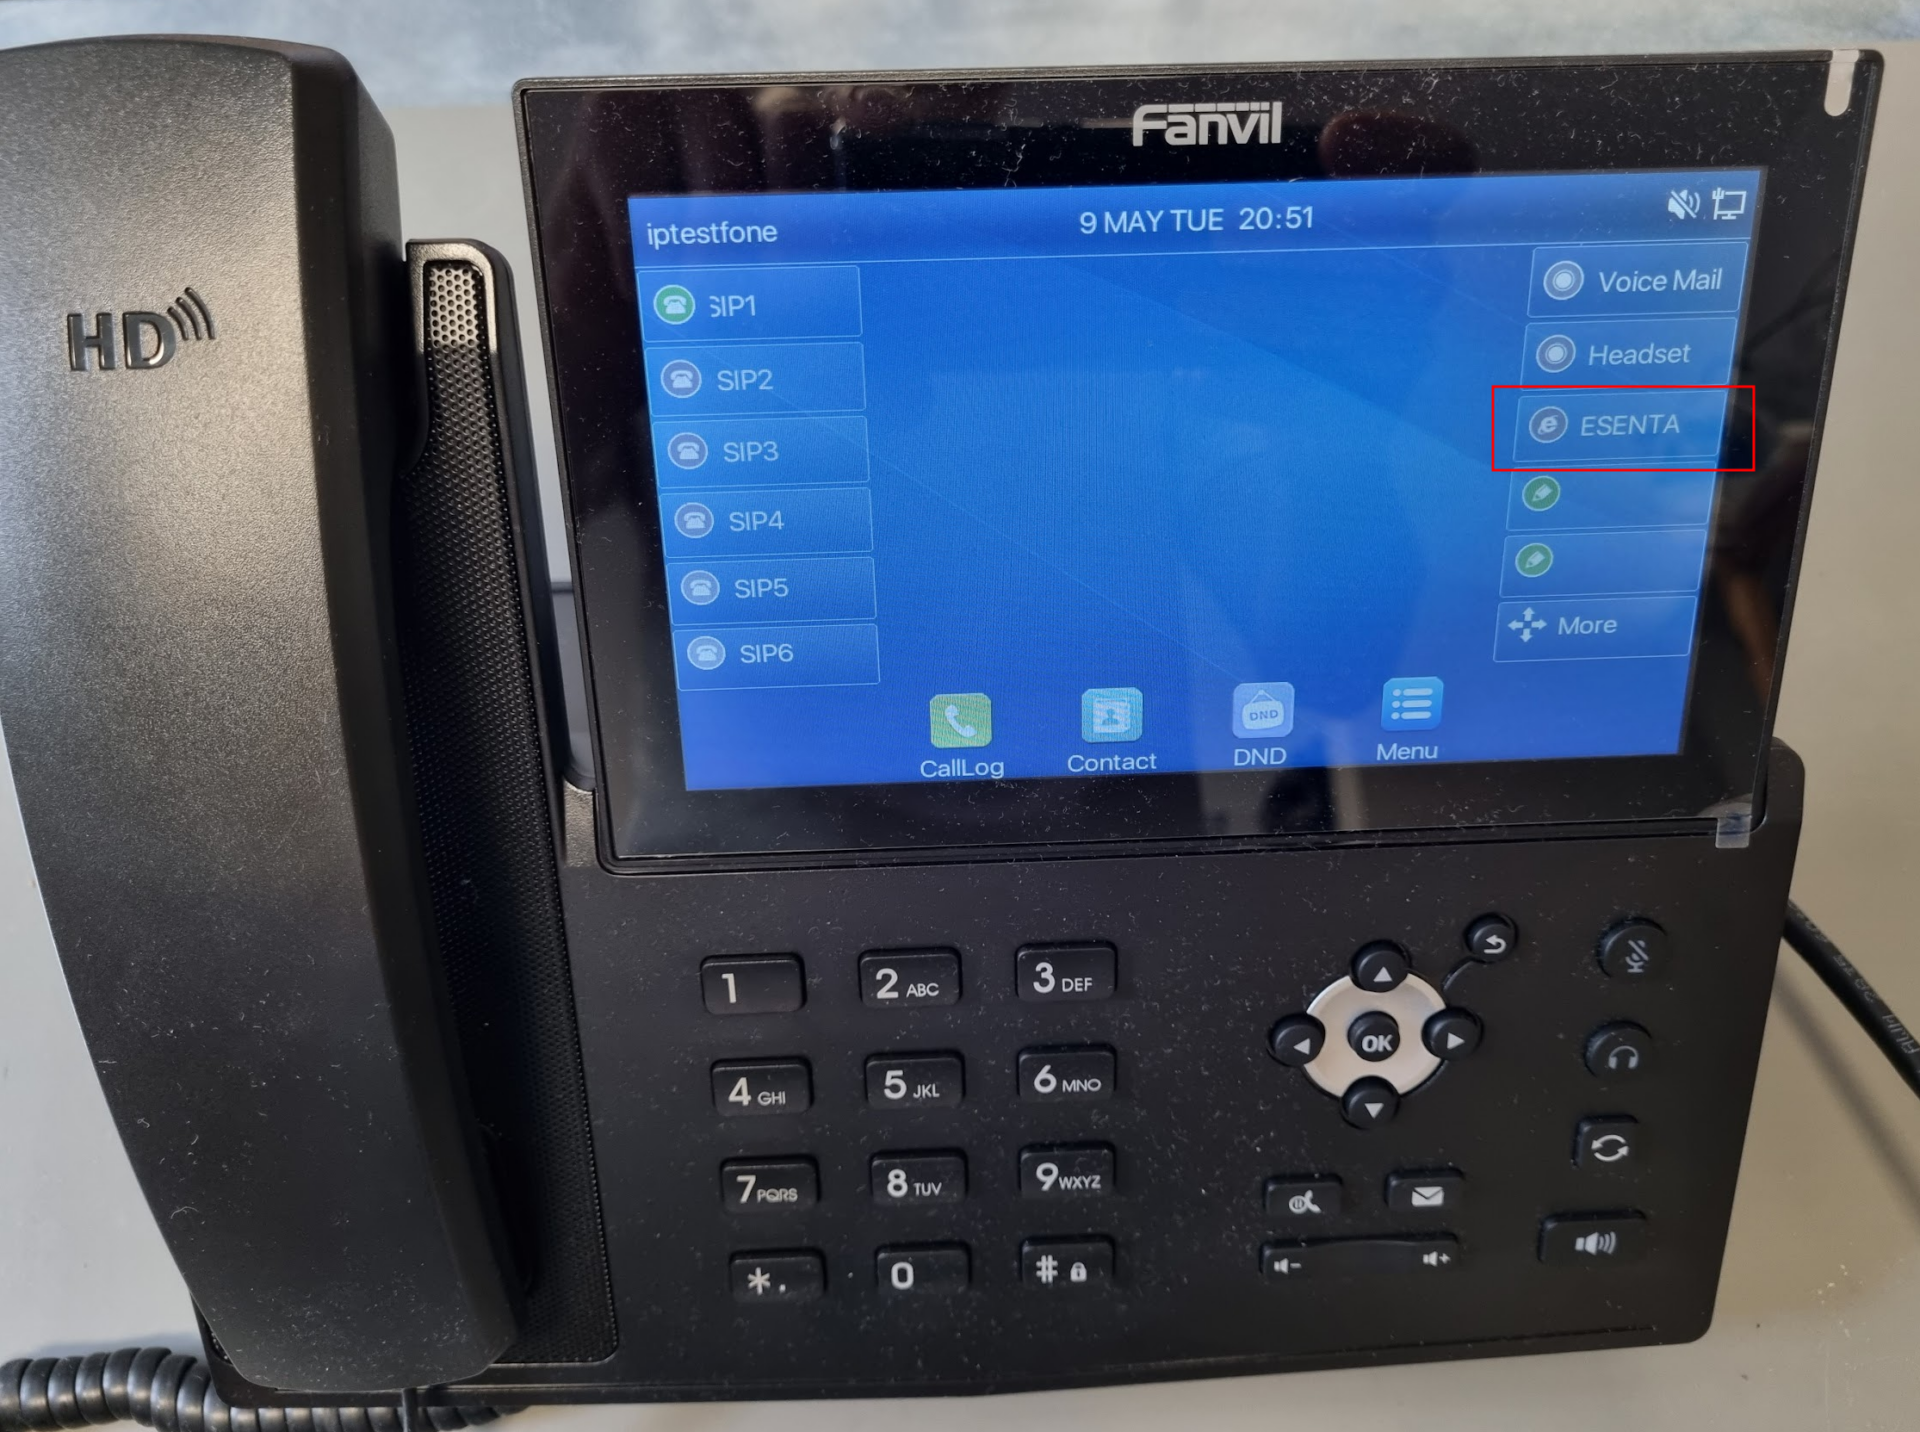
- Under Name, enter any identifier you like (here: ESENTA)
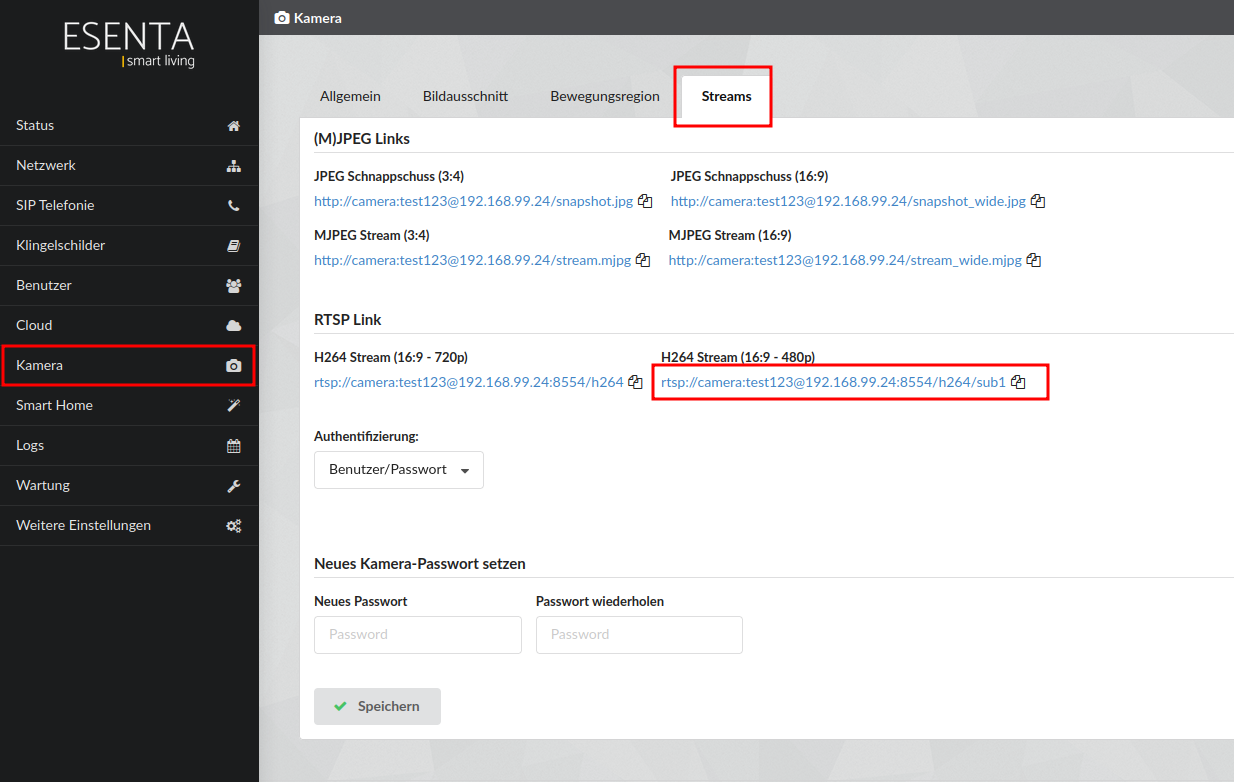
- Under Value, enter the RTSP stream address of ESENTA SIAS at 480p resolution. Note that using the stream at 720p resolution is not possible.
- Finally, save with Apply
You can copy the RTSP stream address from the ESENTA SIAS web interface under Camera > Streams:
The key is then shown on the X7 in the right-hand bar:
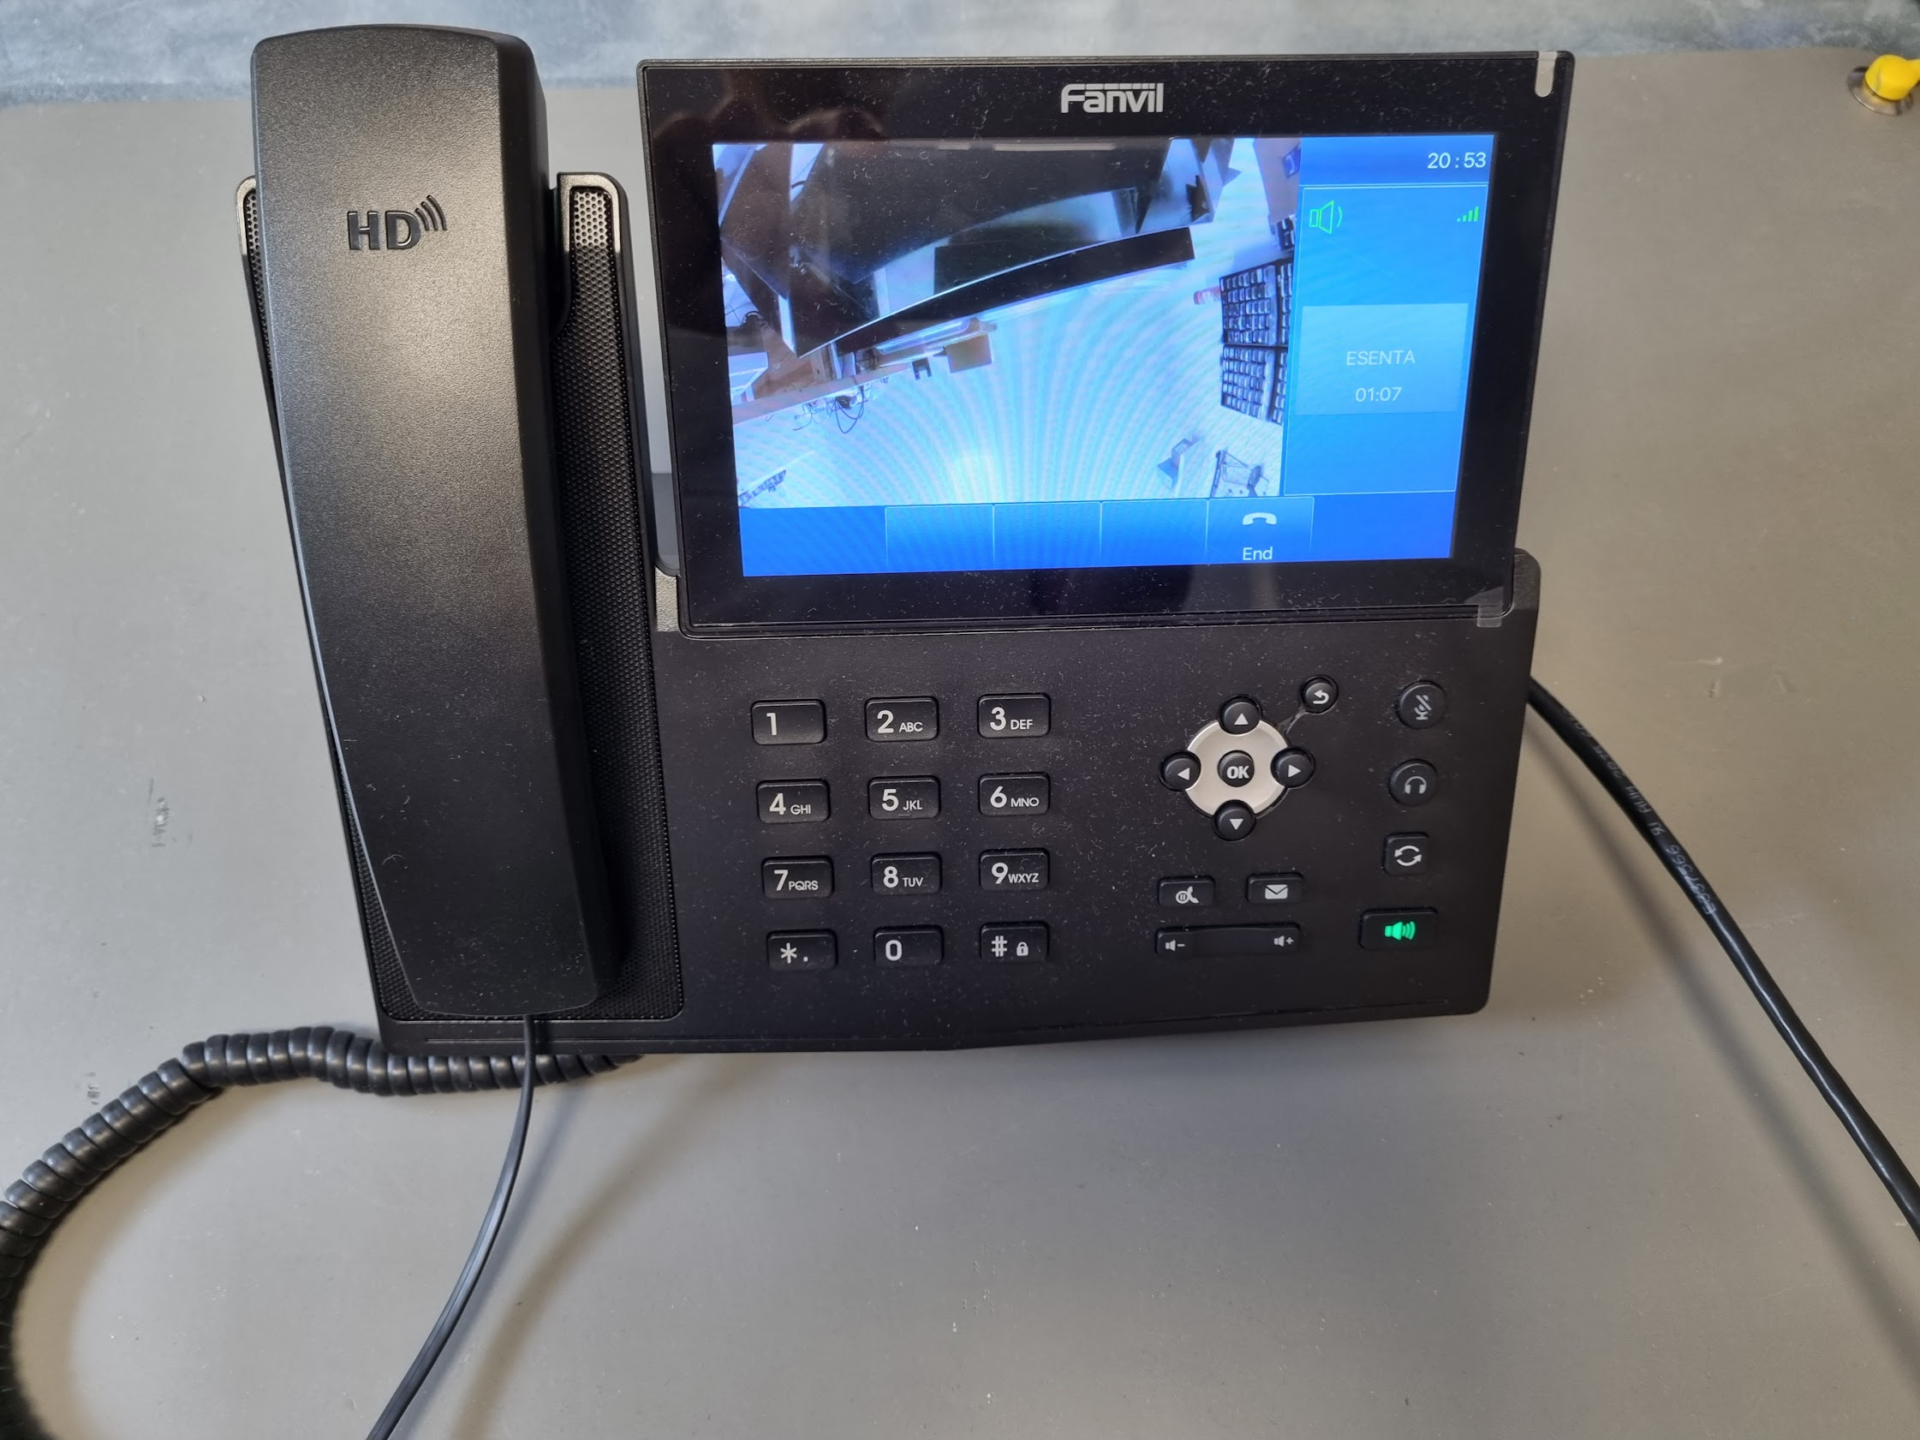
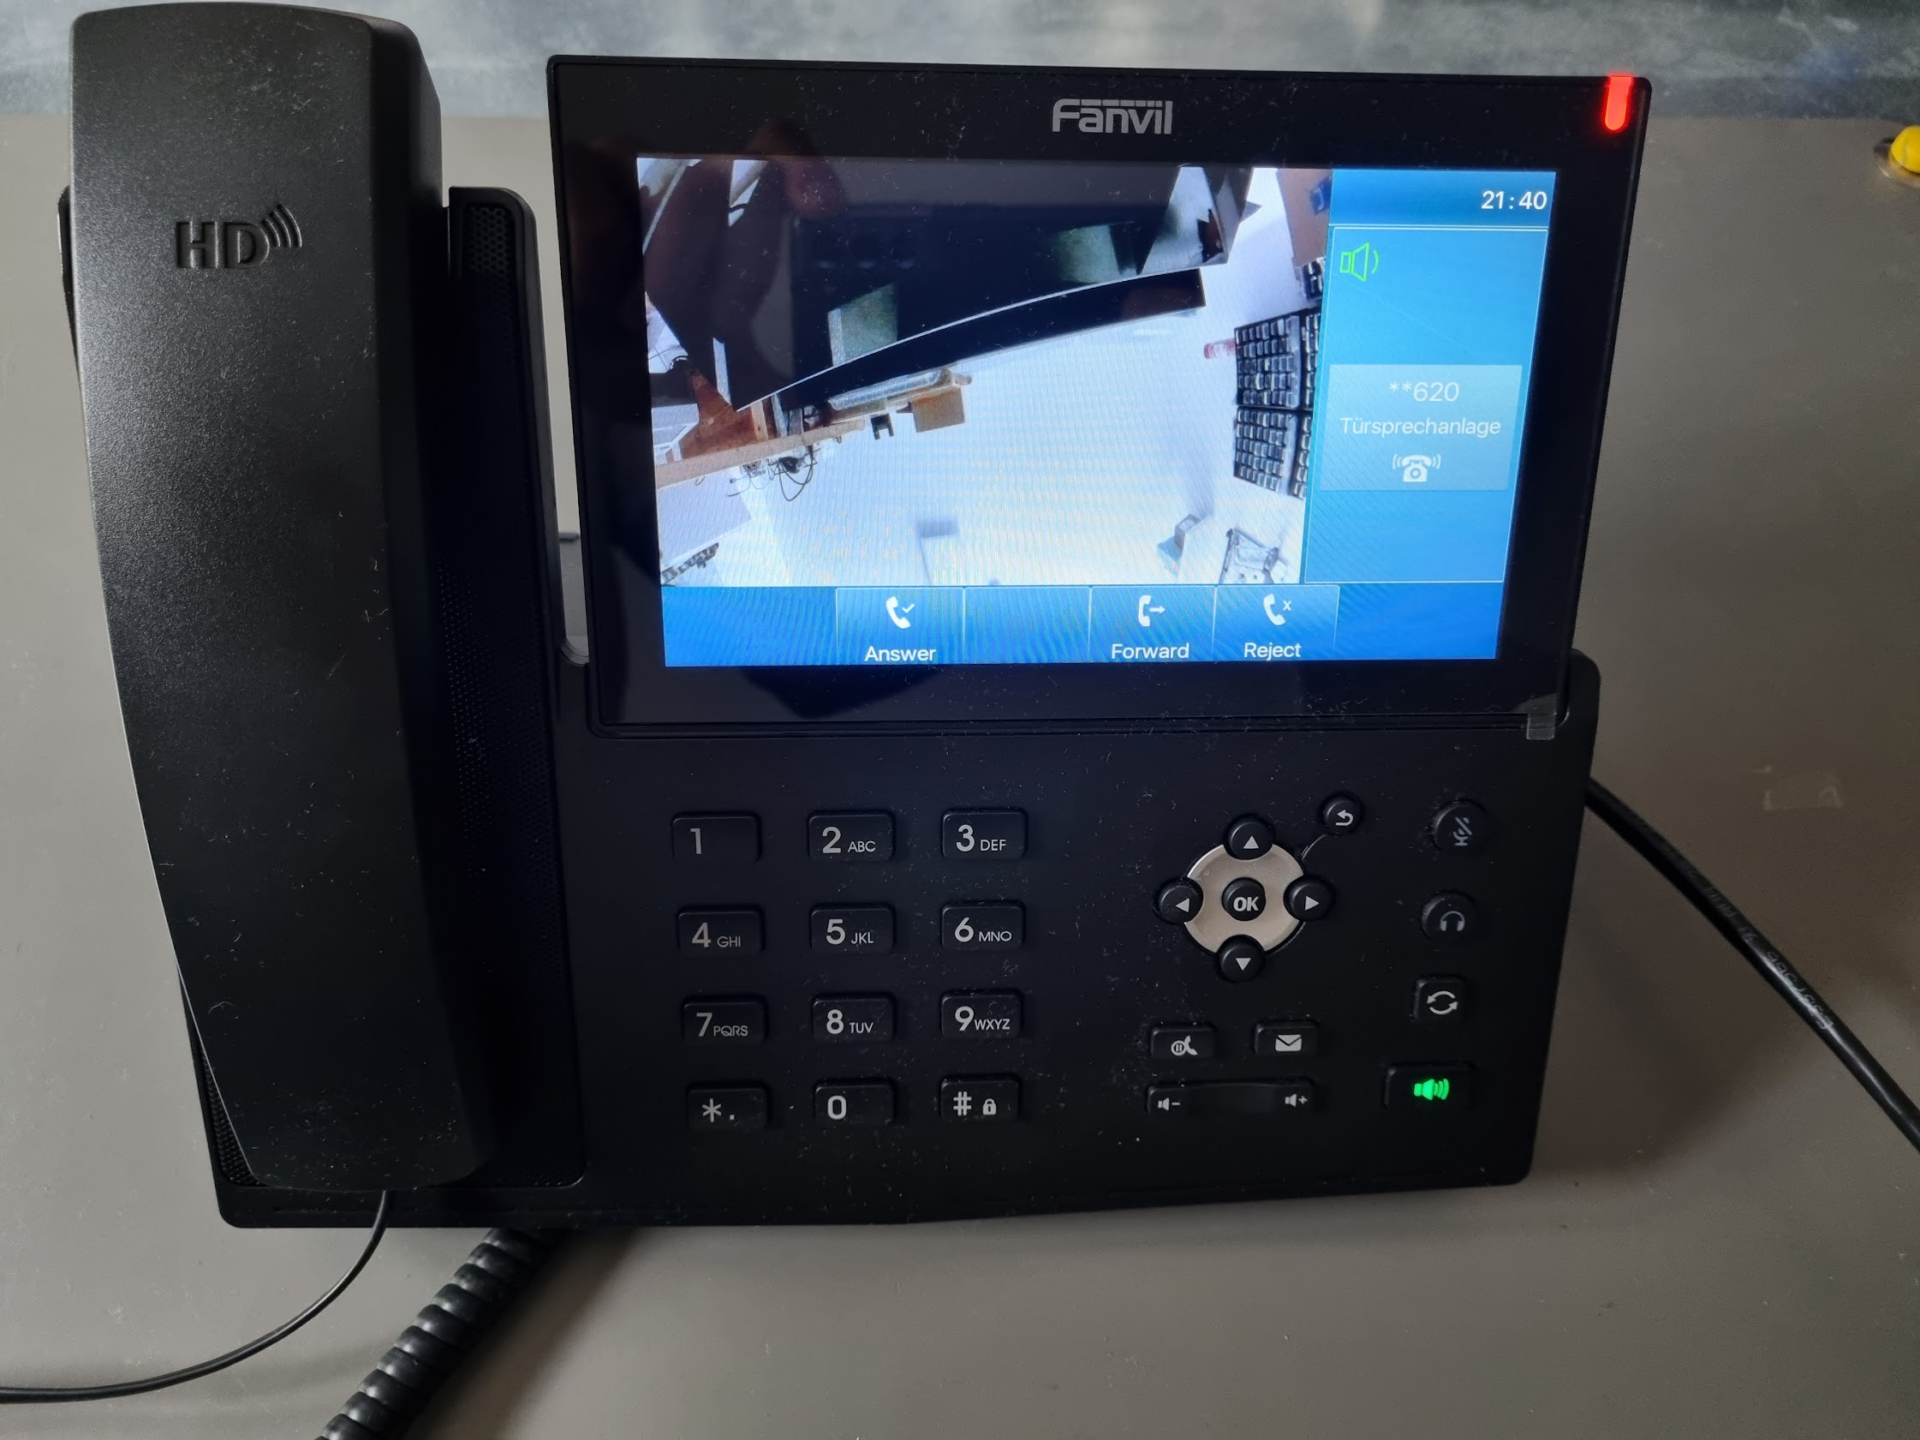
Setting Up the Video Image on Incoming Calls on the Fanvil X7
For the outdoor station's video image to be shown automatically when it calls, a Fanvil Action Plan must be created.
In the Fanvil web interface, go to Line > Action Plan.
- Under Number, enter the SIP username/number of the outdoor station (here: **620)
- Select Early as the Type and, under Line, select the SIP server the outdoor station is connected through
- Under URL, enter the H264 480p RTSP URL of ESENTA SIAS used earlier
- Save with Add
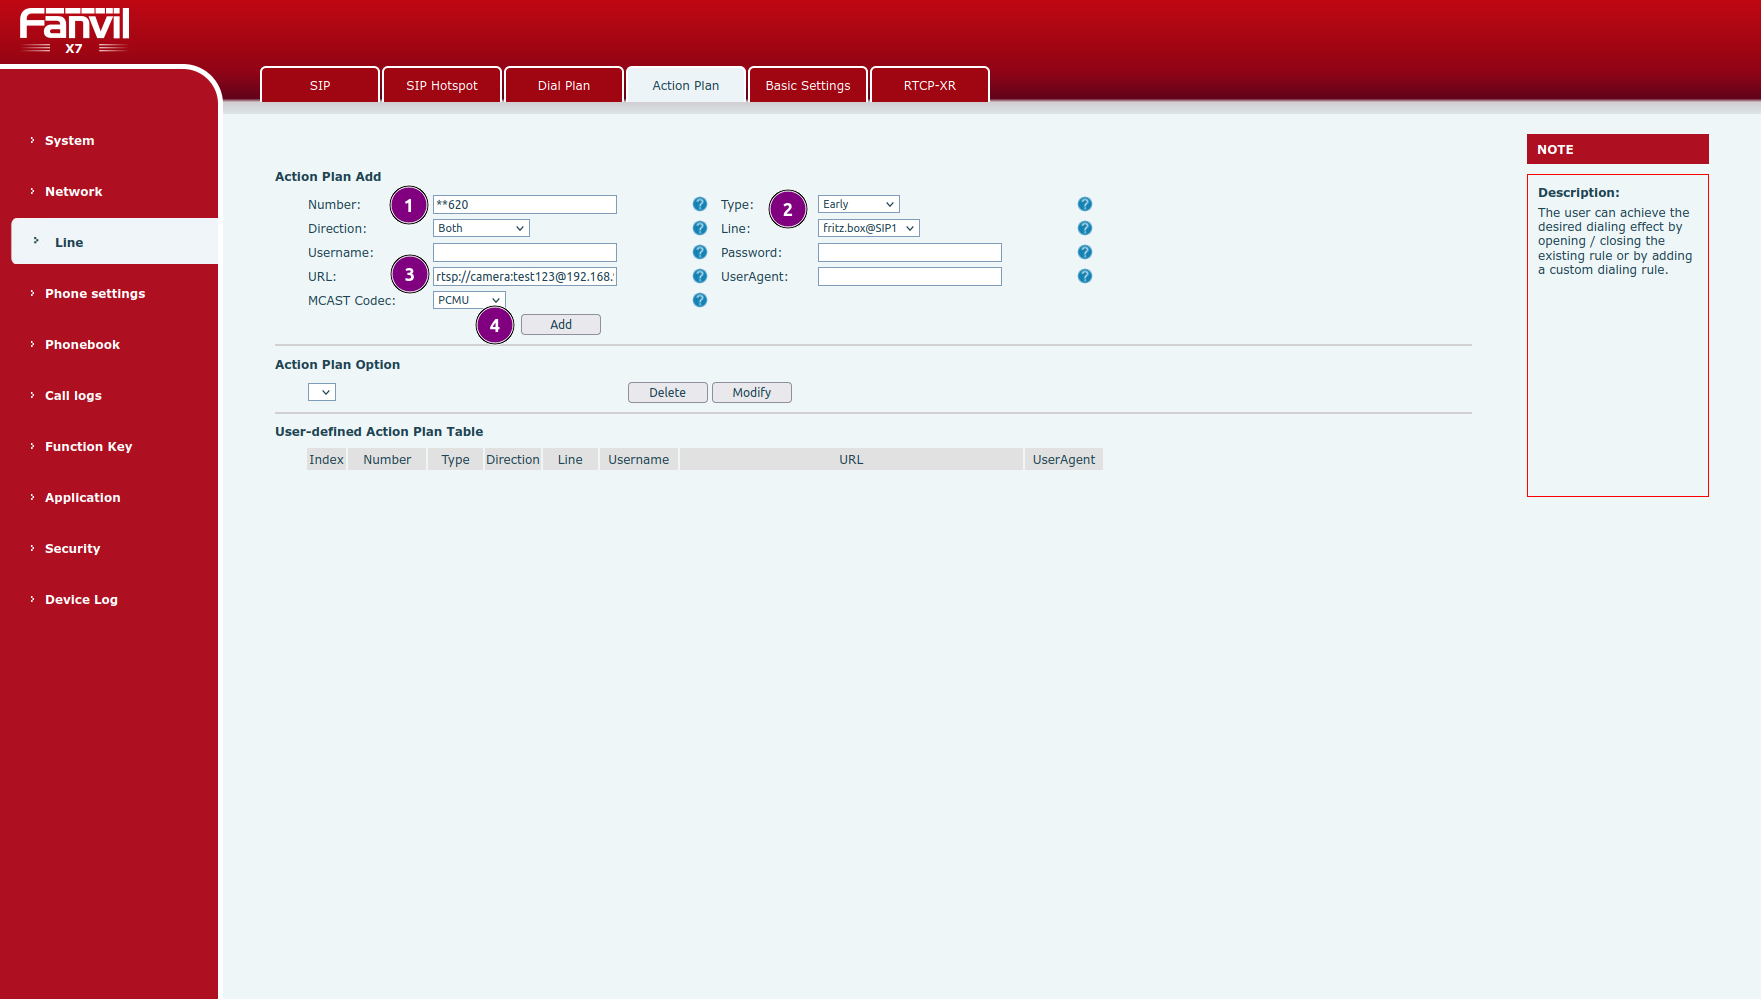
Note: It can happen that the RTSP URL is not accepted correctly and doesn't appear in the User-defined Action Plan table after adding it. In that case, press the Modify button and enter the URL again.
Creating a Door-Opener Button
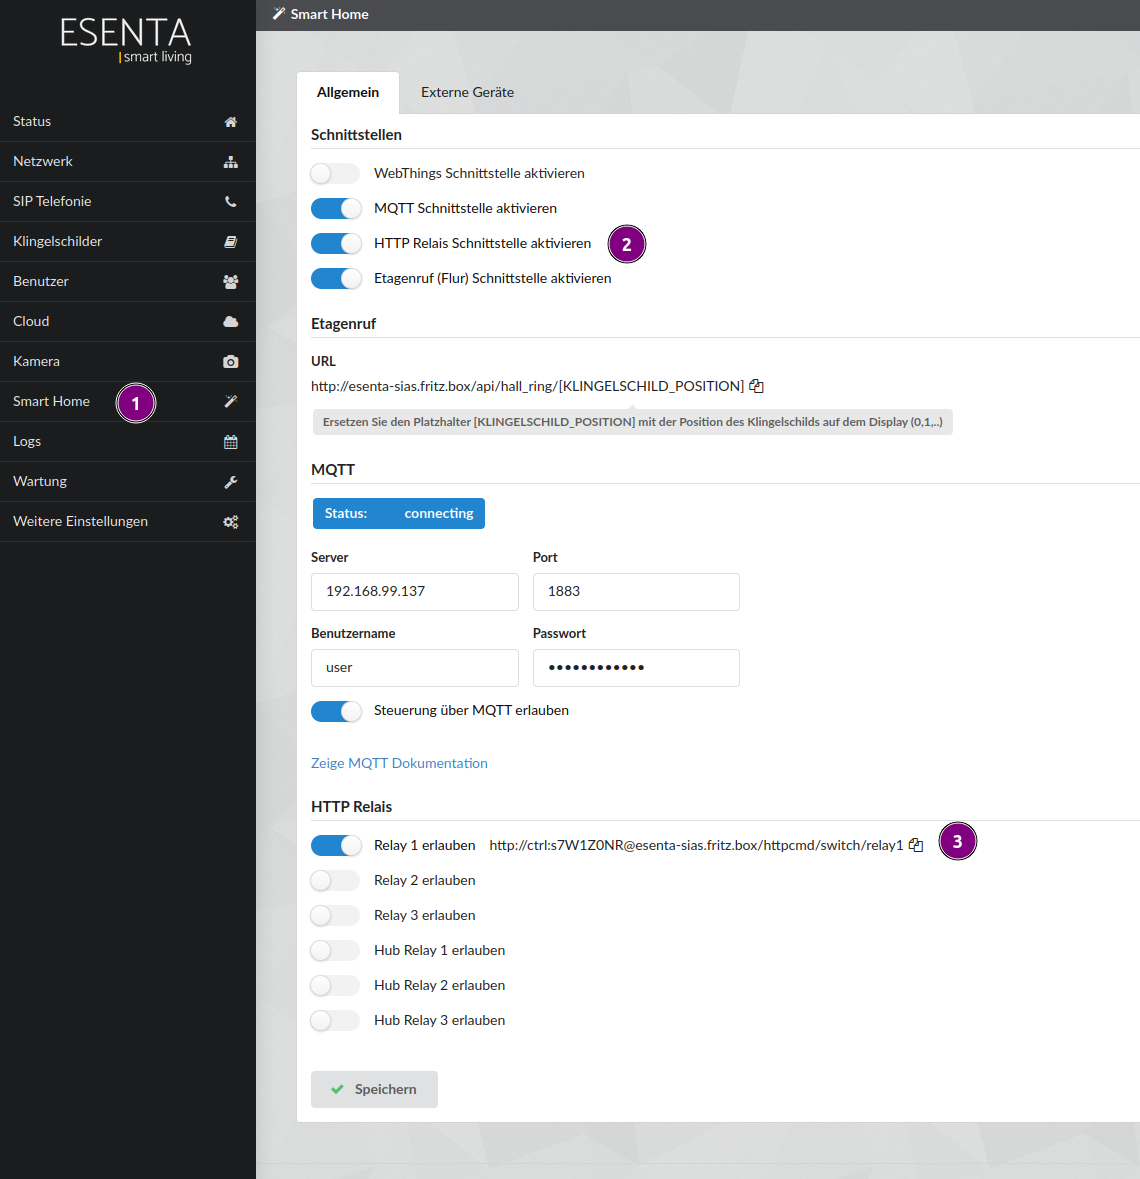
To create a door-opener button that also works without an active call, ESENTA SIAS's HTTP relay interface can be used.
Proceed as follows:
- Go to the Smart Home subpage
- Enable the HTTP Relay Interface
- Enable Relay 1 (or whichever relay controls the door opener) and copy the URL
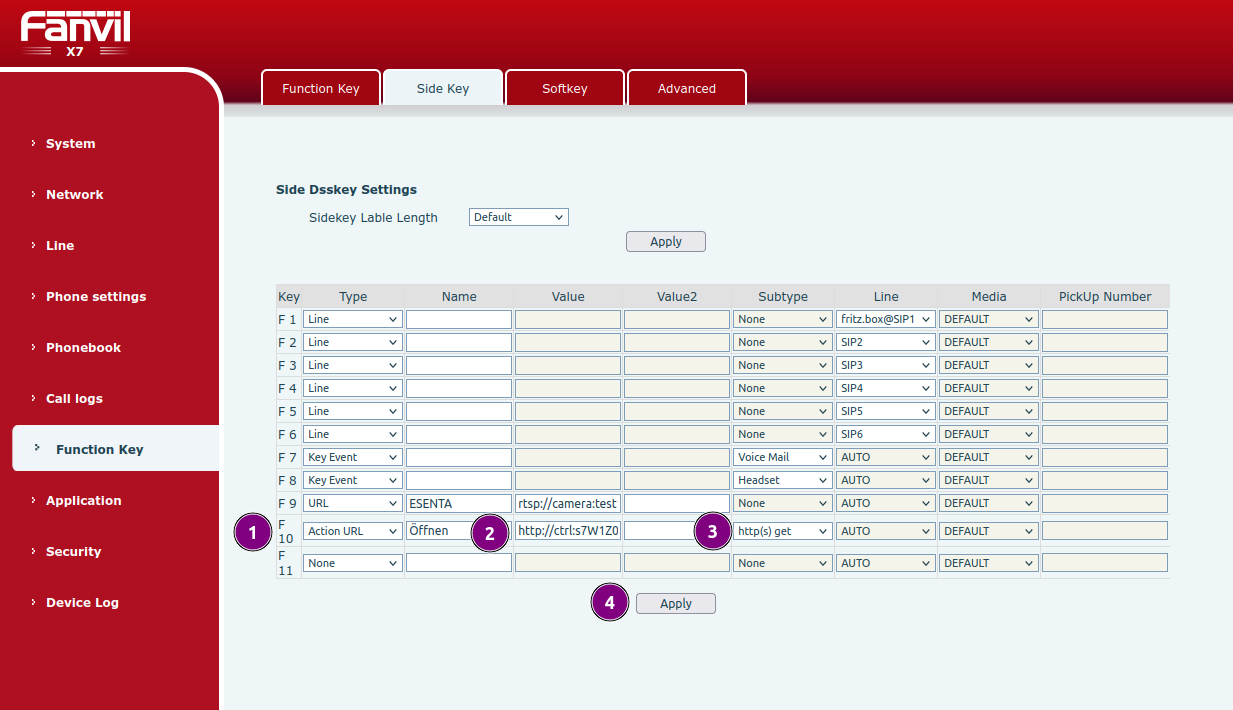
In the Fanvil web interface, go to the Function Key > Side Key page
- For F10, select Action URL as the Type
- Give it a name (here: Open) and enter the ESENTA SIAS HTTP relay URL under Value
- Use http(s) get as the Subtype
- Save
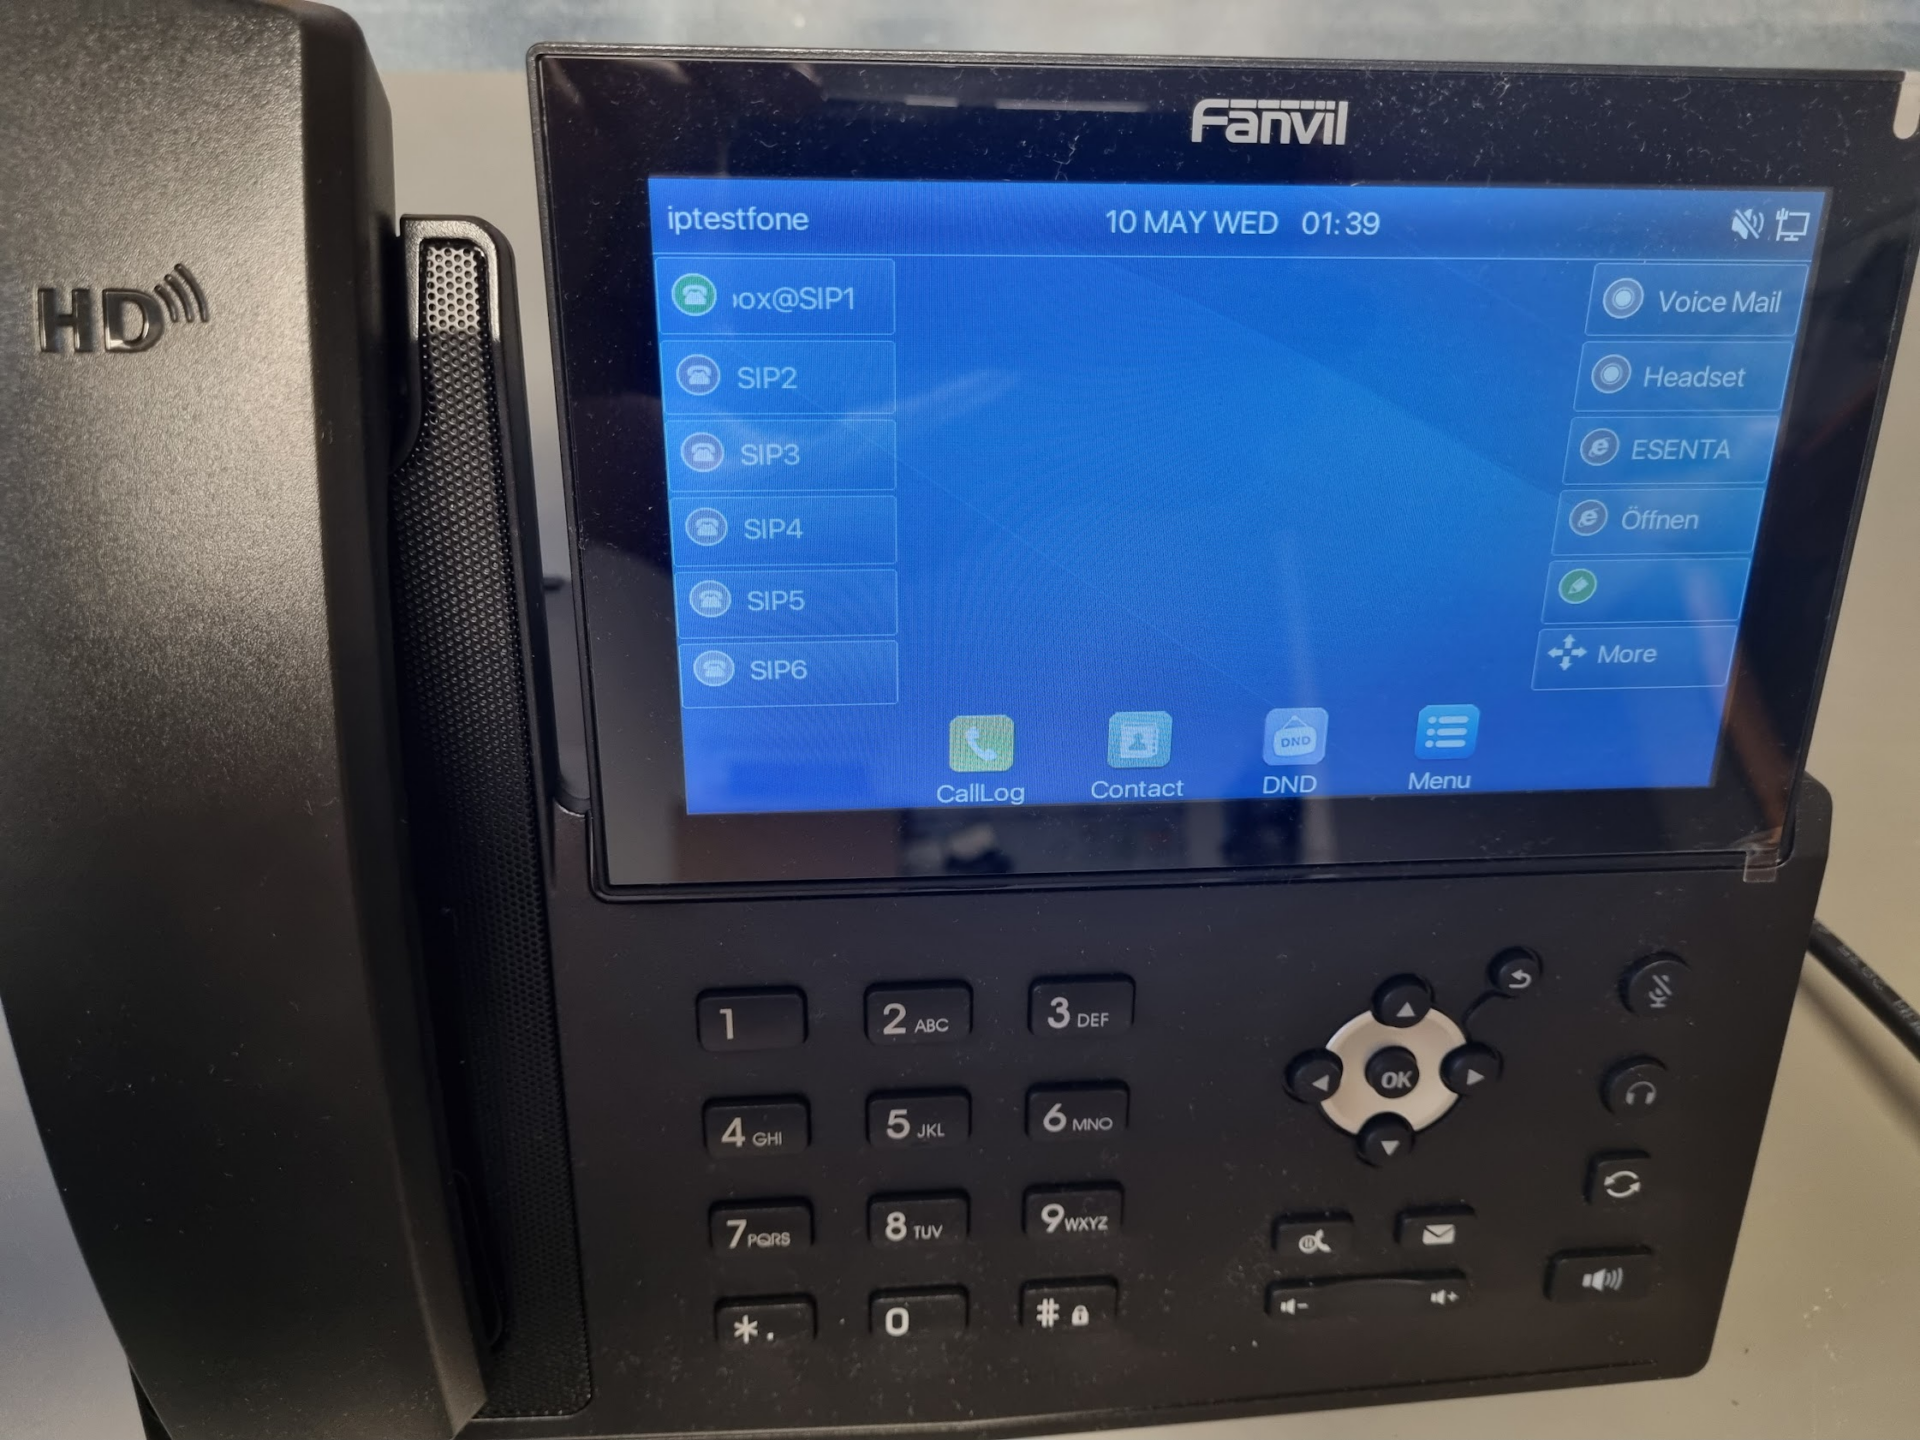
The Open button is then shown as in the following image:
If desired, Action URLs (the HTTP relay interface) can also be set up in place of DTMF codes during an active call.


