NOTE:
This guide assumes that ESENTA Sias has already been set up in the FRITZ!Box as a telephony device.
(See SIAS user manual pages 51 – 61)
Setting up the Fanvil i10D in a FRITZ!Box as a telephony device
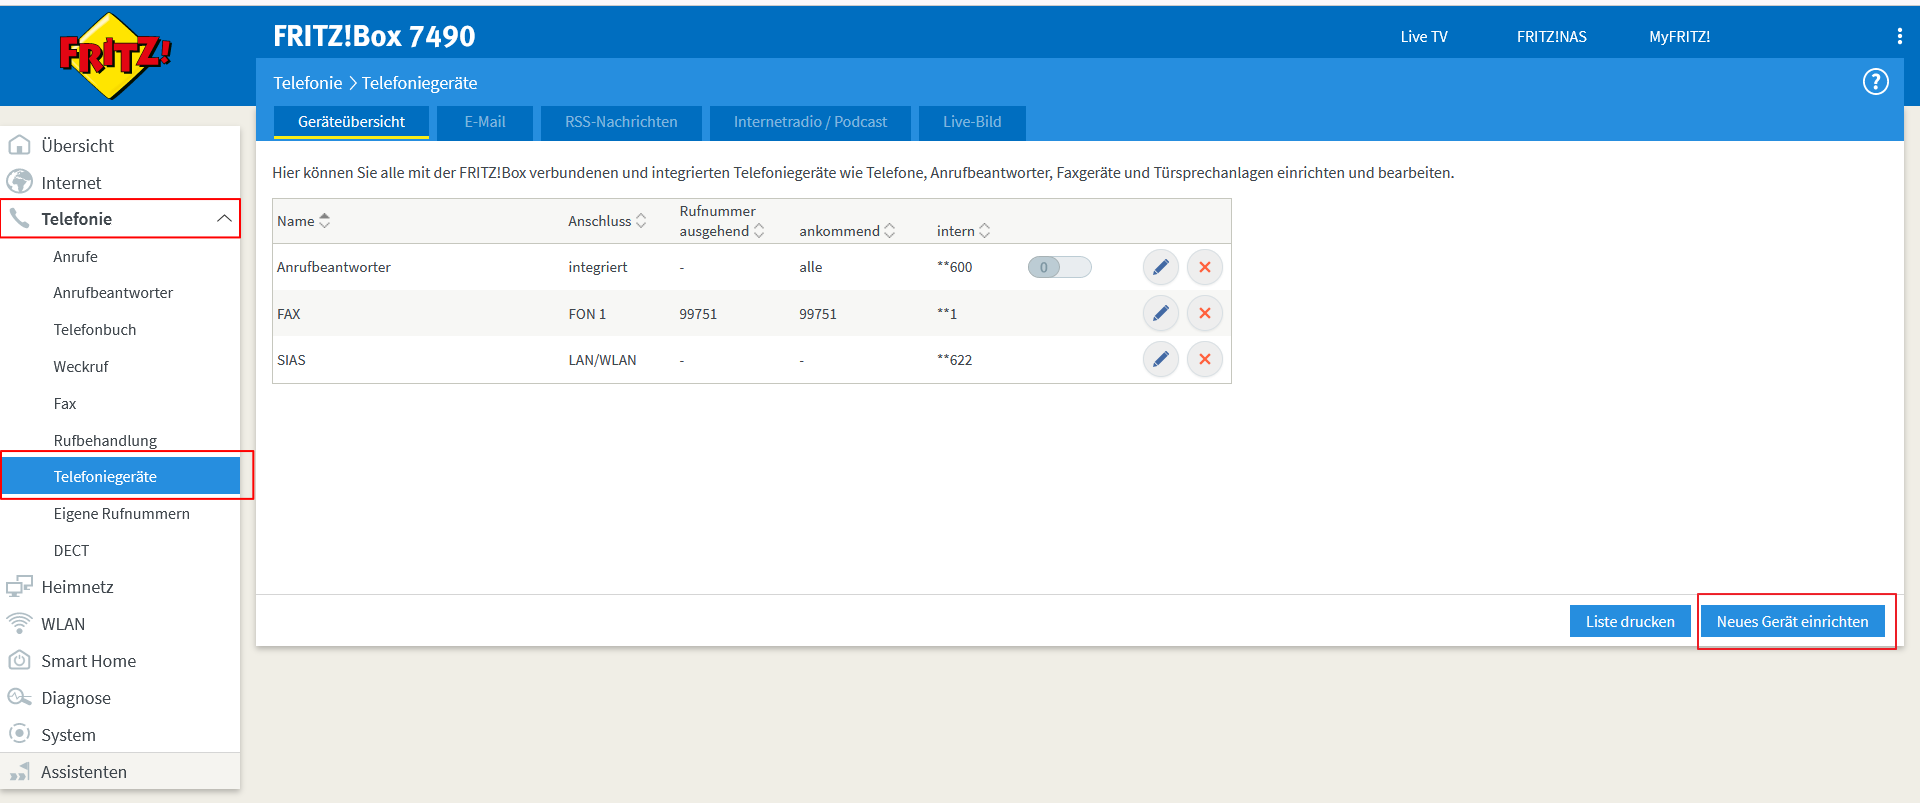
1.1 Log in to the FRITZ!Box -> Telephony -> Telephony Devices -> Set up new device.
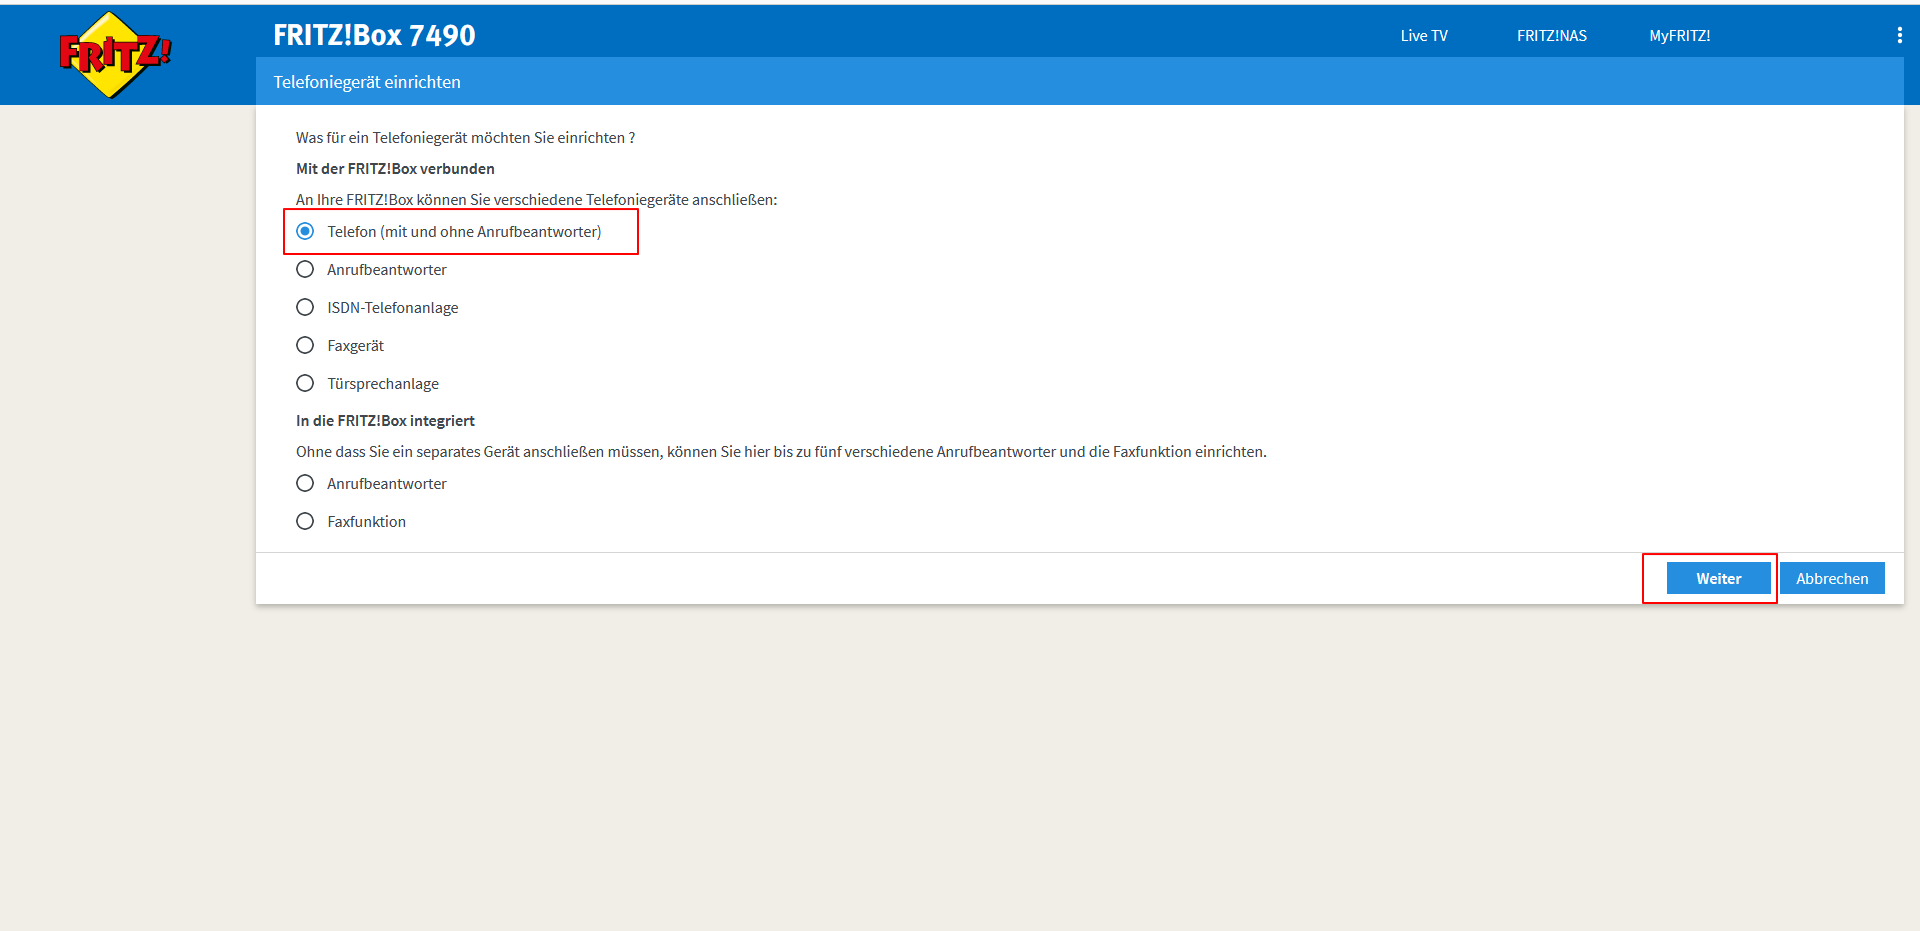
1.2 Select "Telephone (with or without answering machine)" -> Next.
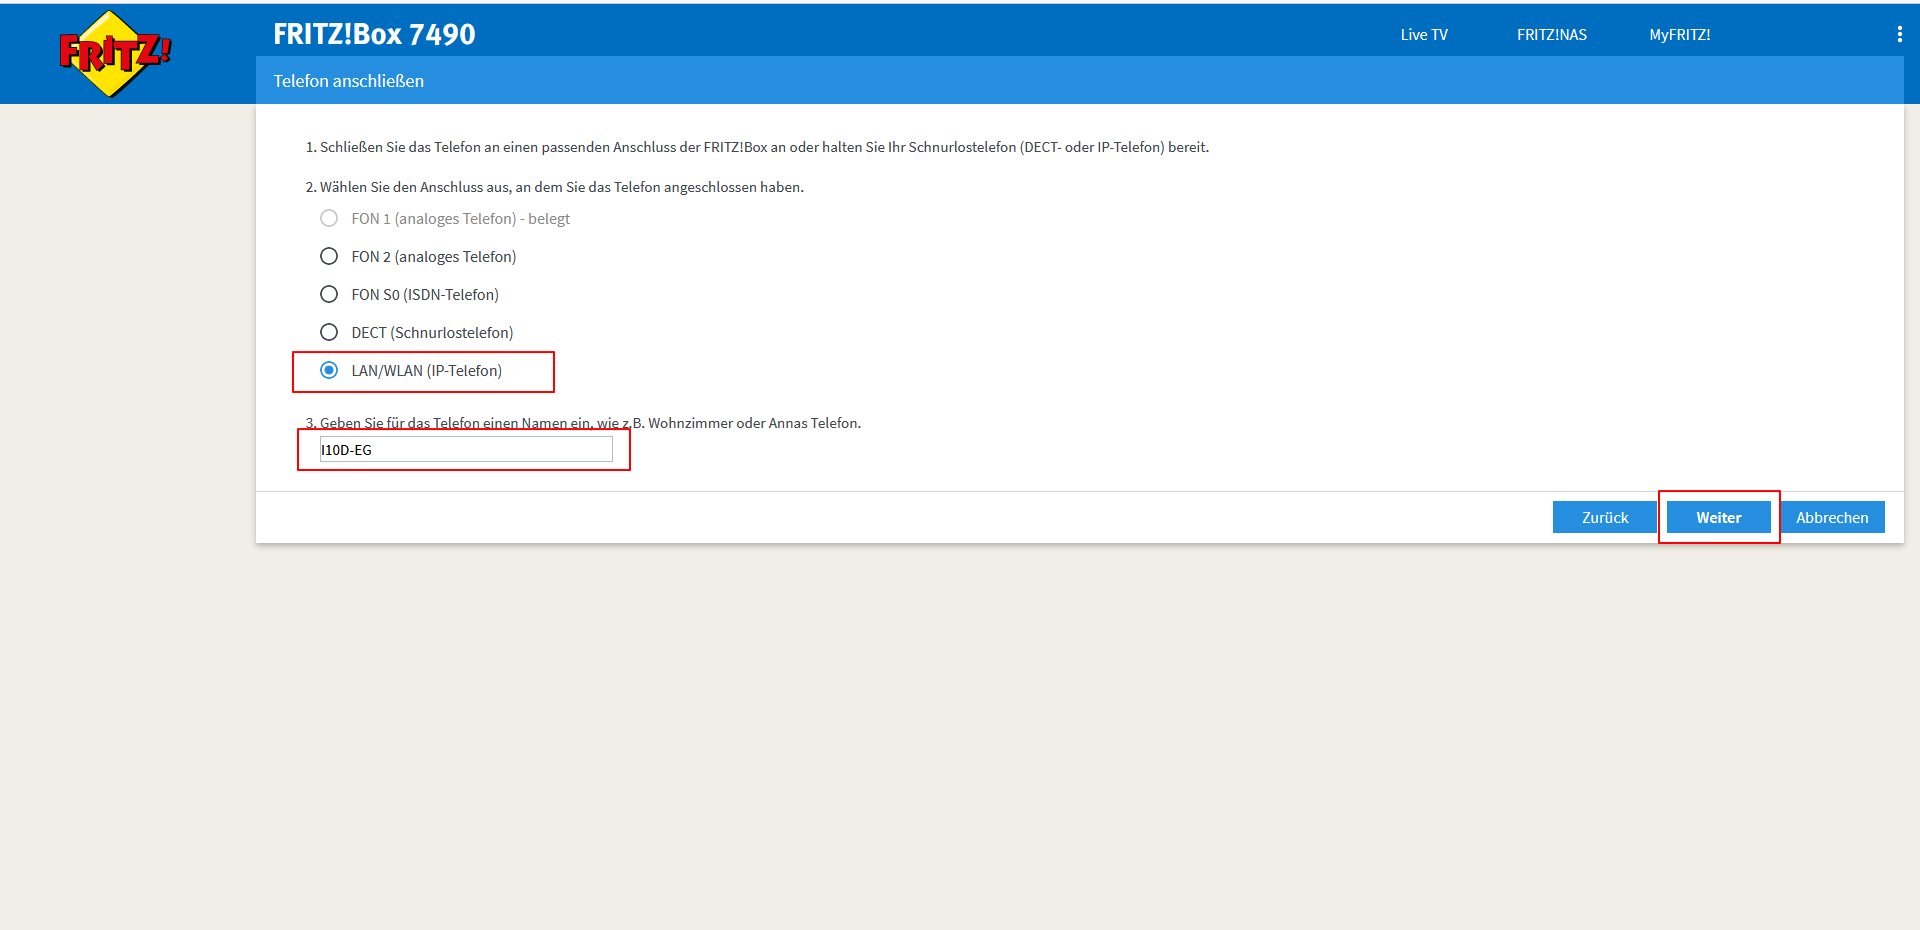
1.3 Select "LAN/WLAN (IP phone)" and assign a name -> Next.
1.4 Enter a "username" and a "password" and note them down, as they will be needed in a later step -> Next.
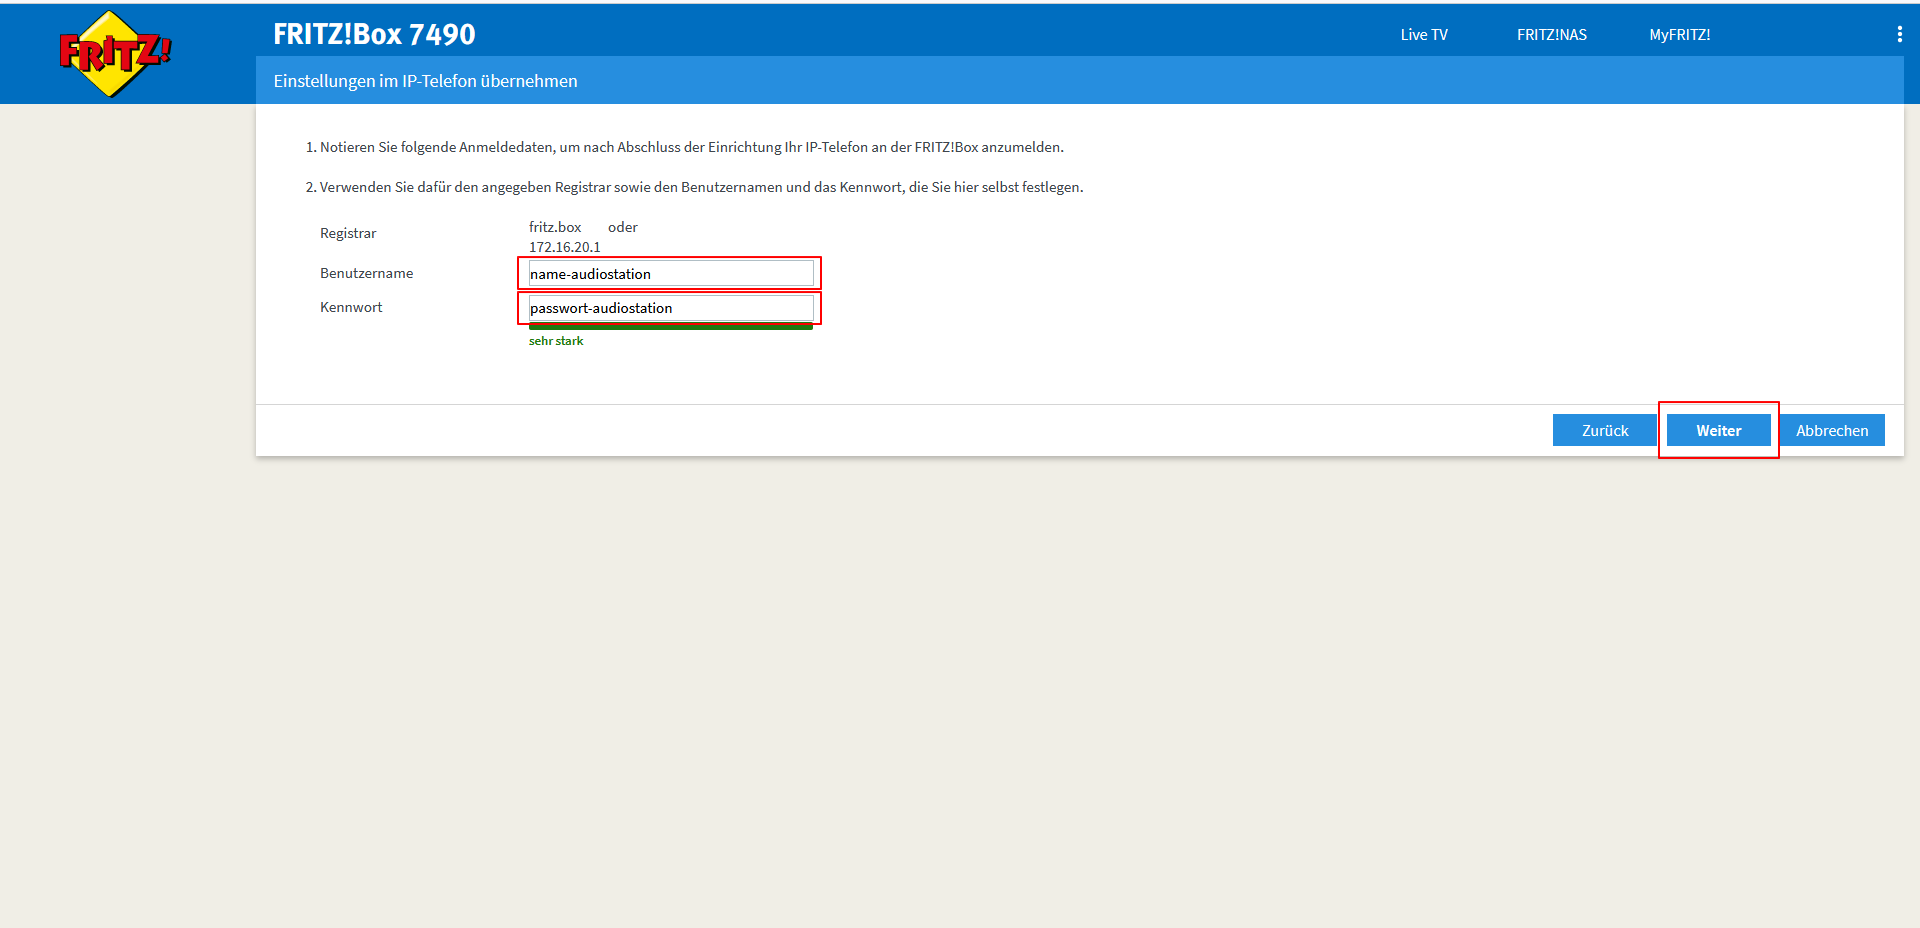
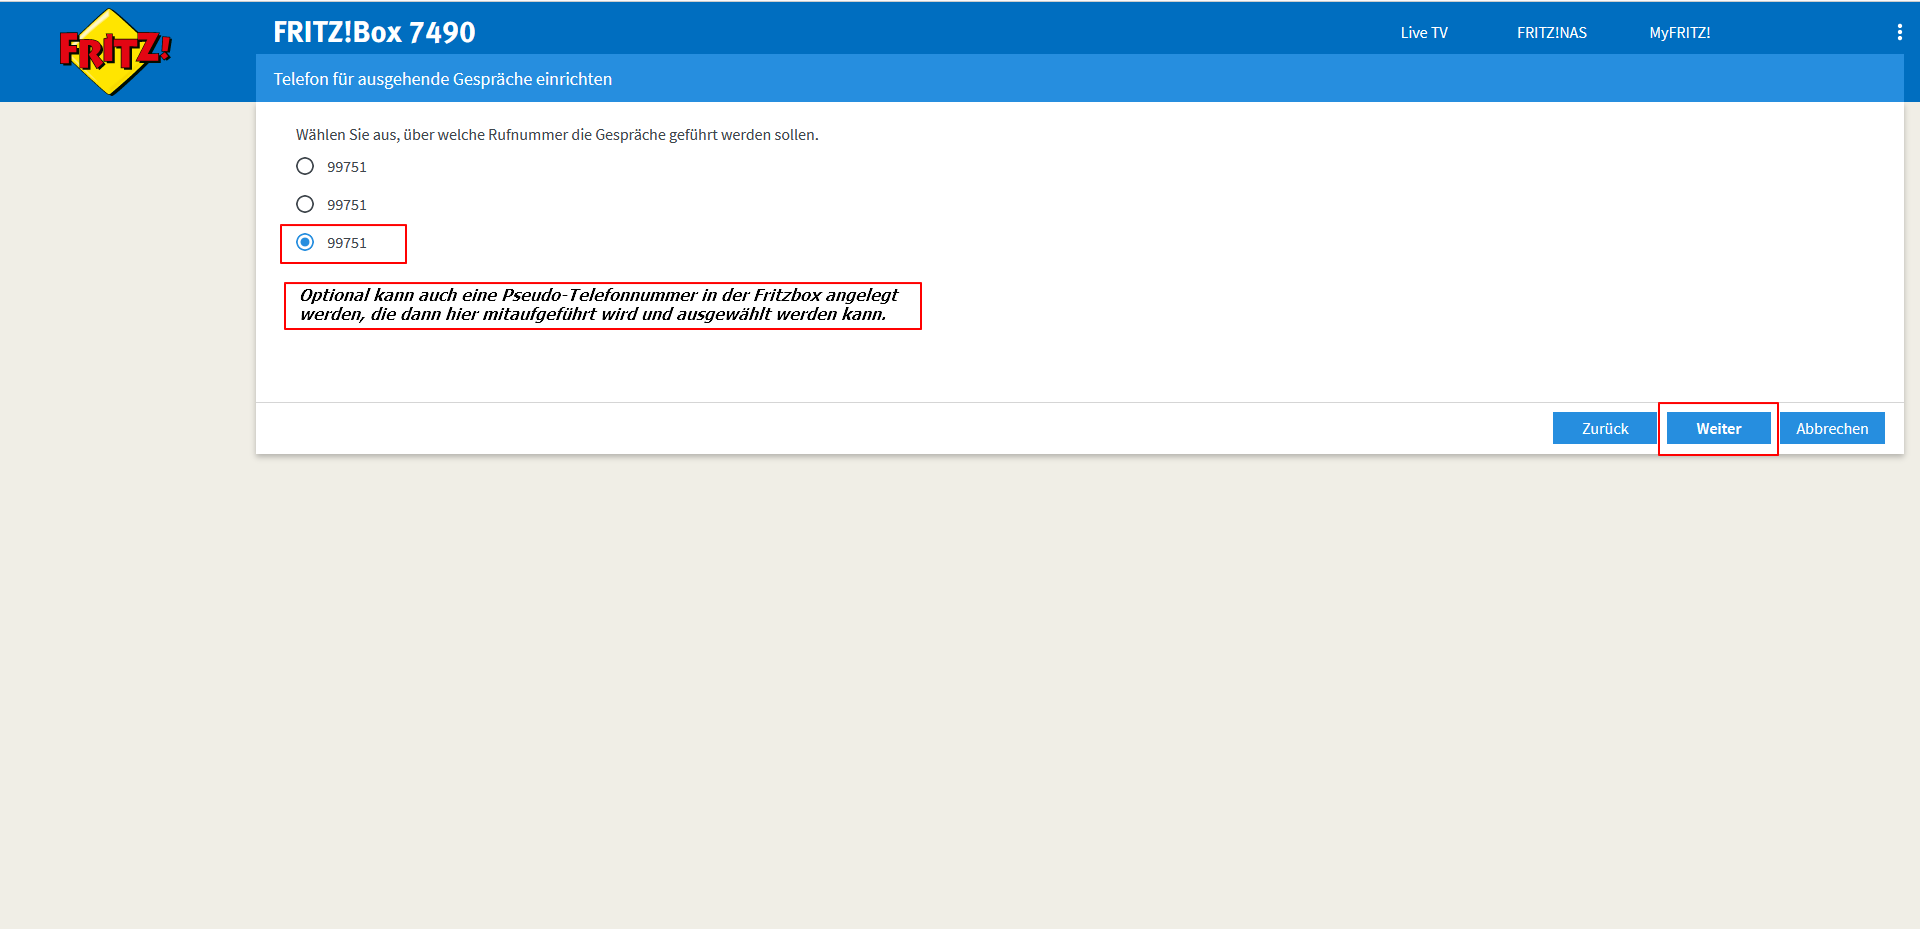
1.5 Select one of the phone numbers already stored in the FRITZ!Box -> Next.
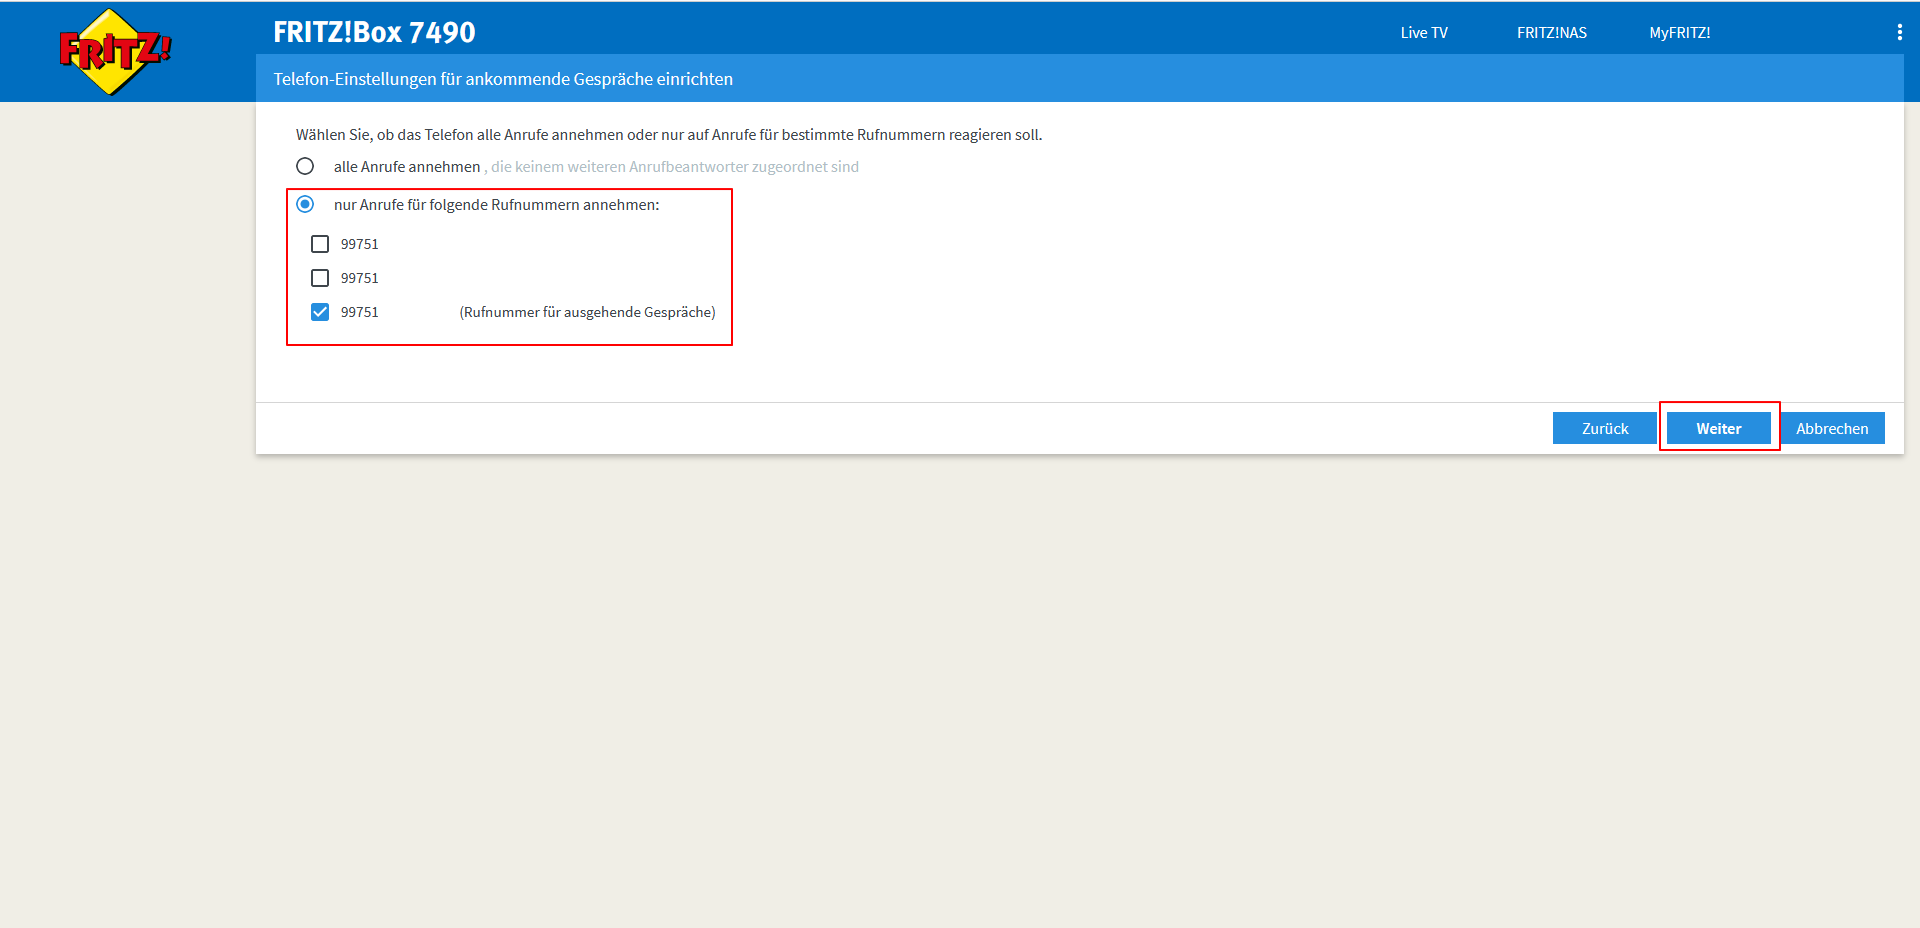
1.6 Select "Only calls for…" and the number -> Next.
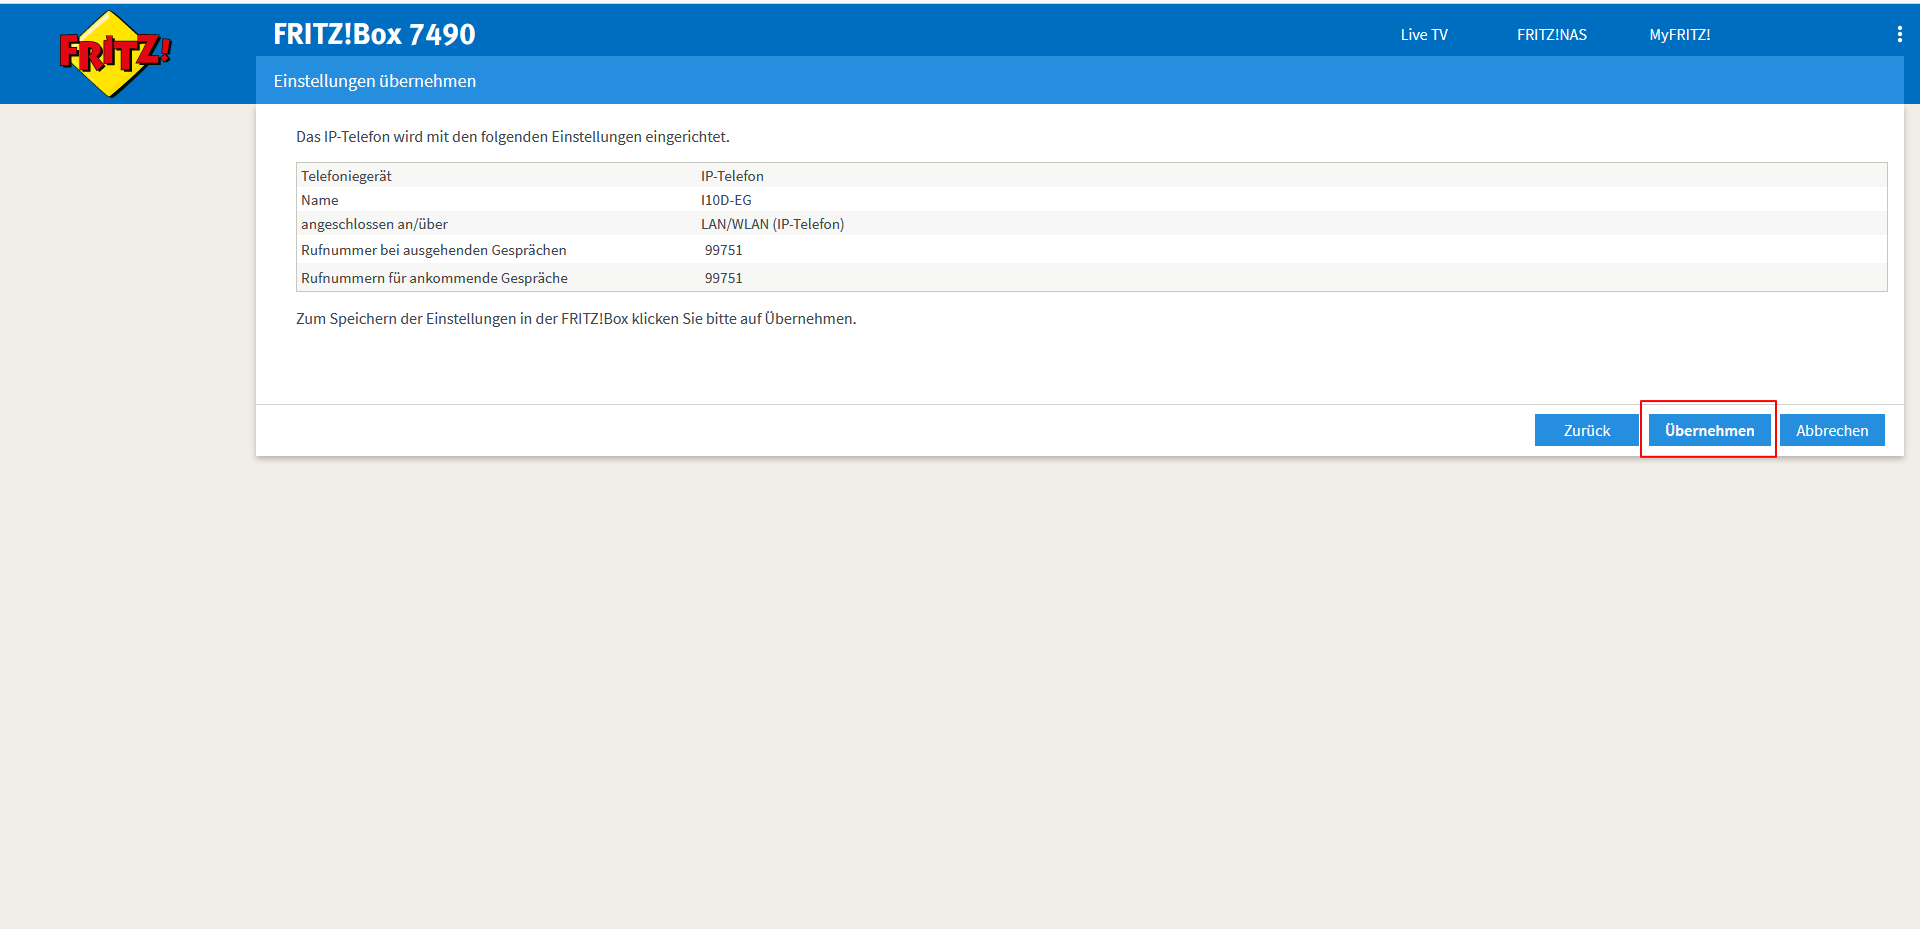
1.7 "Apply".
1.8 Confirm with the FRITZ!Fon or the FRITZ!Box button on the FRITZ!Box.
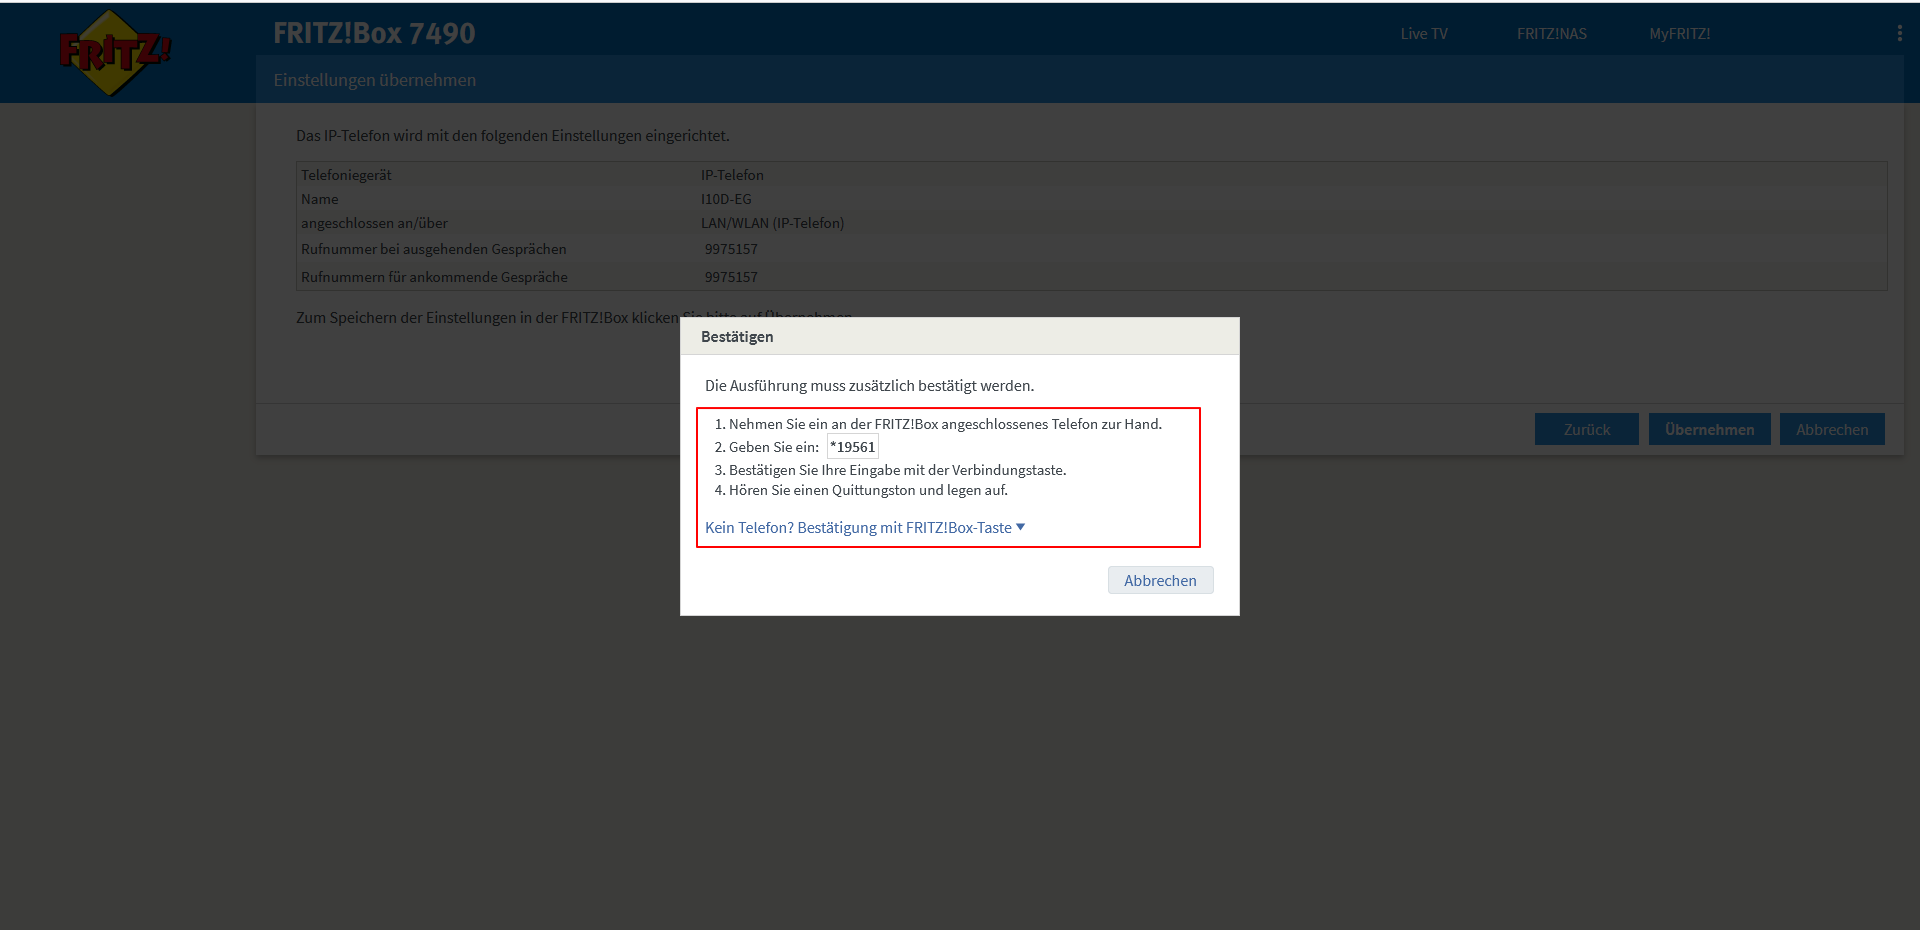
1.9 Confirm with "OK".
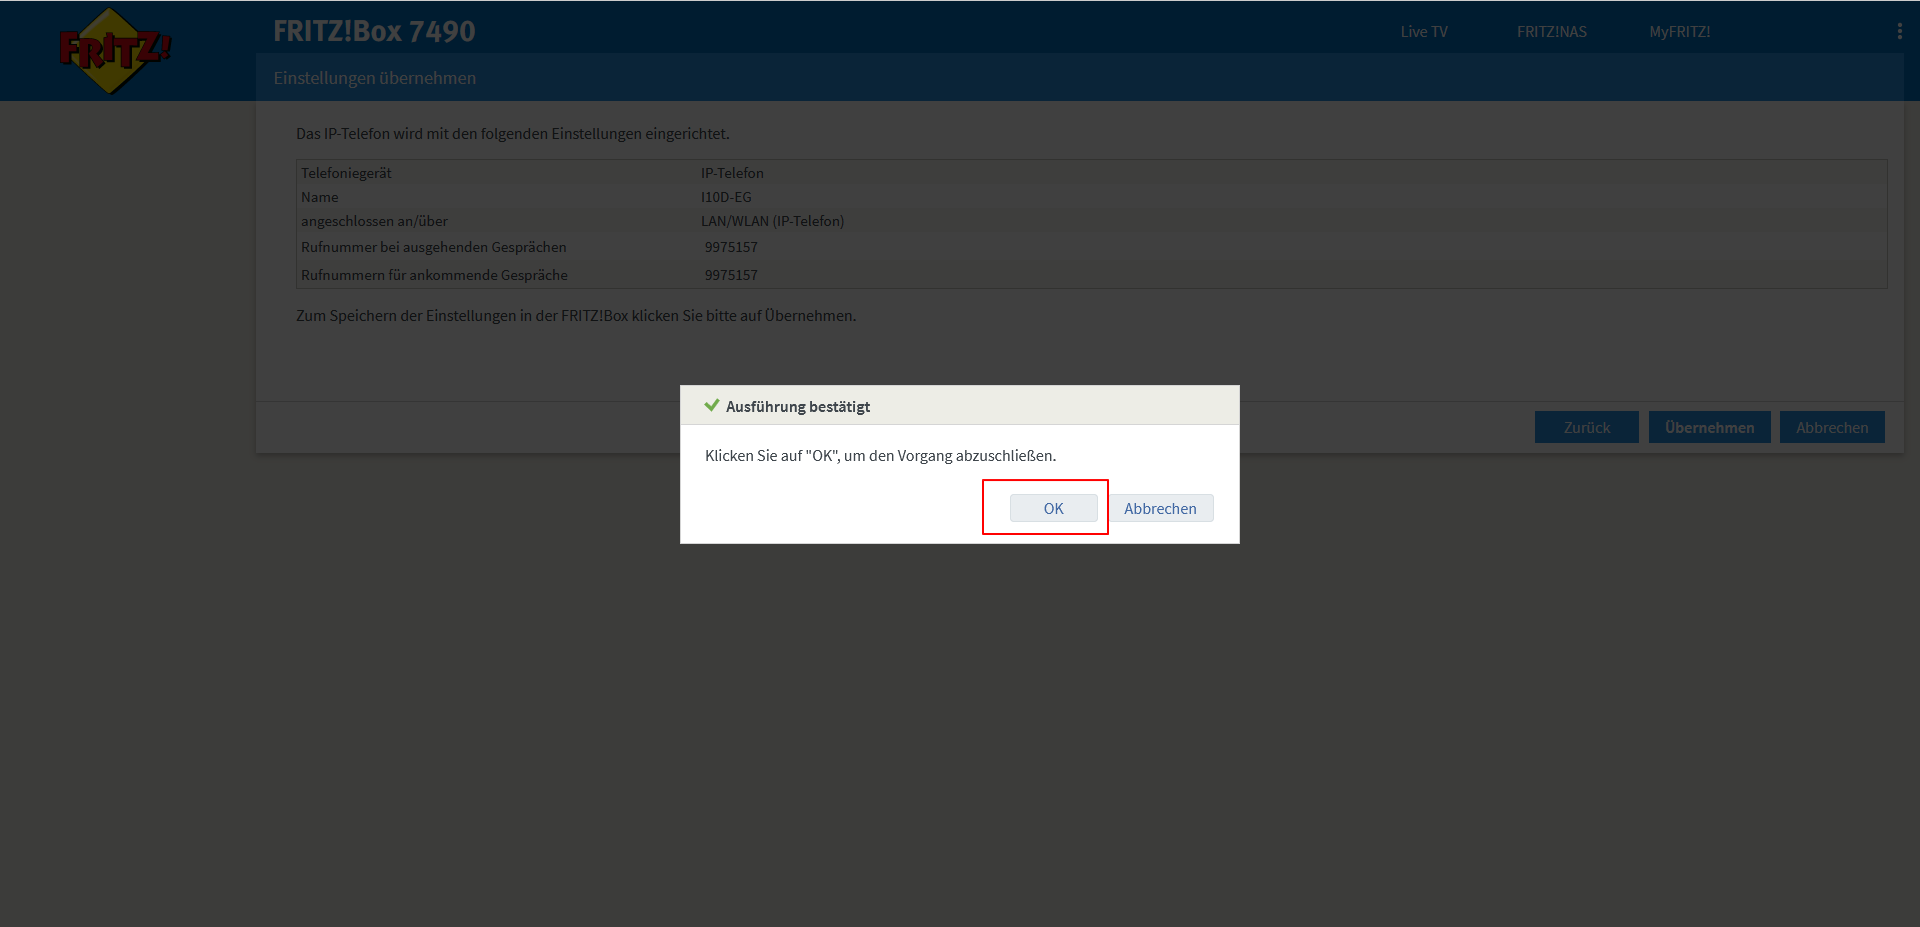
1.10 The i10D is listed among the telephony devices — note down the "xxx" number".
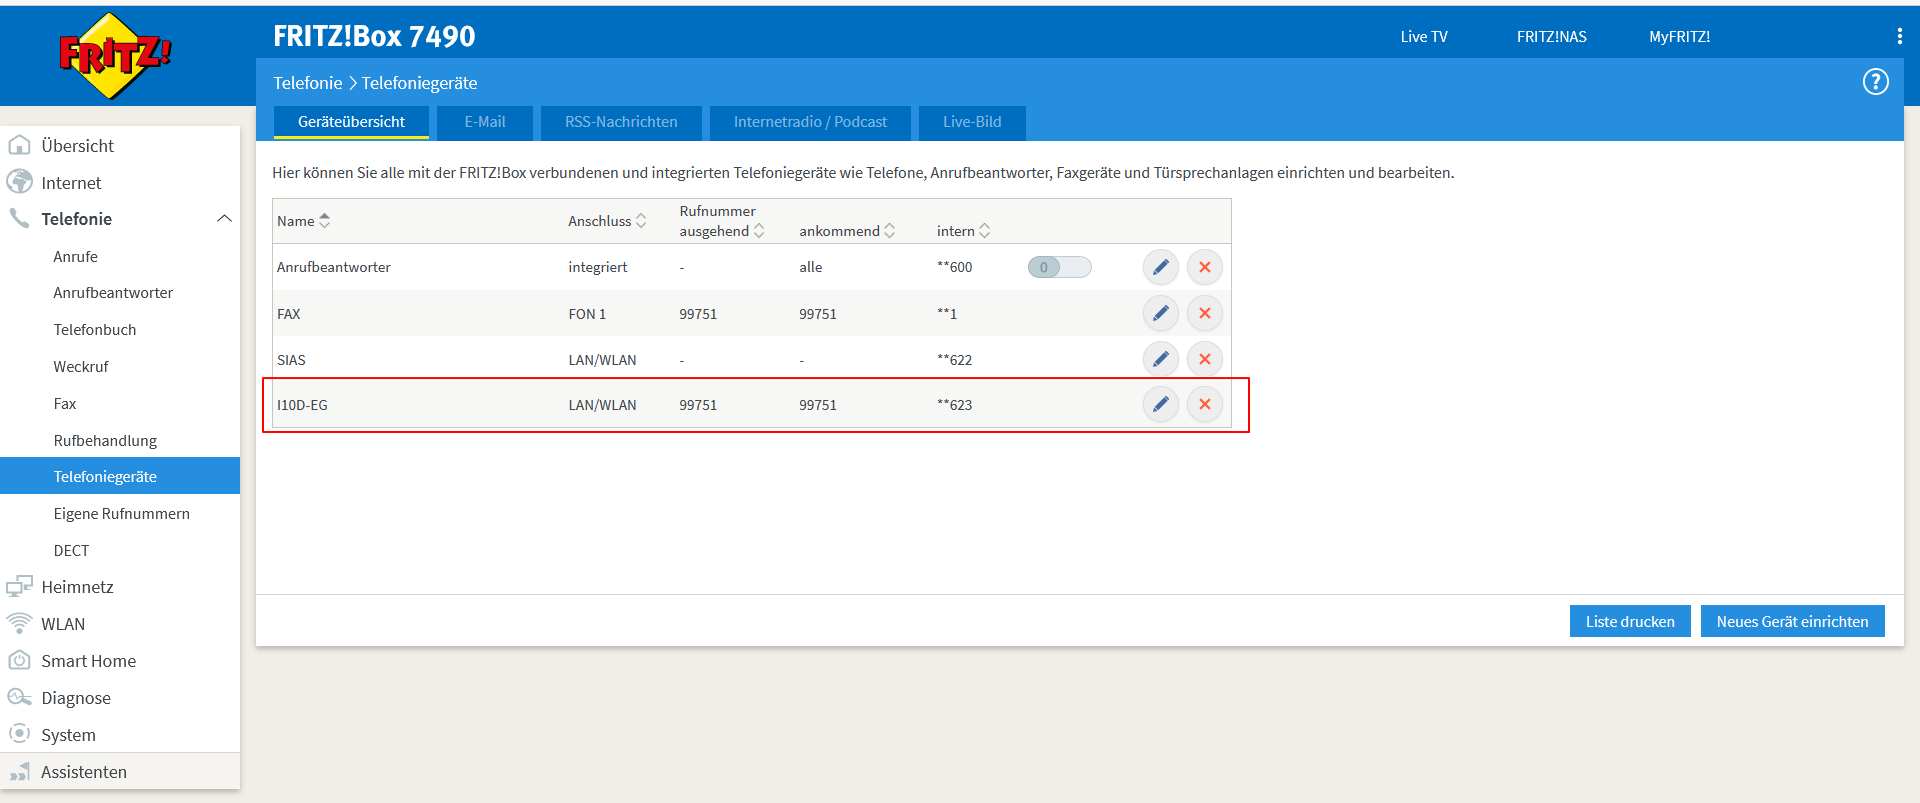
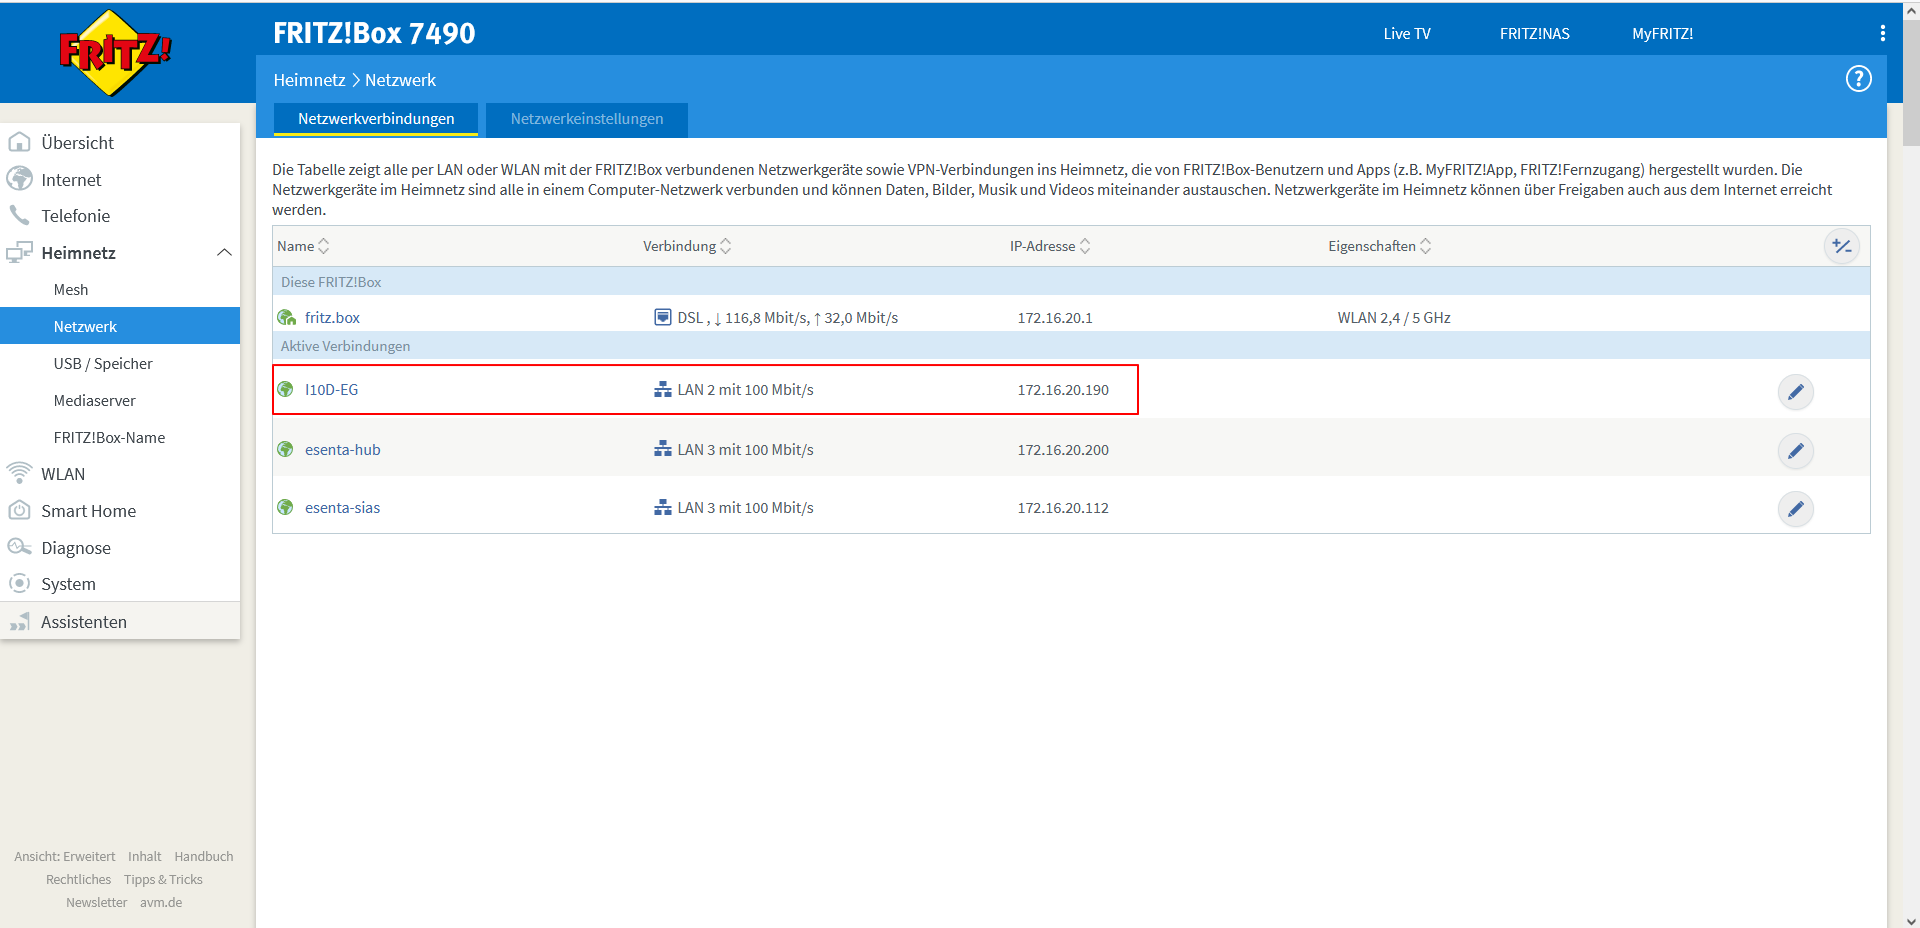
1.11 Open Home Network -> Network and click the pencil icon next to "PC-xxx-xx-xxx".
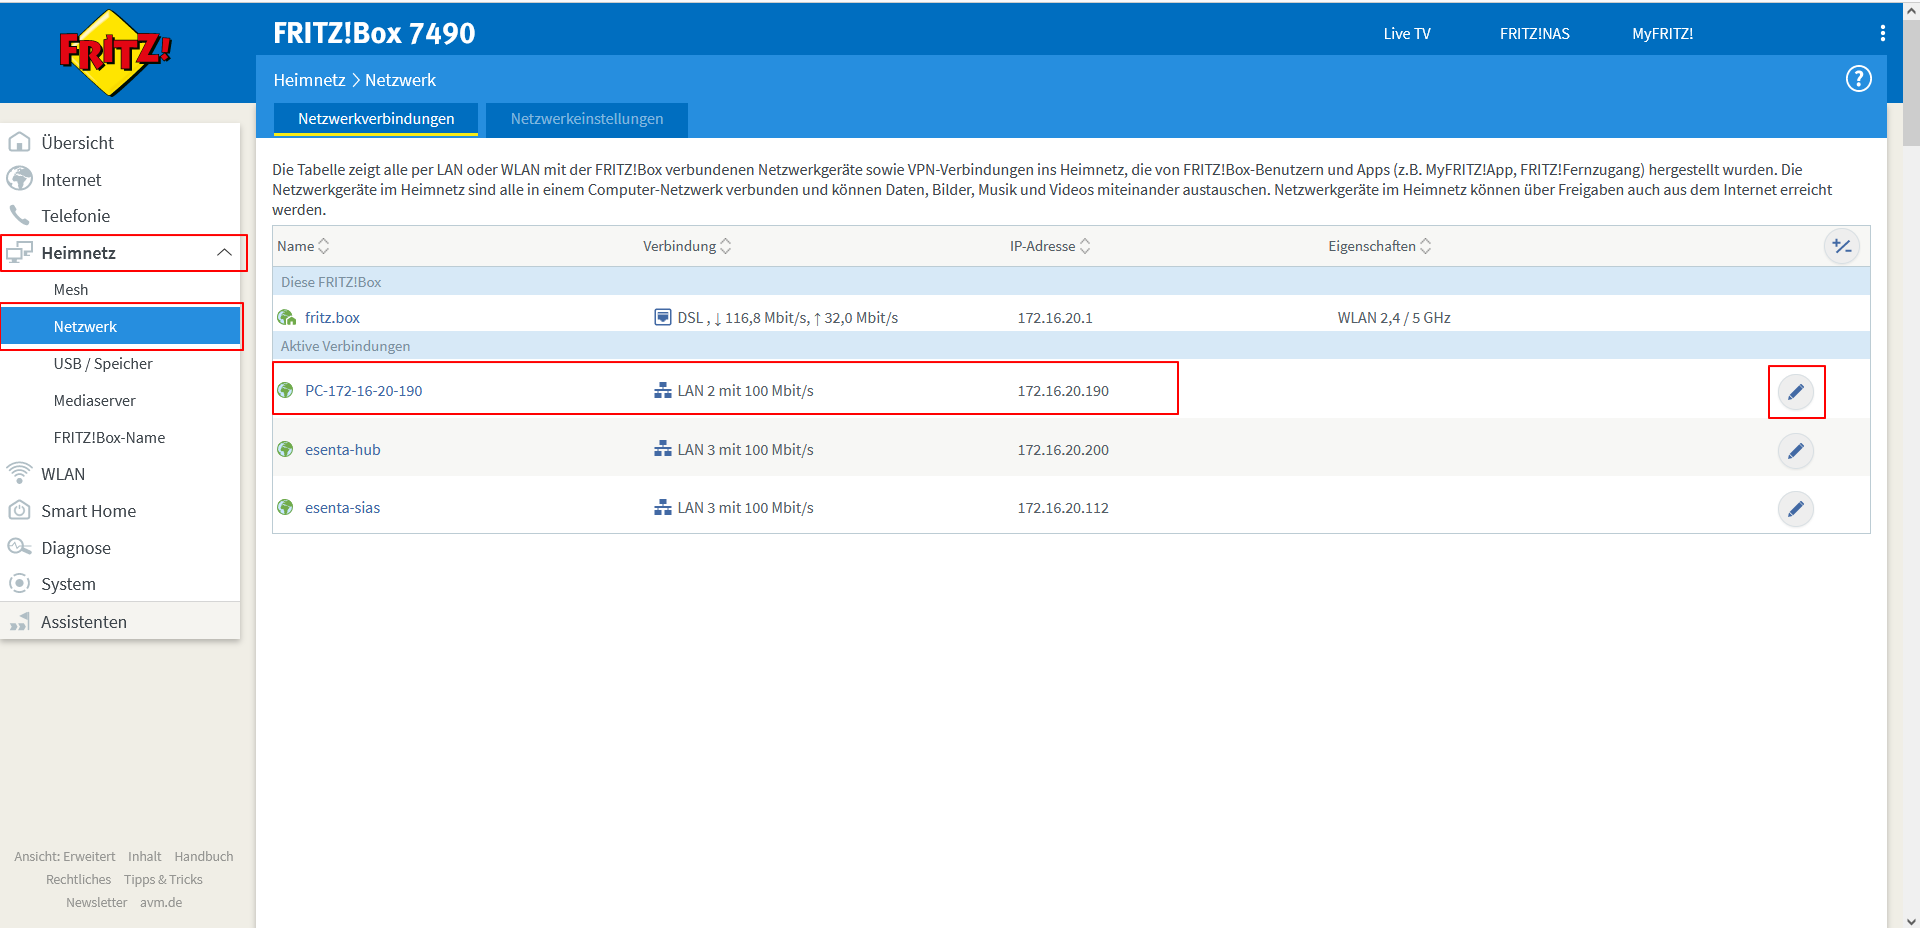
1.12 Assign a name -> check the box for "Always assign this network device the same IP address…" -> confirm with "OK".
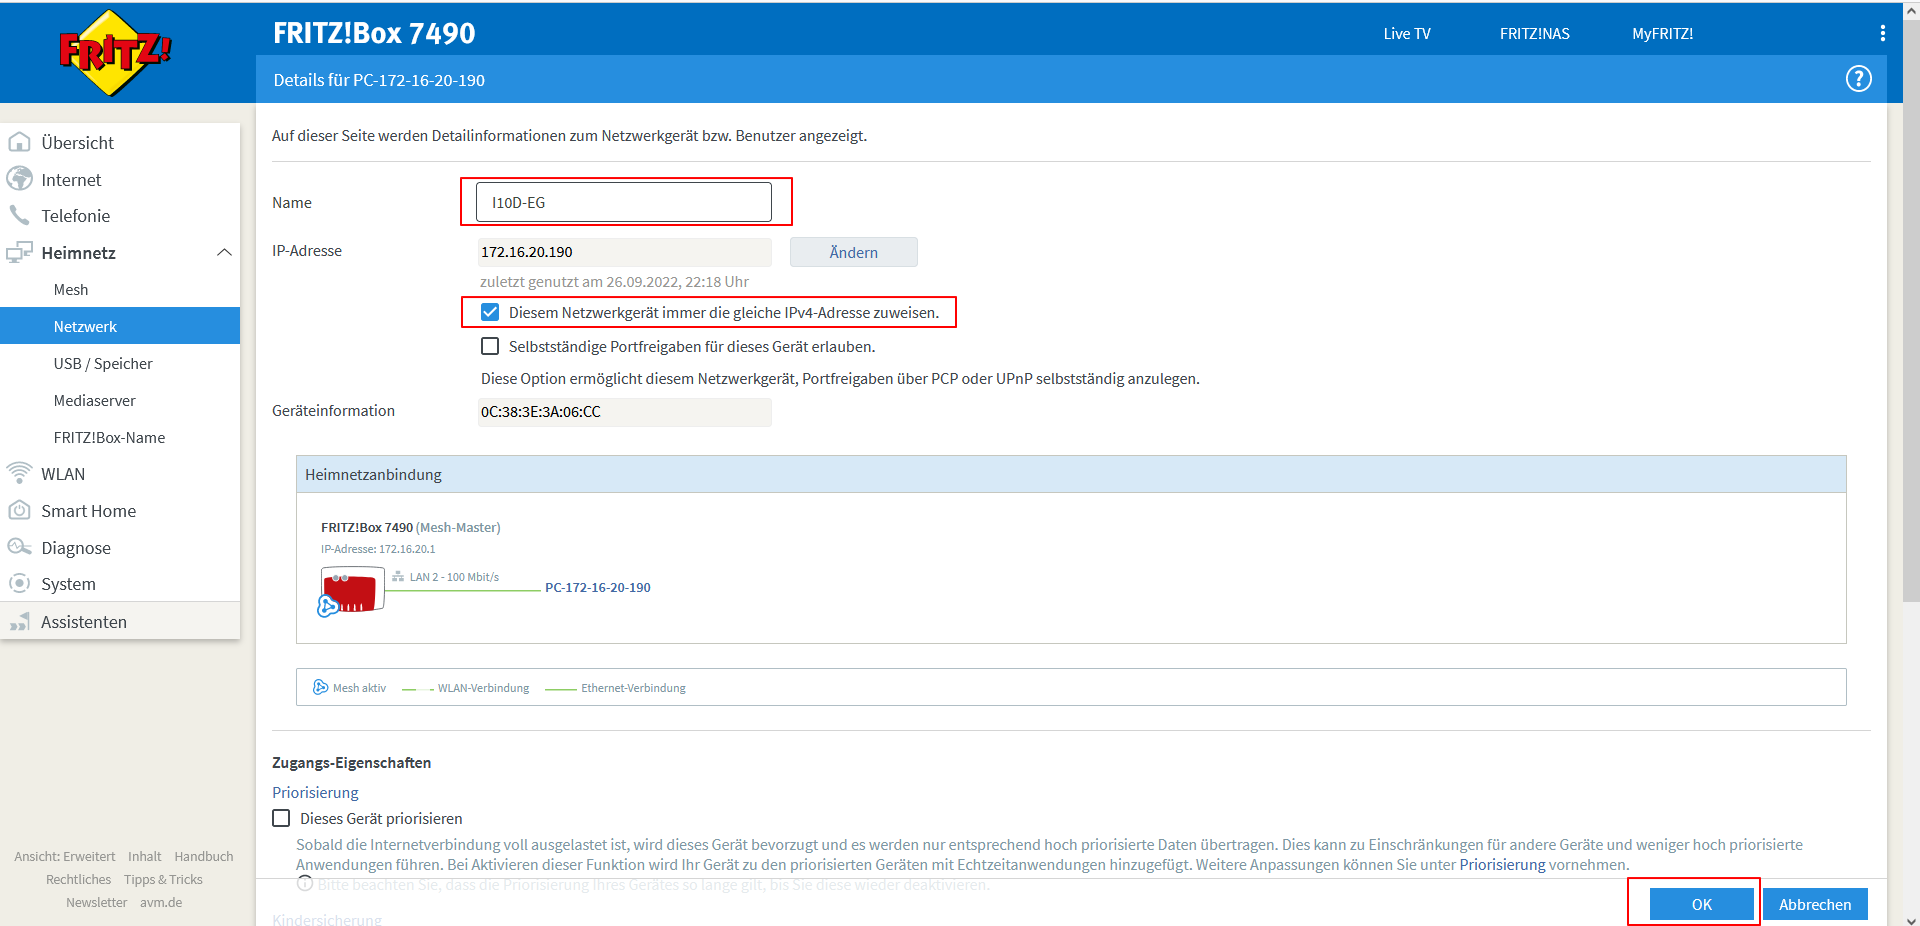
1.13 Confirm with "OK".
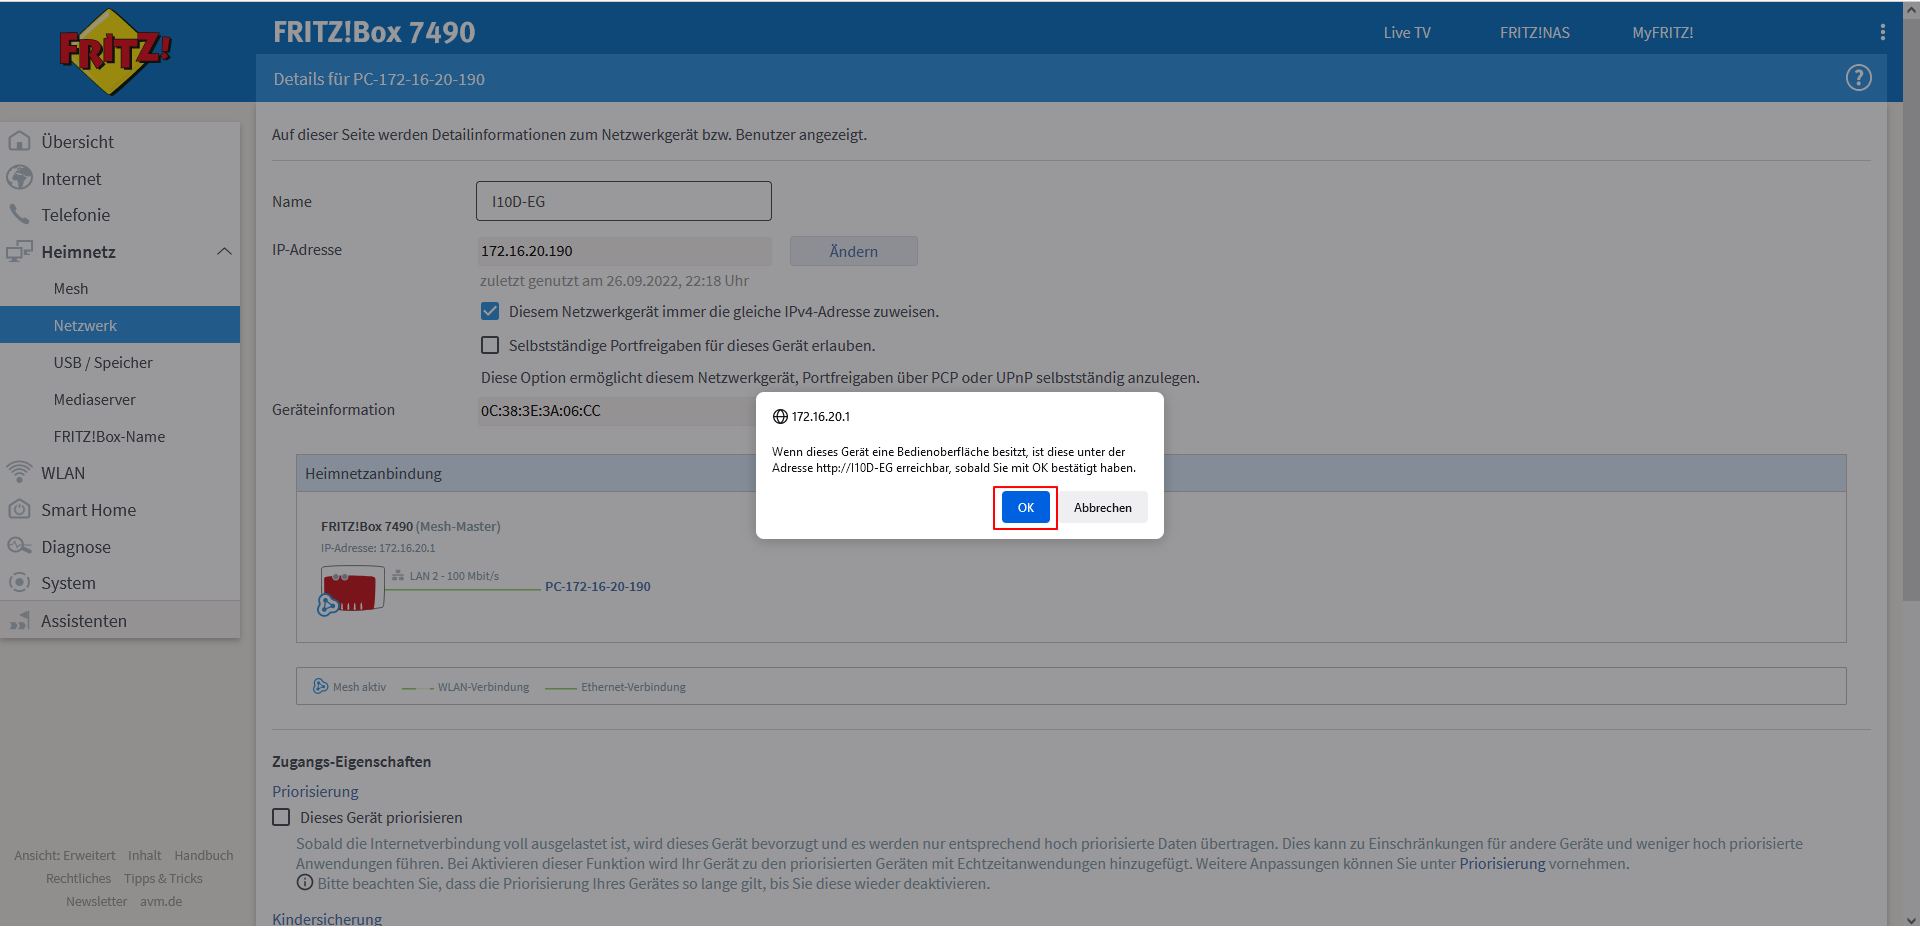
1.14 The changed name is now shown in the list — note down the "IP address" of the i10D.
Storing the SIP destination number in the SIAS web interface
2.1 Open the ESENTA SIAS web interface via its IP address
- Log in with the access credentials supplied with the SIAS.

2.2 Open the "Doorbell Nameplates" menu item
- Select "Add doorbell nameplate" if a doorbell button hasn't already been set up; in that case, click the wrench icon instead.
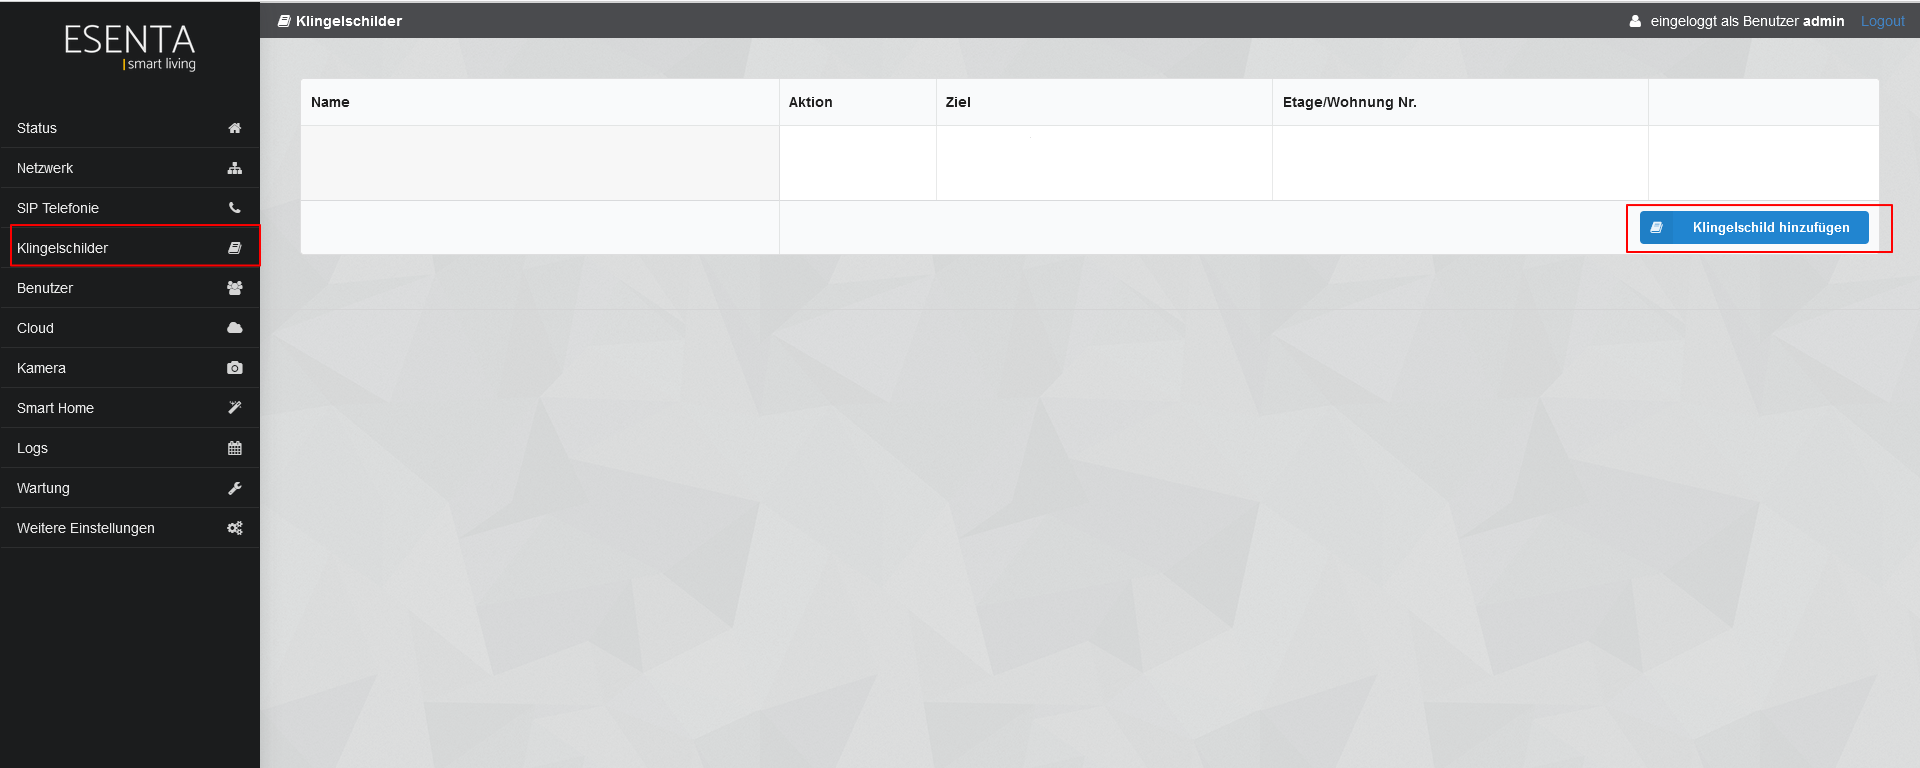
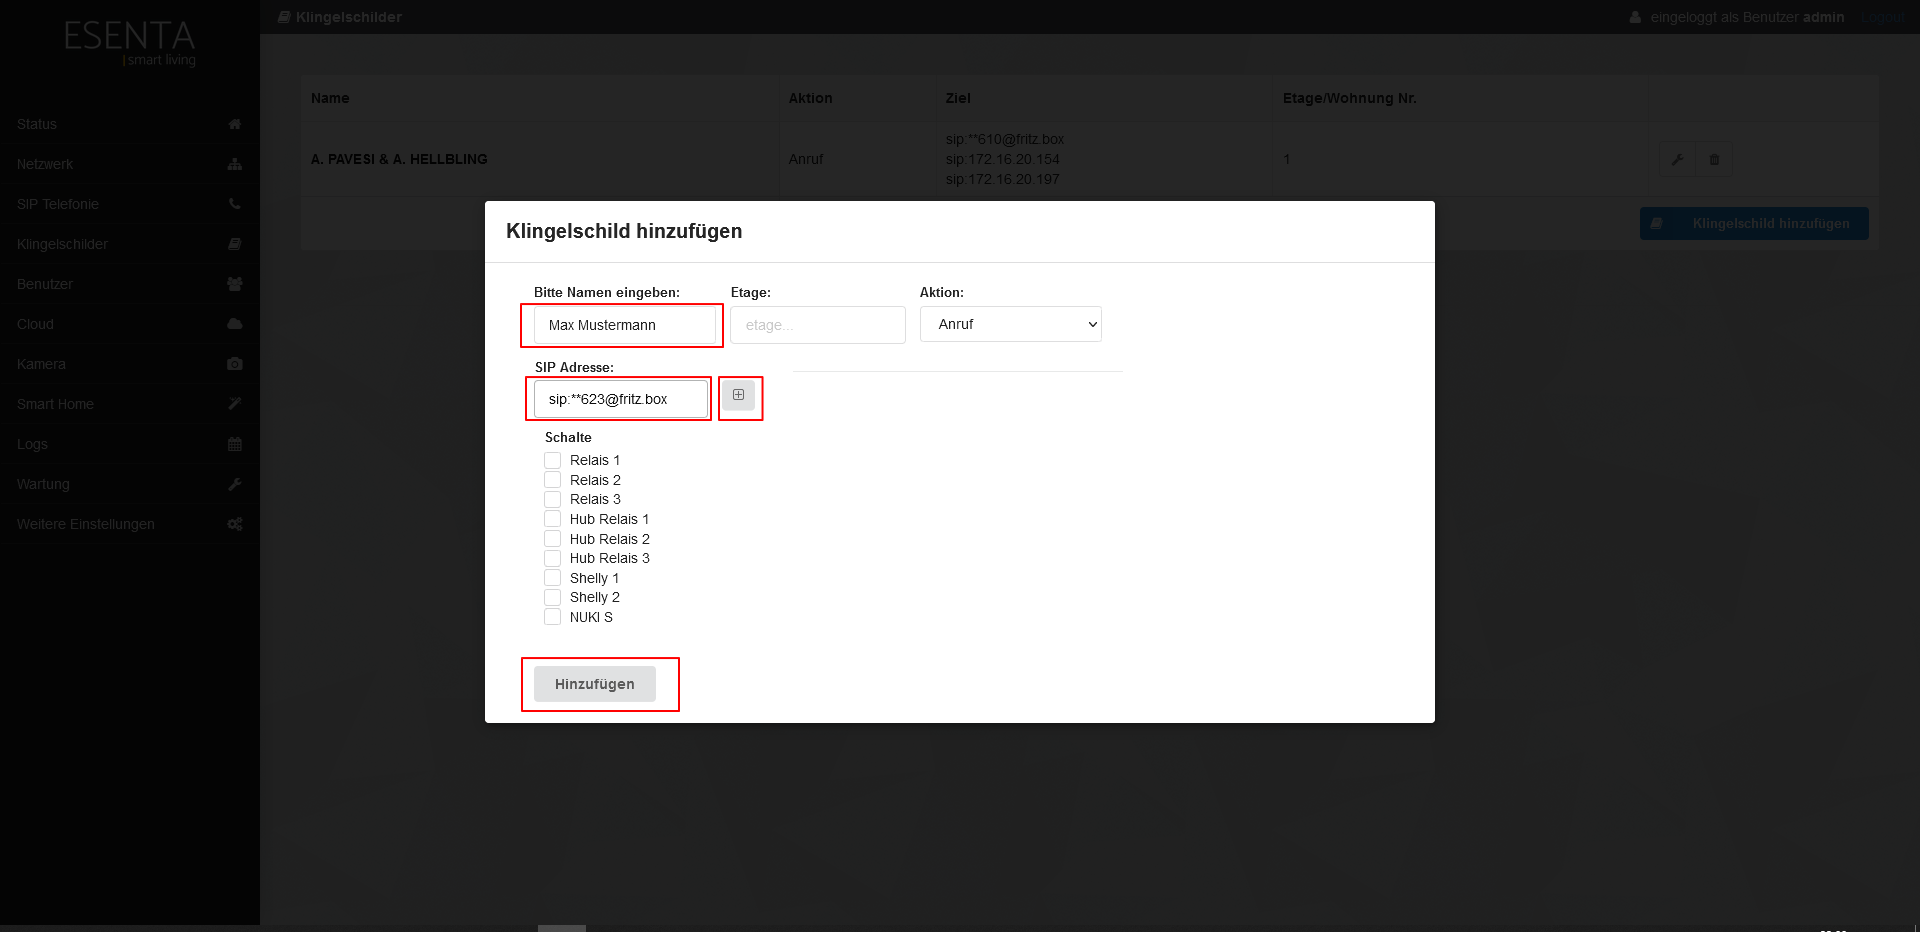
2.3 Enter "a name to be displayed on the doorbell button"
- In the "SIP address" field, enter sip:**xxx@fritz.box (noted in step 1.10)
- Insert it with the "+" sign
- Confirm with "Add".
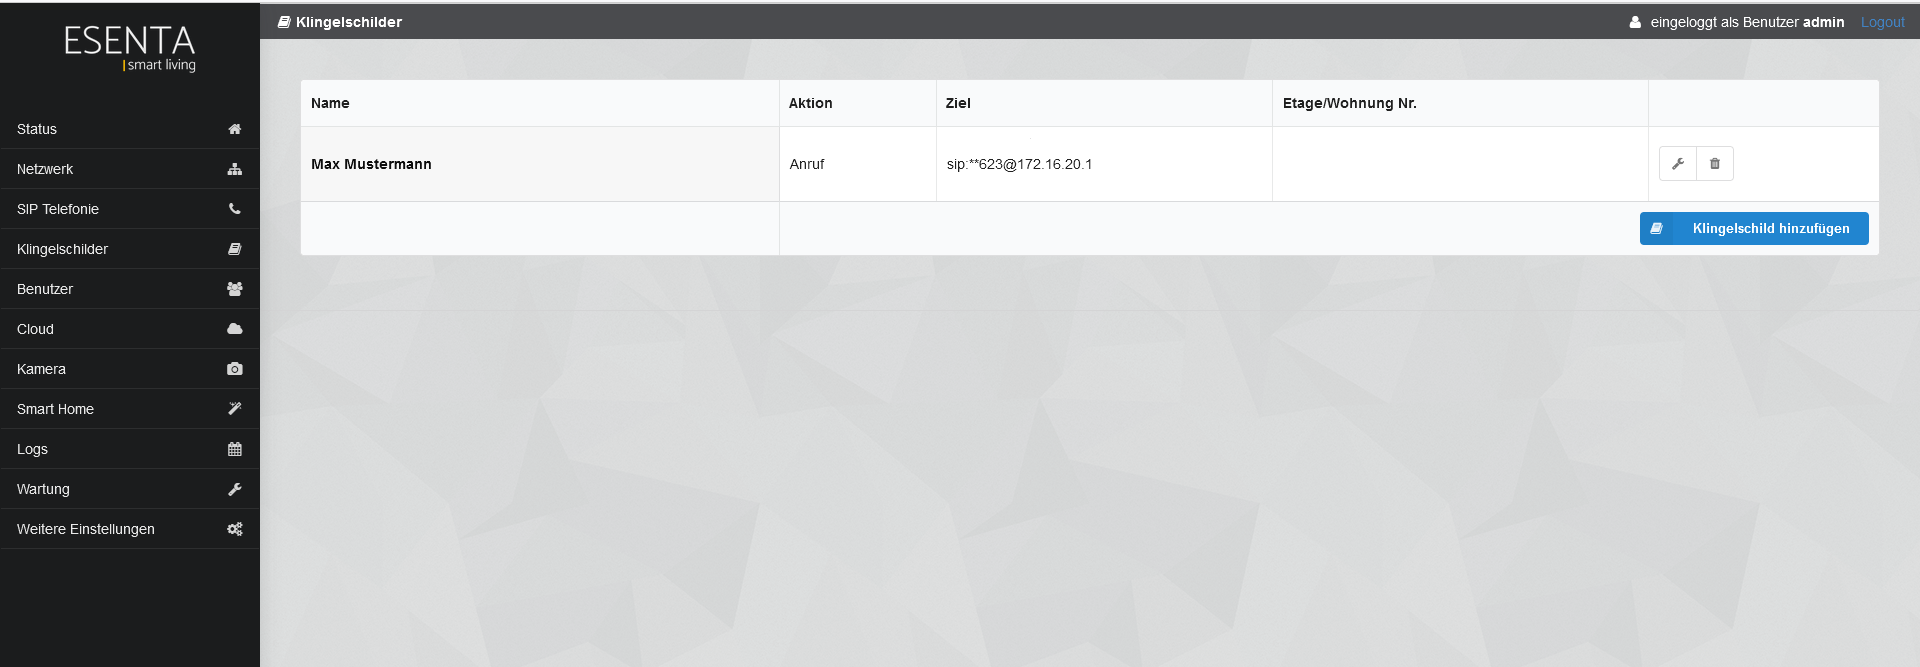
2.4 The "name" and "destination number" are shown in the overview.
Storing the DTMF code in the SIAS web interface
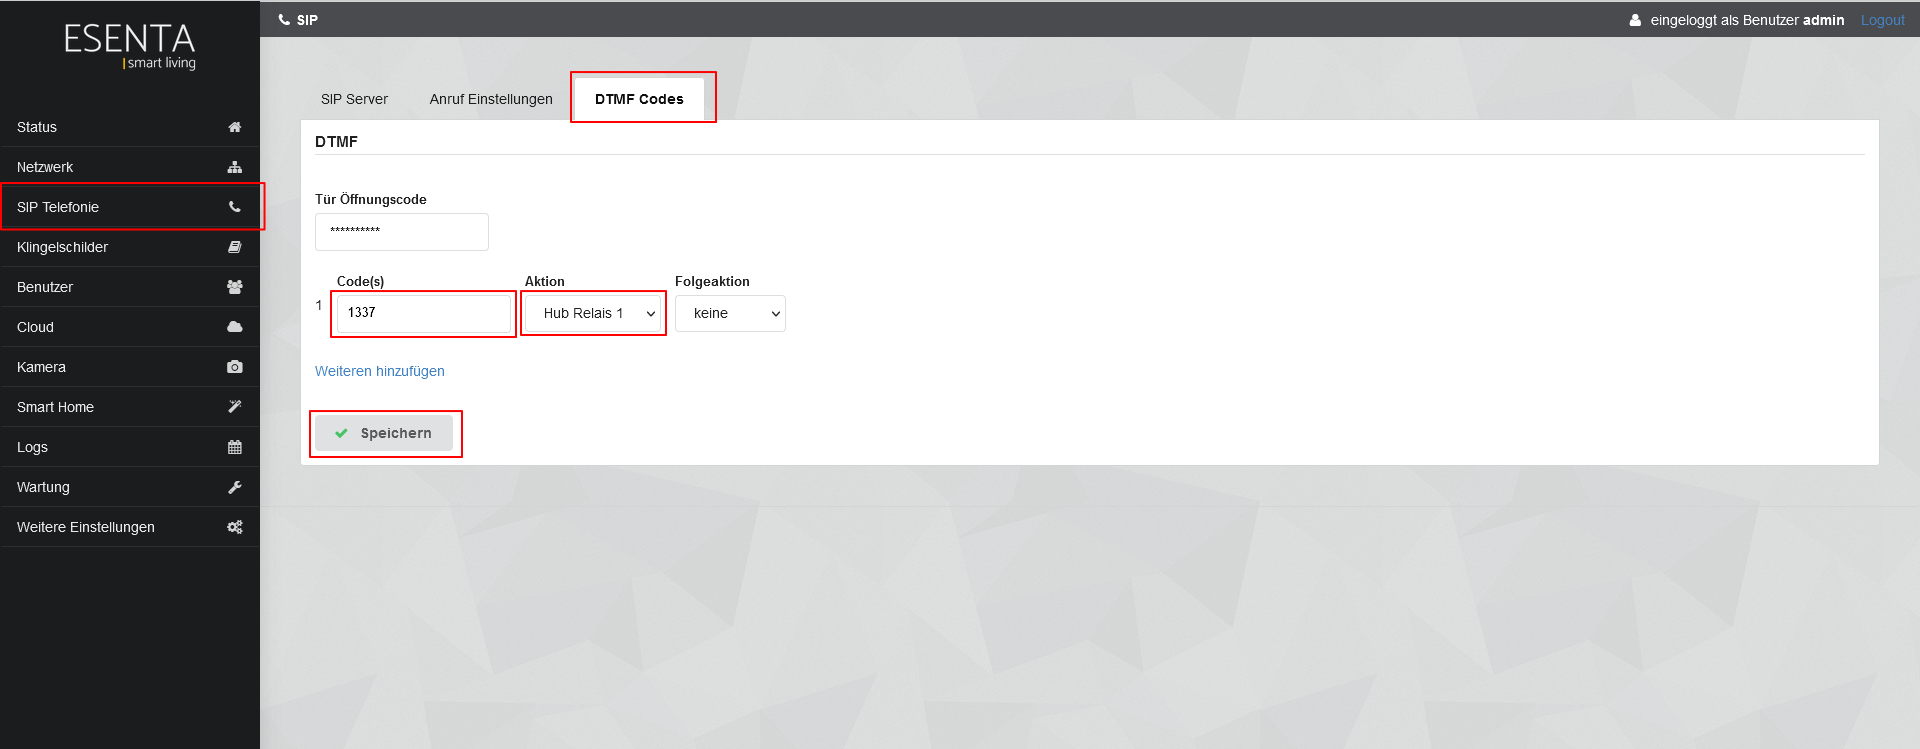
3.1 Open the "SIP Telephony" menu item -> open the "DTMF Codes" tab
- In the "Code(s)" field, enter a code of your choice (at least 4 digits) and note it down
- In the "Action" field, select the relay that should be triggered by the code
- Confirm with "Save".
Storing the SIP configuration in the Fanvil i10D interface
4.1 Open the Fanvil i10D interface via the i10D's "IP address" (noted in step 1.14) and log in.
- User: admin, Password: admin
- Select a language and check the box
- Confirm with "Login".

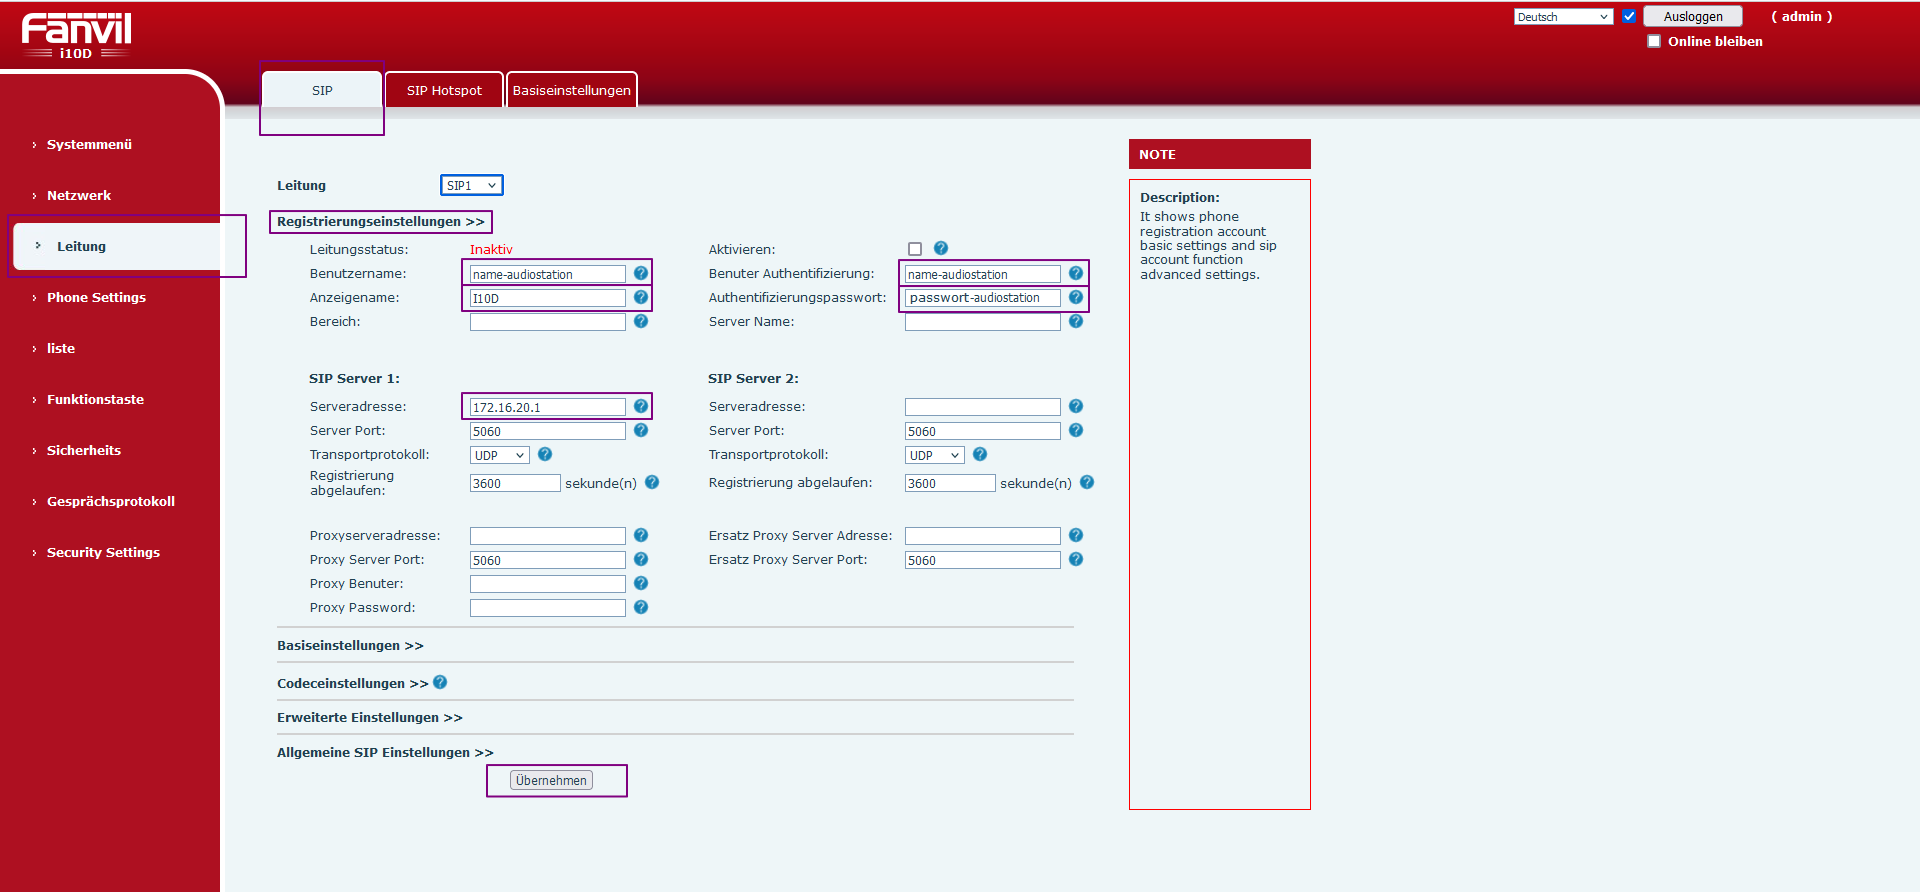
4.2 "Line" menu item
Open the "SIP" tab
Select the "Registration Settings" section
In the "Username" field, enter the "username" noted in "step 1.4"
In the "Authentication User" field, enter the same "username" noted in "step 1.4"
In the "Display Name" field, enter a name of your choice for the i10D
In the "Server Address" field, enter the IP address of the "FRITZ!Box"
Confirm with "Apply".
4.3 Check the "Enable" checkbox
- Confirm with "Apply"
- The line status should now be marked as "Registered".
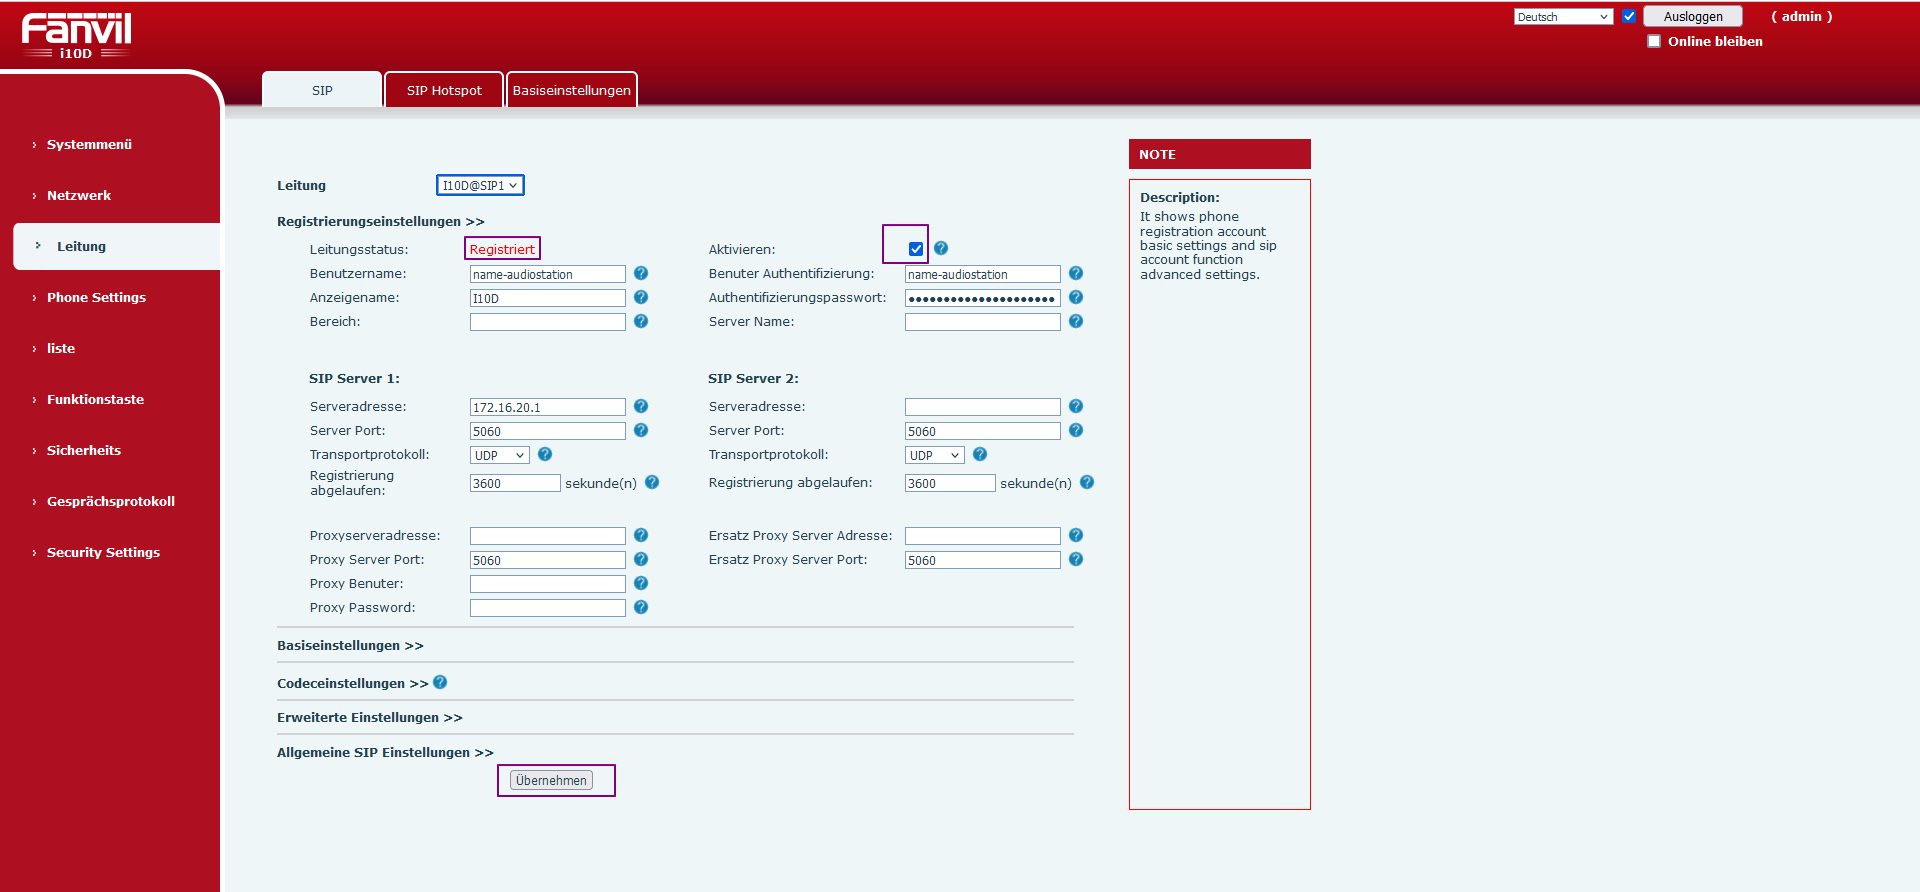
4.4 "Line" menu item
- Open the "SIP" tab
- Select the "Basic Settings" section
- Uncheck the box for "Enable Auto Answer"
- Confirm with "Apply".
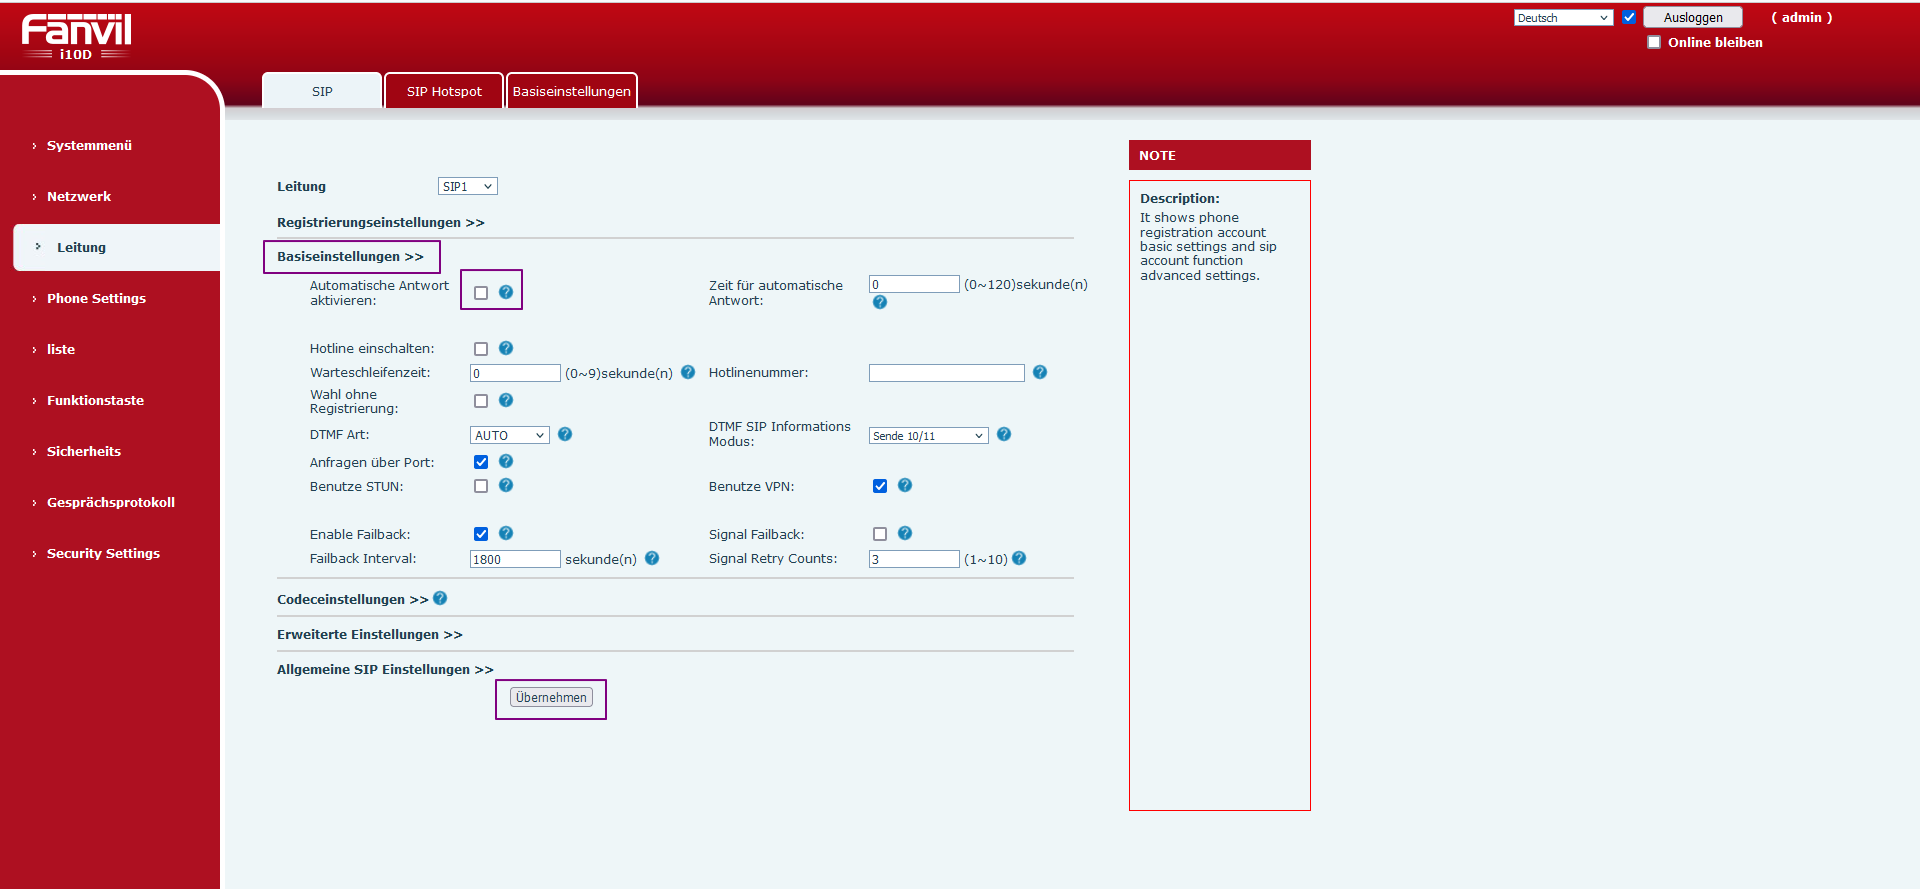
Storing the DTMF code on the Fanvil i10D
5.1 Open the "Function Keys" menu item
- Select the "Function Key Settings" section
- In the "DSS Key 1" row, select "DTMF" in the Type field
- In the Name field, enter "a name of your choice" (describing what this code unlocks)
- In the Value field, enter the "code noted in step 3.1" -> confirm with "Apply".
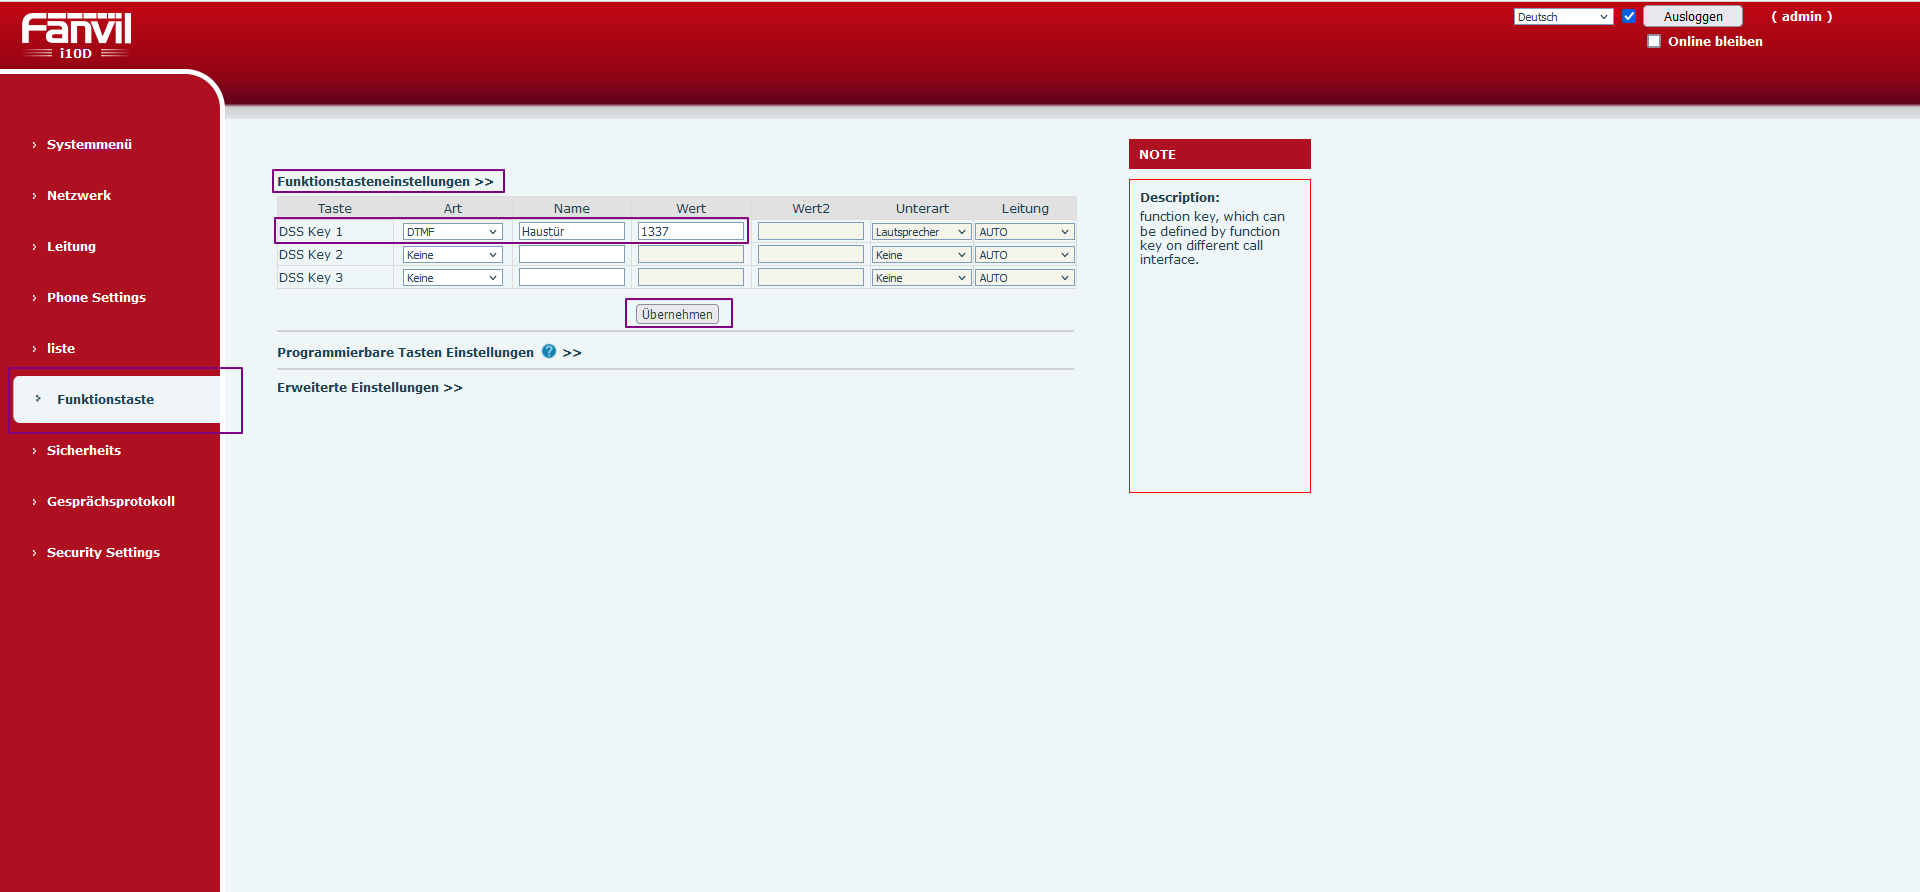
5.2 Open the "Function Keys" menu item
- Select the "Programmable Key Settings" section
- In the "Key2" row, select "Dsskey 1 (Name)" in the Talking field
- Confirm with "Apply".
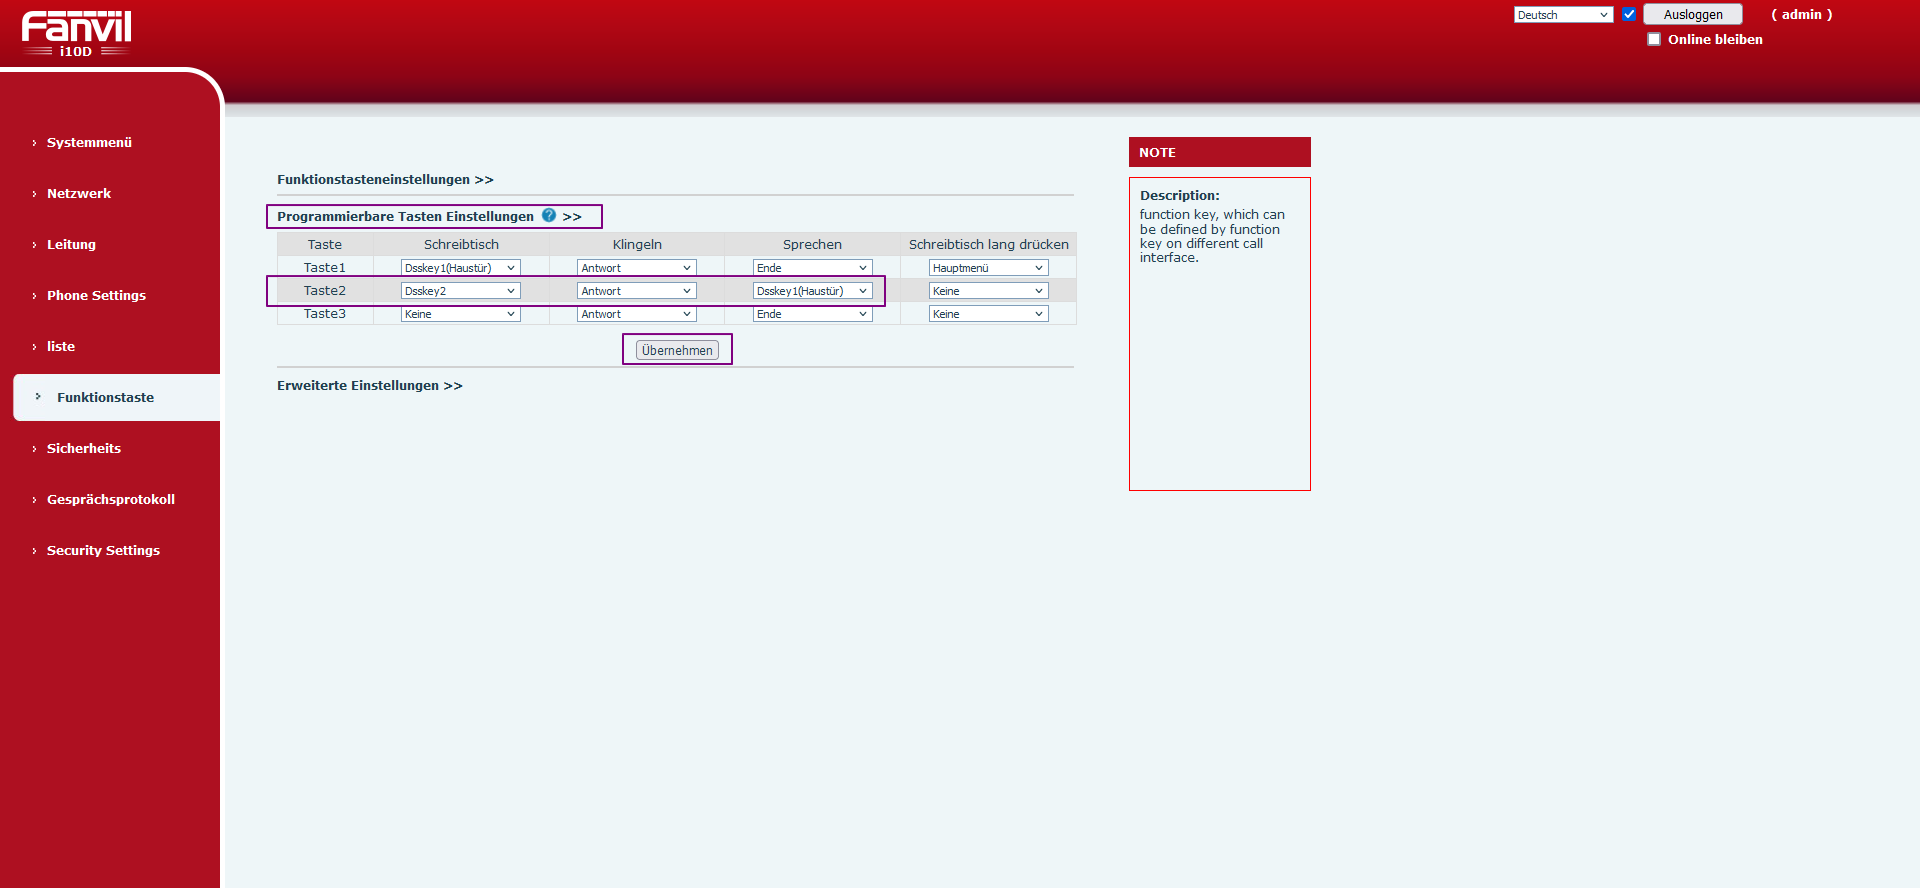
Other settings for the Fanvil i10D
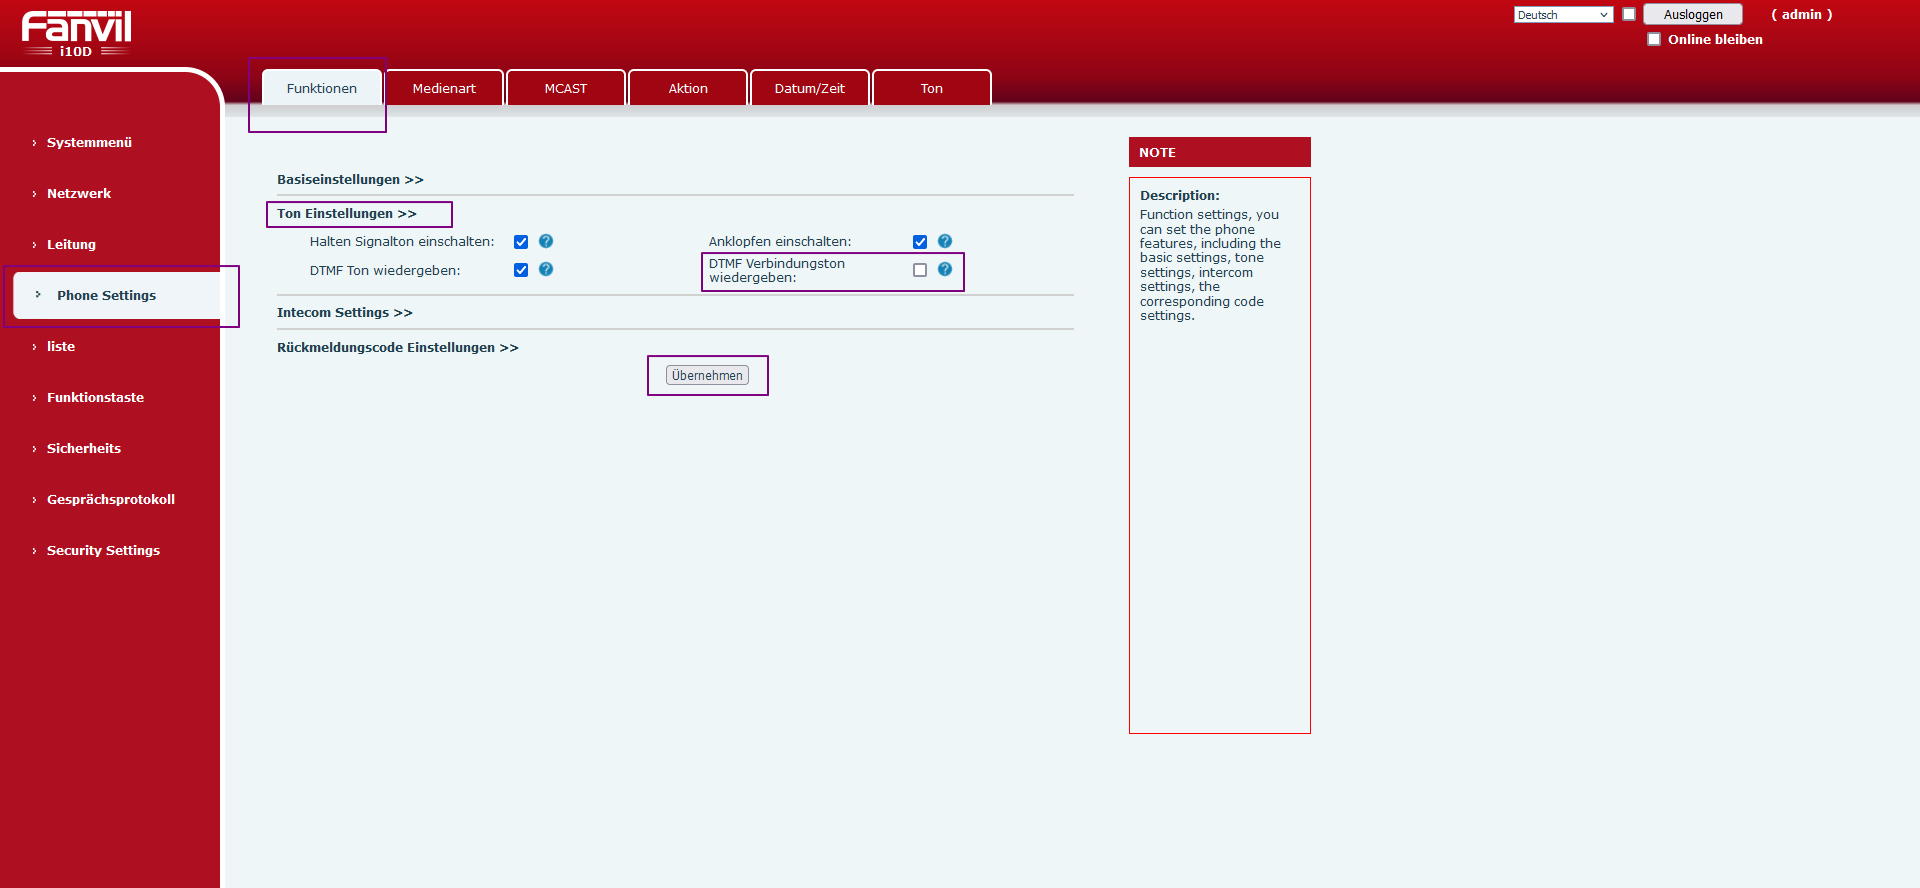
6.1 "Phone Settings" menu item
- Open the Features tab
- Select the "Tone Settings" section
- Uncheck the box for "Play DTMF connection tone"
- Confirm with "Apply".
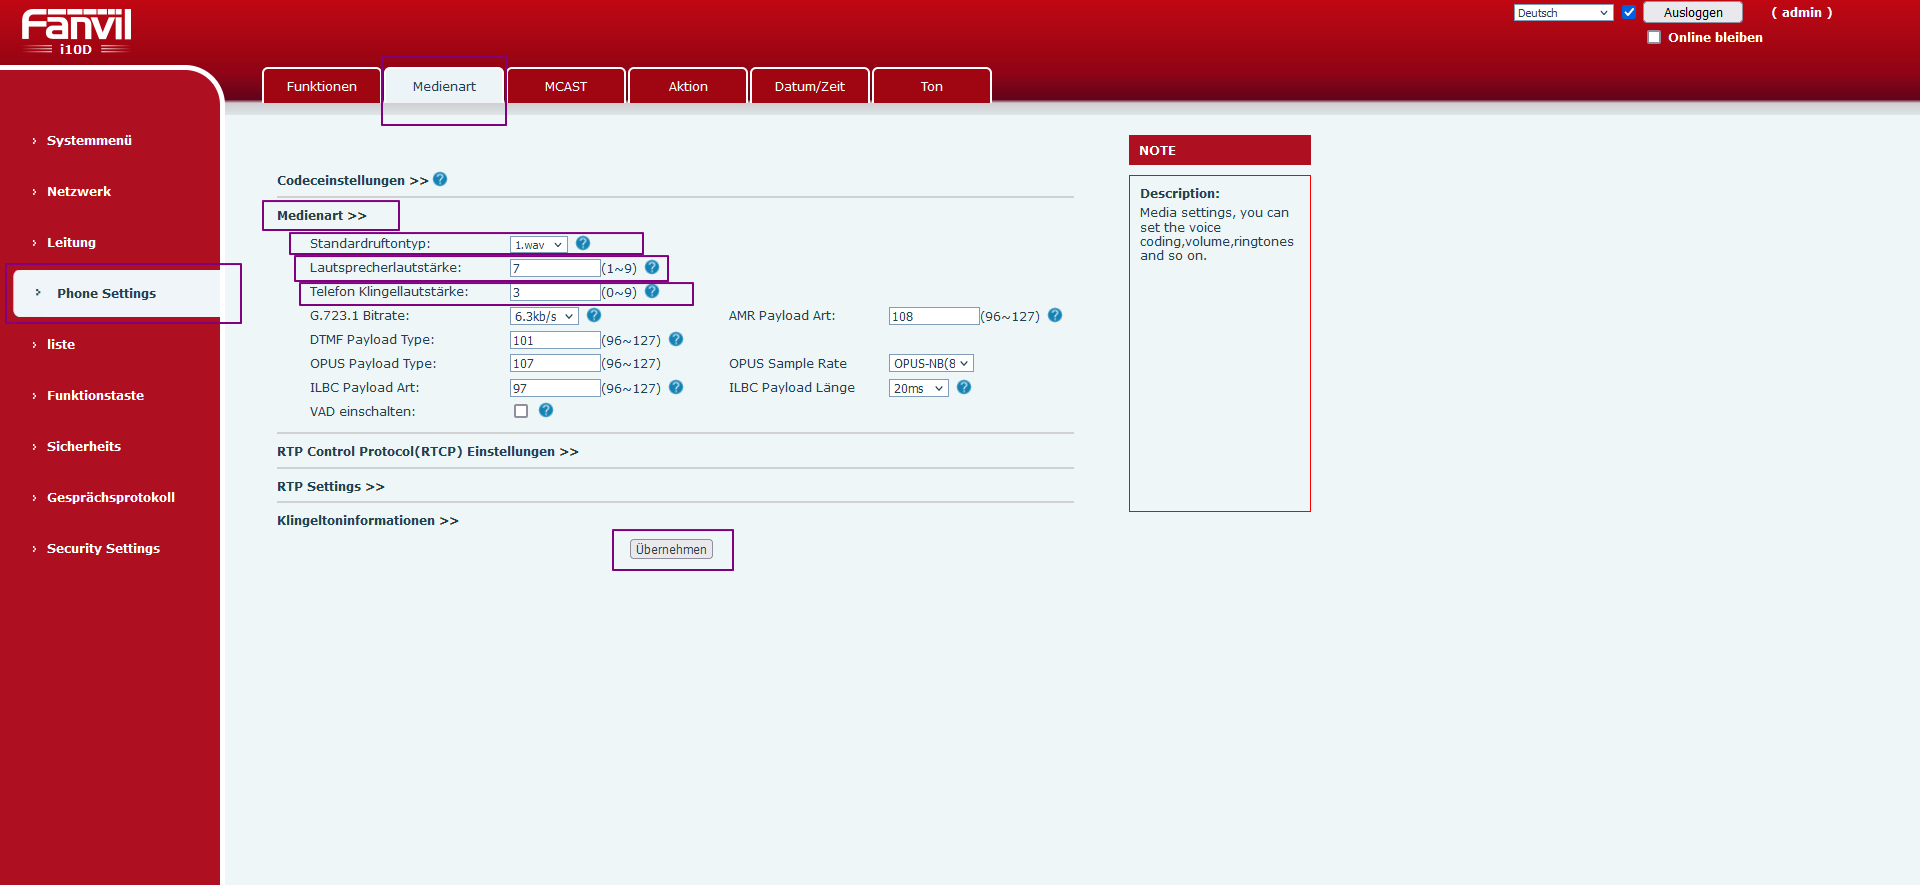
6.2 "Phone Settings" menu item
- Open the "Media Type" tab
- Select the "Media Type" section
- In the "Default Ringtone Type" row, select the ringtone
- In the "Speaker Volume" row, select the volume
- In the "Phone Ring Volume" row, select the volume
- Confirm with "Apply".
6.3 "Phone Settings" menu item
- Open the "Tone" tab
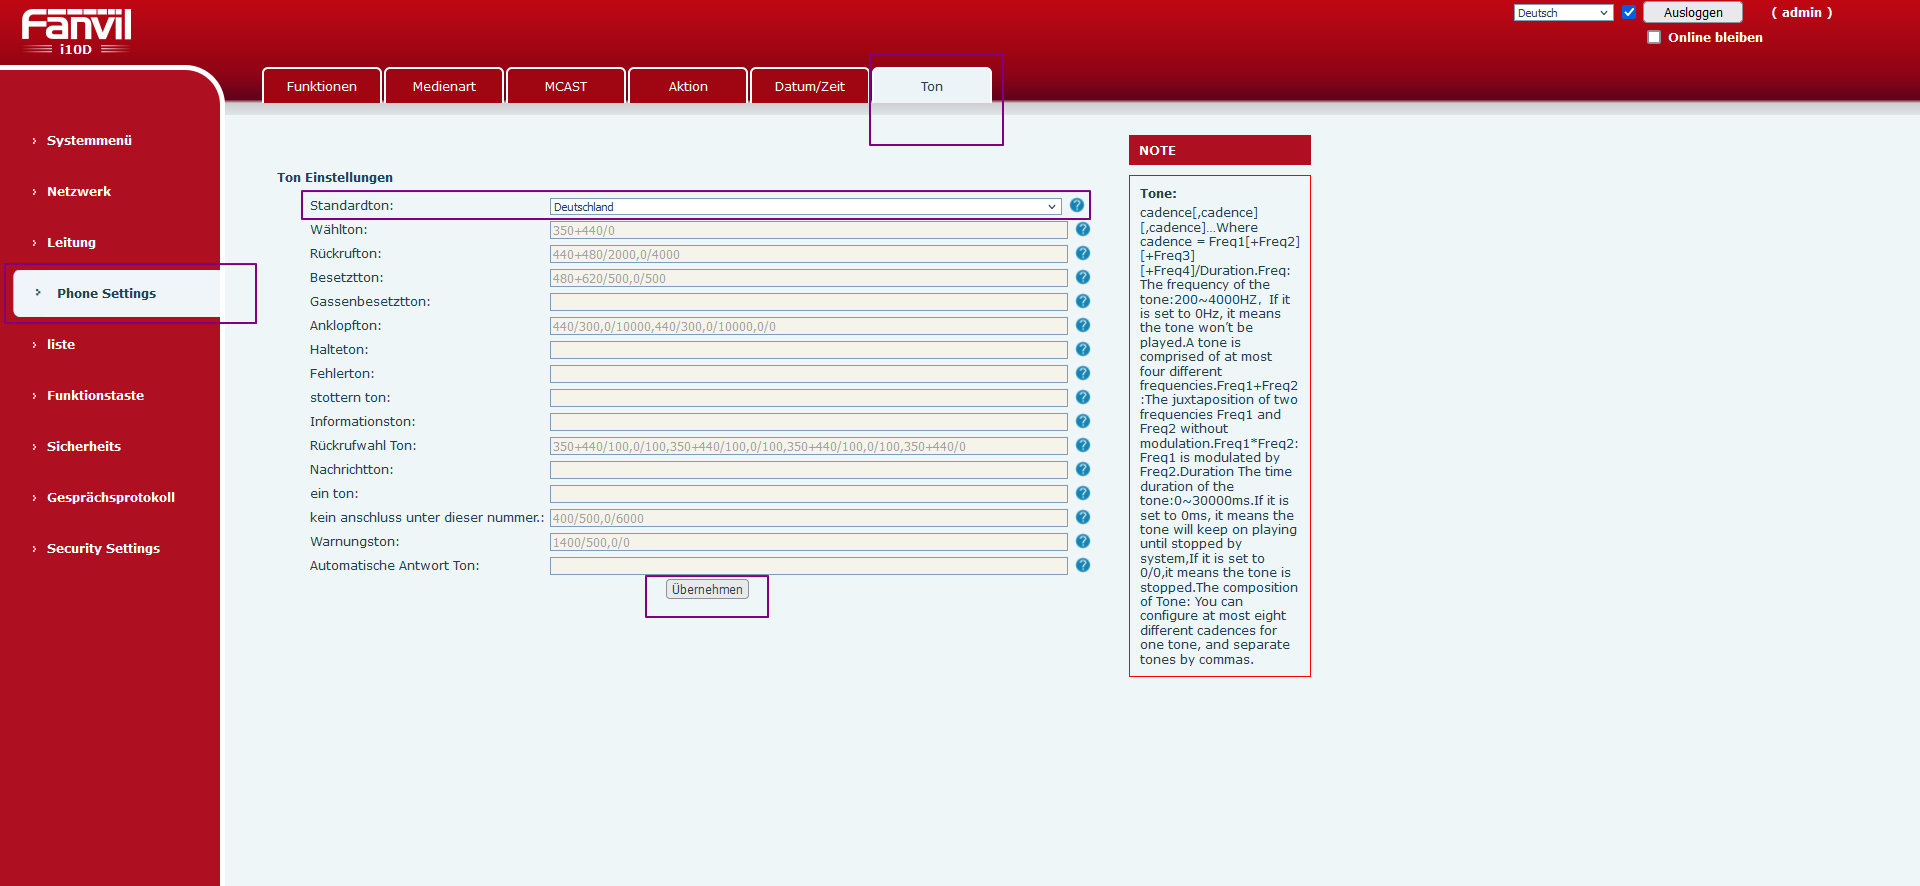
- In the "Default Tone" row, select the country
- Confirm with "Apply".