Enable the NUKI HTTP interface
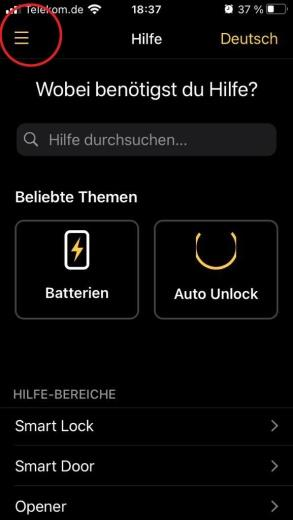
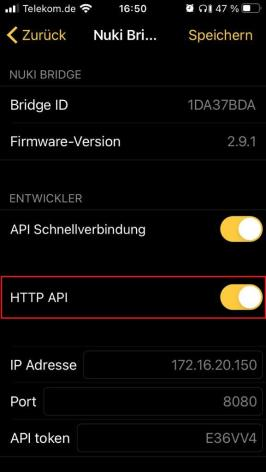
Open the NUKI app and follow the steps below.
- Tap the three lines in the top-left corner.
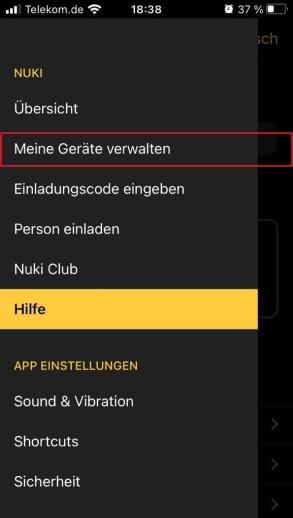
- Tap "Manage my devices".
- Select "Bridge".
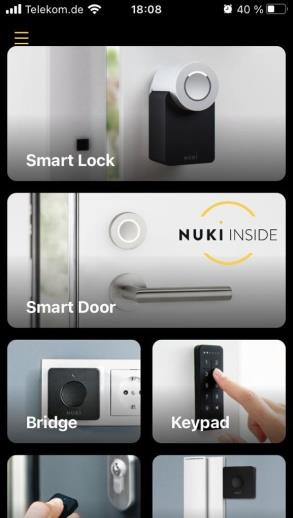
- Enable the HTTP API there.
Add NUKI to ESENTA SIAS
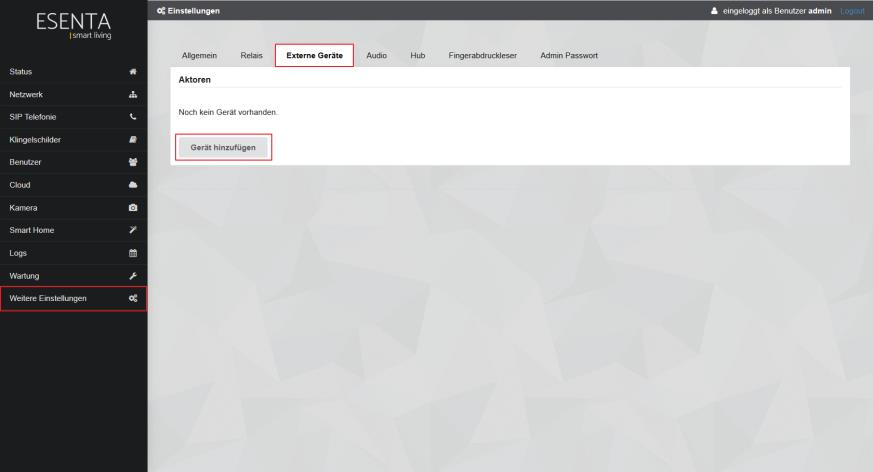
Now open the ESENTA SIAS IP address:
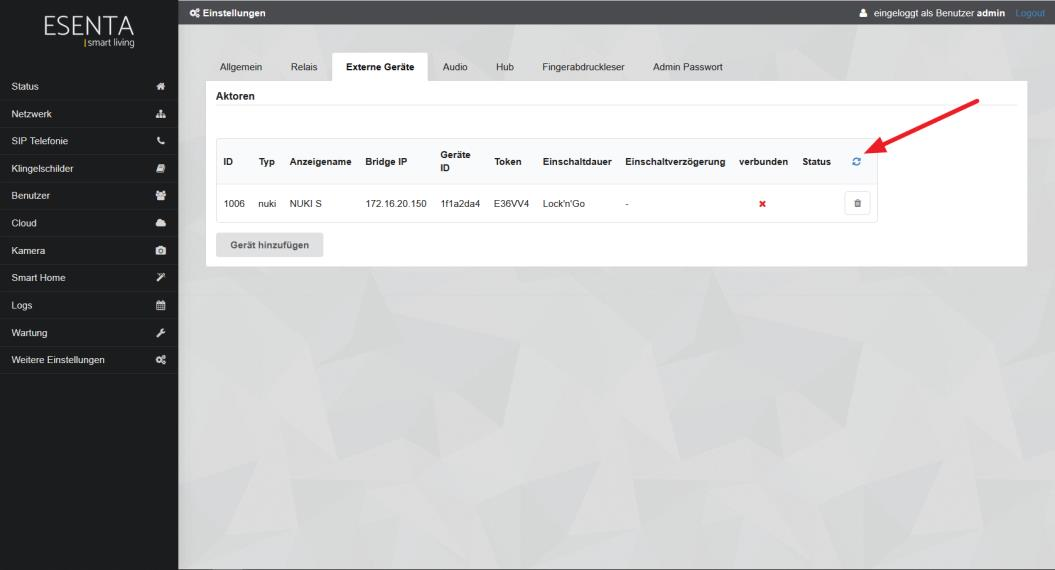
Additional Settings > External Devices > Add Device
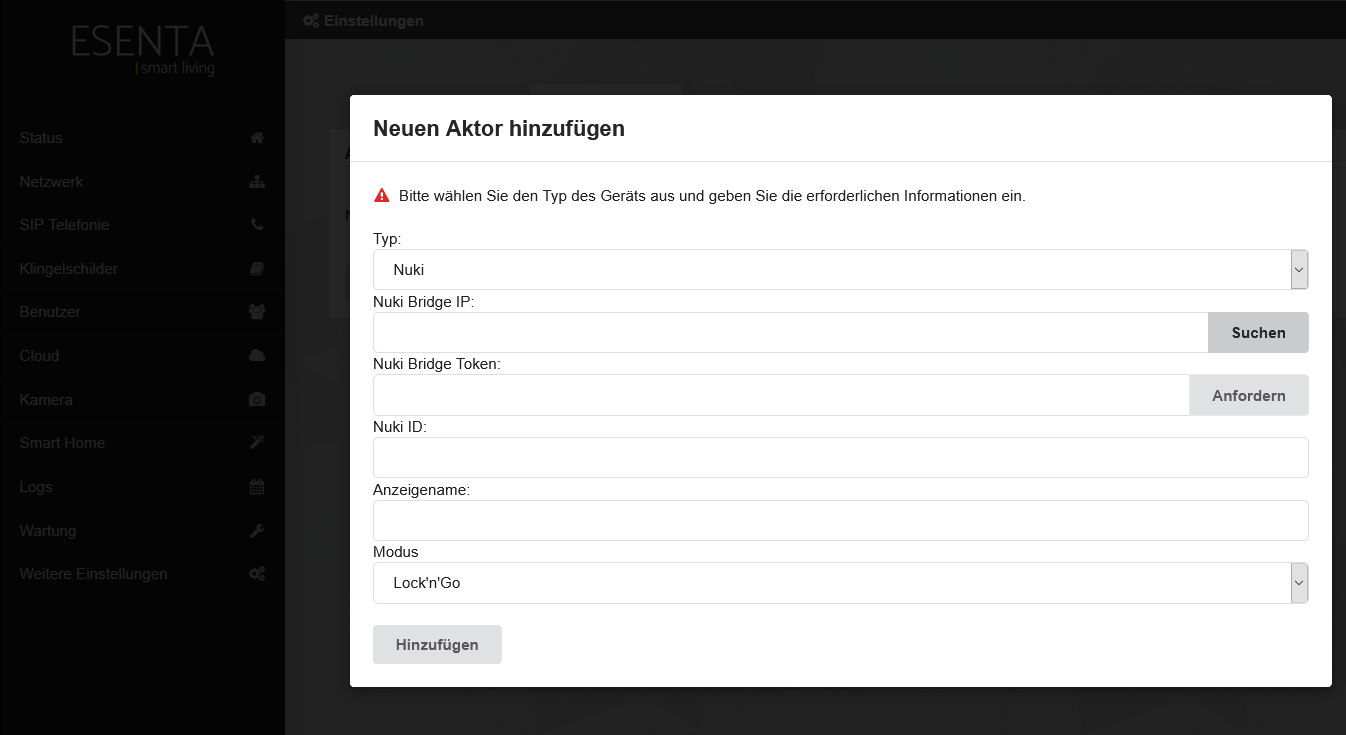
Fill in the following fields:
a. In the Nuki Bridge IP field, click Search — the IP address will be filled in automatically.
(Note: the bridge must not be in maintenance mode at this point. In the Nuki app, leave the bridge's settings area.)
b. In the Nuki Bridge Token field, click Request, confirm with OK, and press the button on the Nuki bridge.
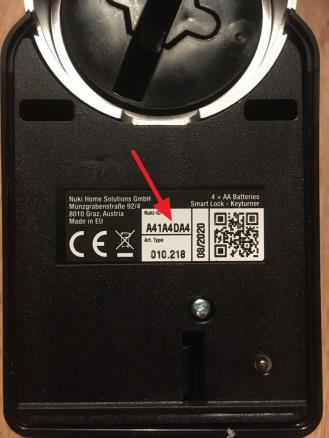
c. In the Nuki ID field, enter the Nuki ID number, which you can find on the back of the respective Nuki Smart Lock.
d. In the Display Name field, you can enter any name for the lock.
e. In the Mode field, you can choose between two modes.
Lock 'n' Go (settings are made in the Nuki app)
- With Lock'n'Go, a time can be configured in the Nuki settings, after which the door automatically locks again.
open/close (settings are made in the ESENTA web interface)
- The open/close function is similar to the Lock'n'Go function, except that SIAS sends two separate, time-delayed commands to open and then close again. You can configure an on-time (how long the door should stay open) and also an opening delay (how many seconds later, e.g. after entering an unlock code, the door should be unlocked). This is intended for cases where there's a longer distance between SIAS and the door.
Then click the reload icon in the top-right corner.
Assign NUKI to an authentication event
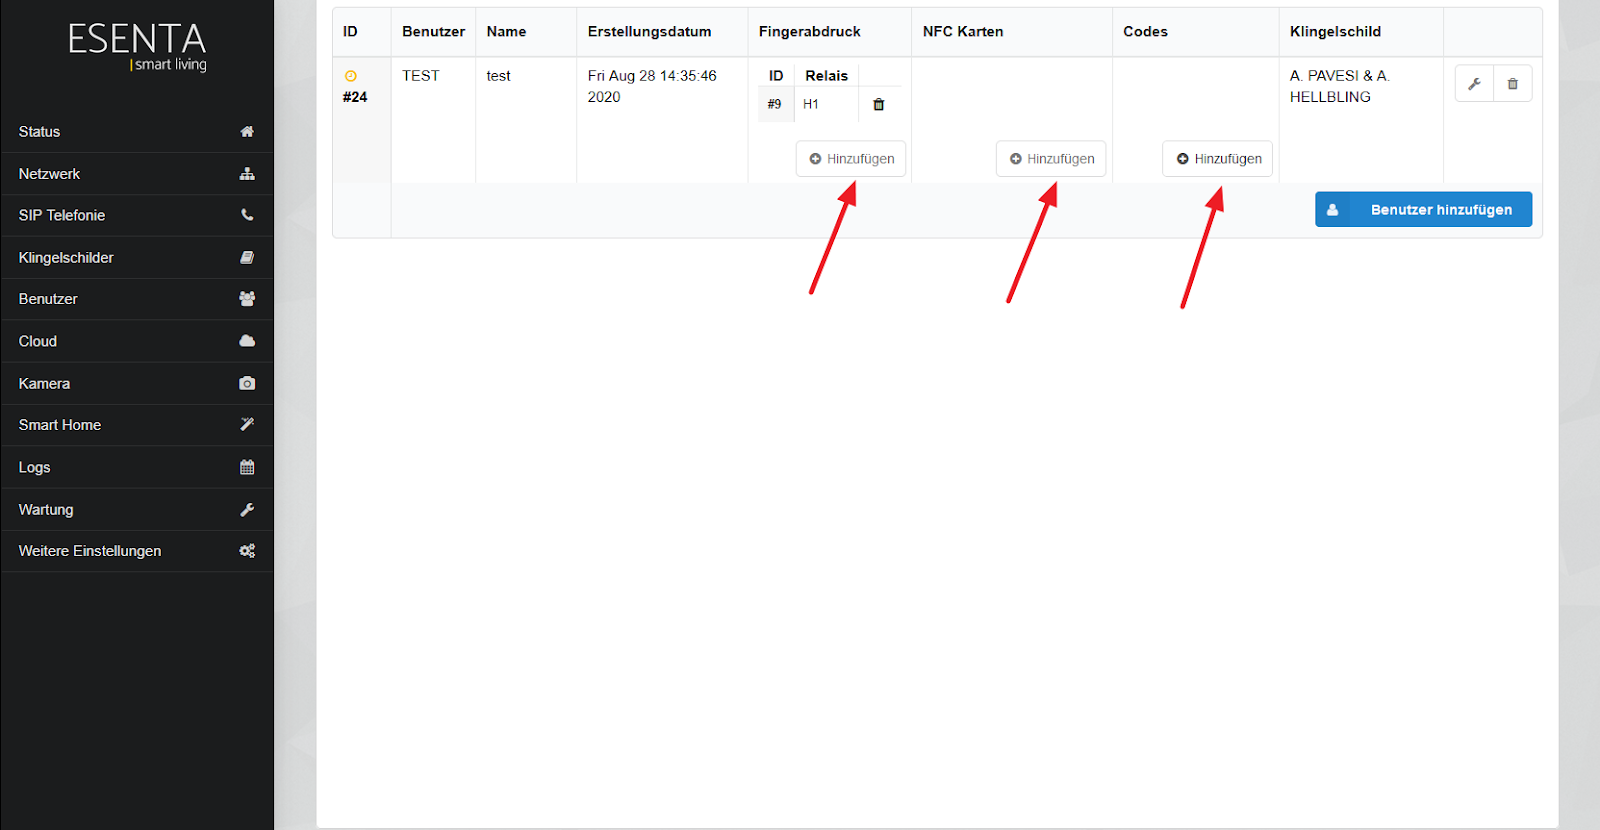
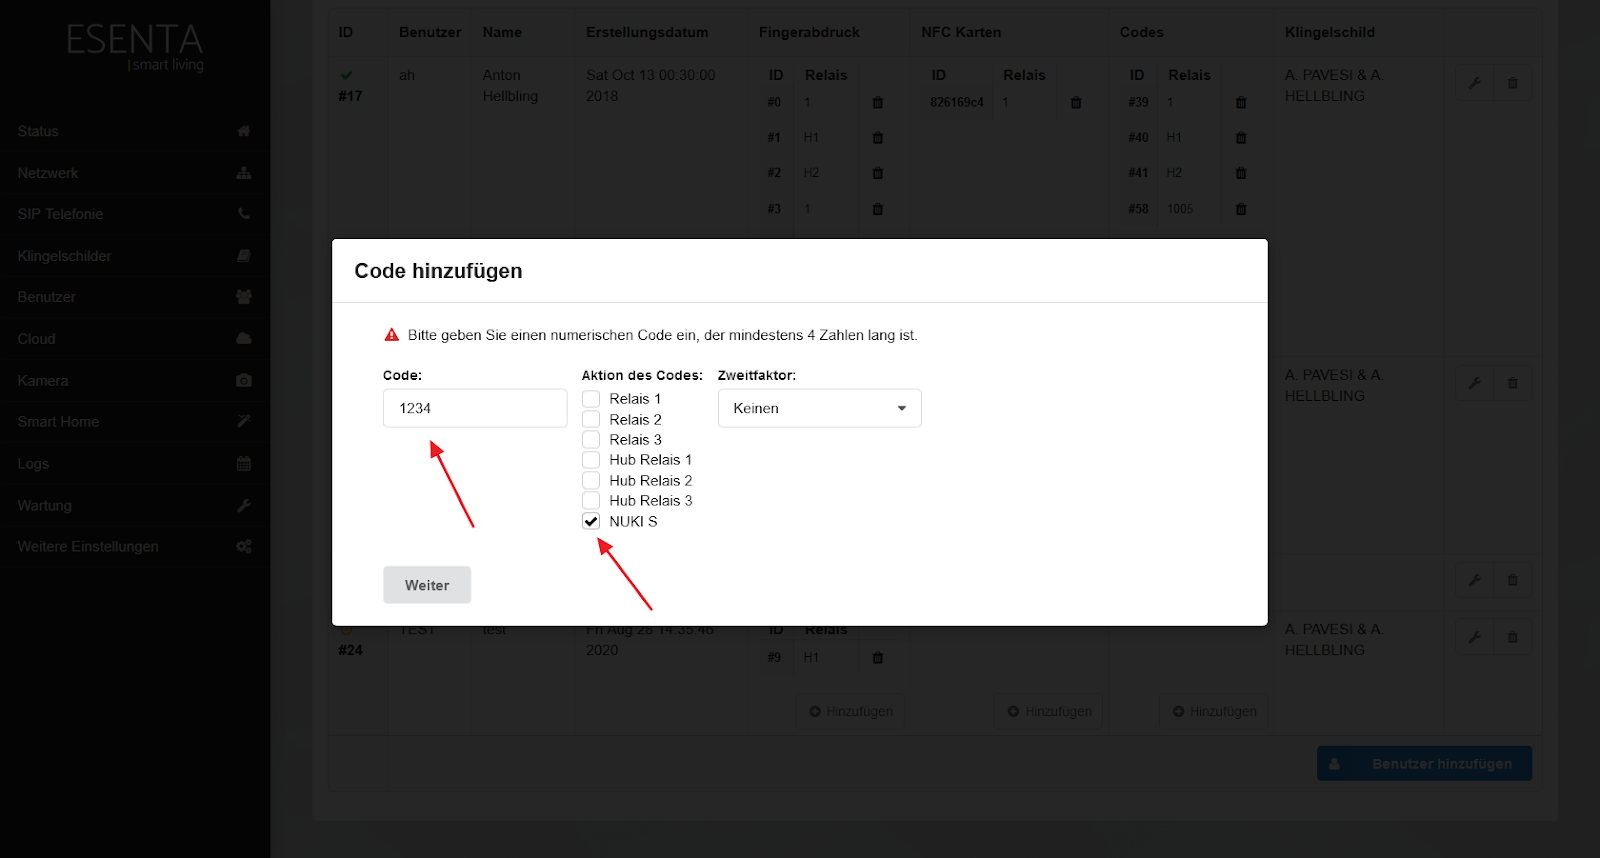
In the ESENTA web interface, open the Users section and set up a fingerprint, NFC card, or code for a user
that should trigger the Nuki Smart Lock:
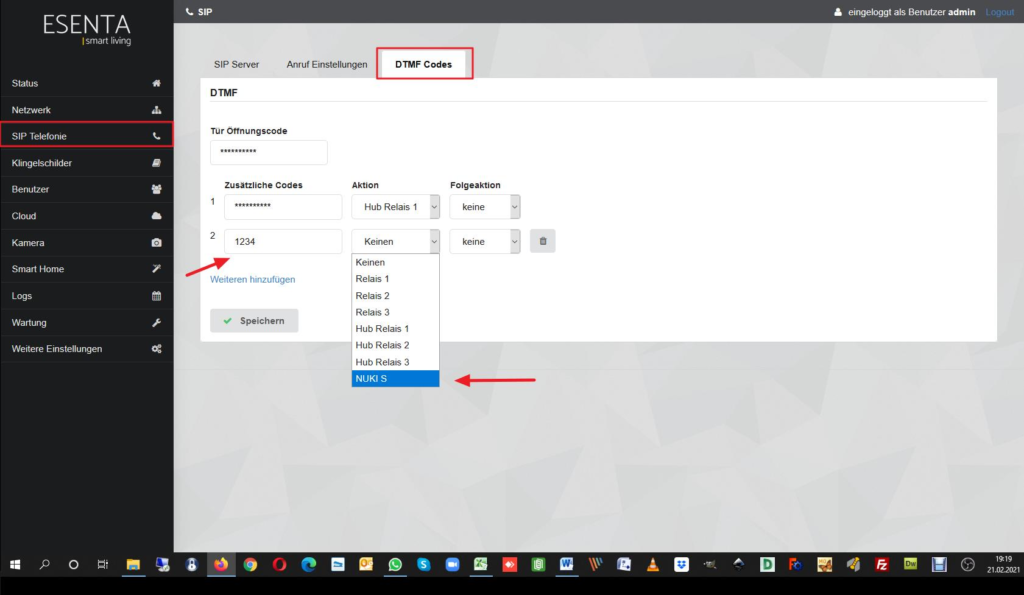
Assign NUKI to a DTMF code
If NUKI should also be controllable via SIP phones, you need to create a DTMF code for controlling the NUKI Smart Lock in the ESENTA web interface under the
SIP Telephony section.