The following guide describes how to operate ESENTA Sias with an innovaphone IP PBX (e.g. a Virtual Appliance).
Setting Up a User for ESENTA Sias
In the innovaphone user interface, navigate to the PBX > Objects subpage
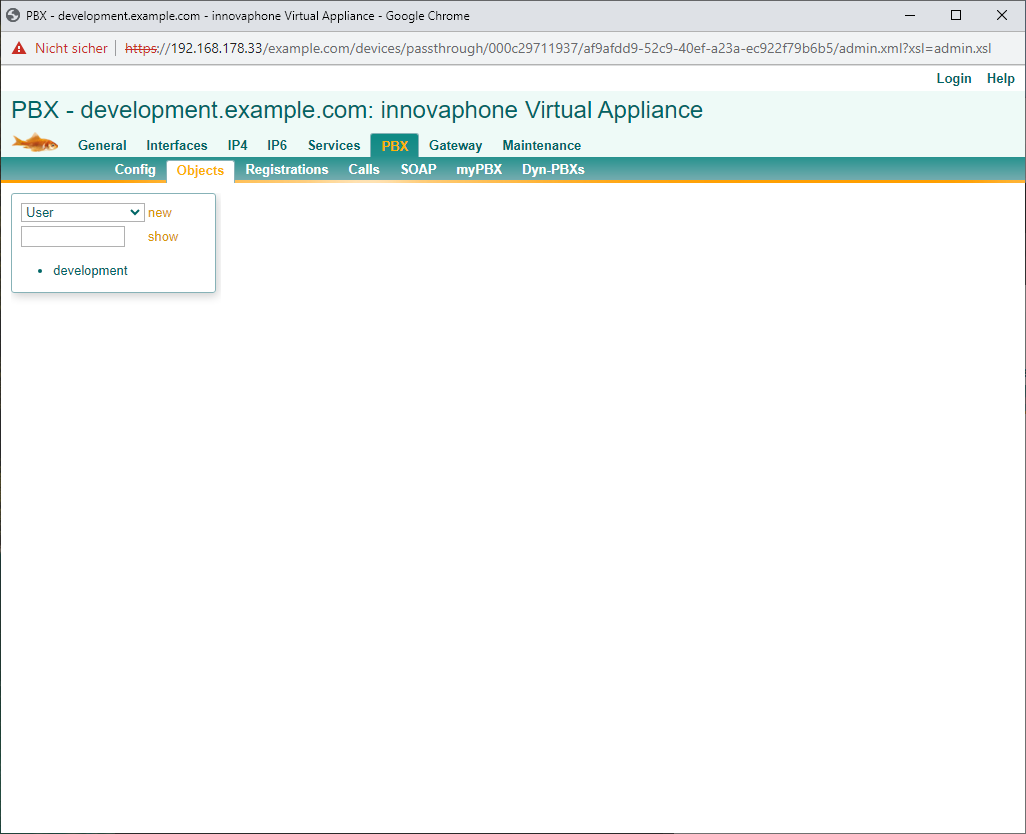
Click new and then fill in the following fields
- Long Name (a descriptive name, here: Sias)
- Name (the short name, here: sias)
- Password (a password of your choice)
- Hardware Id (the username, here: sias)
- Enable Media Relay
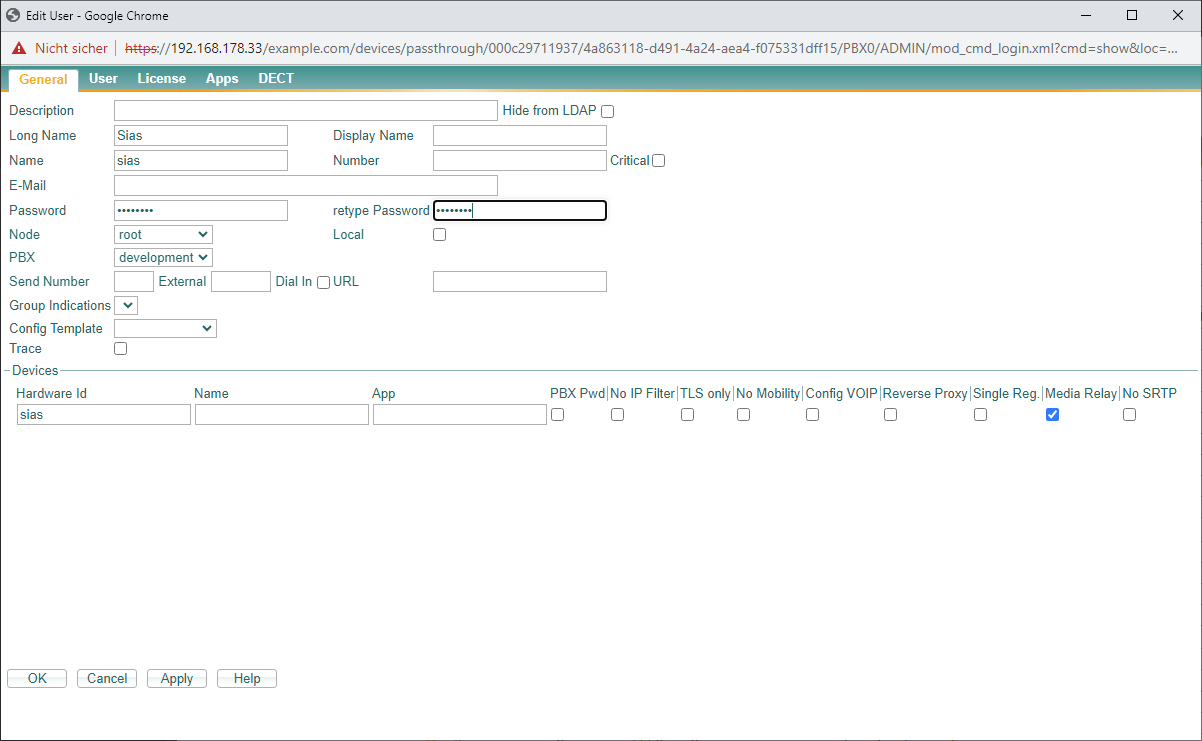
Then save with OK
Configuring SIP Credentials in ESENTA Sias
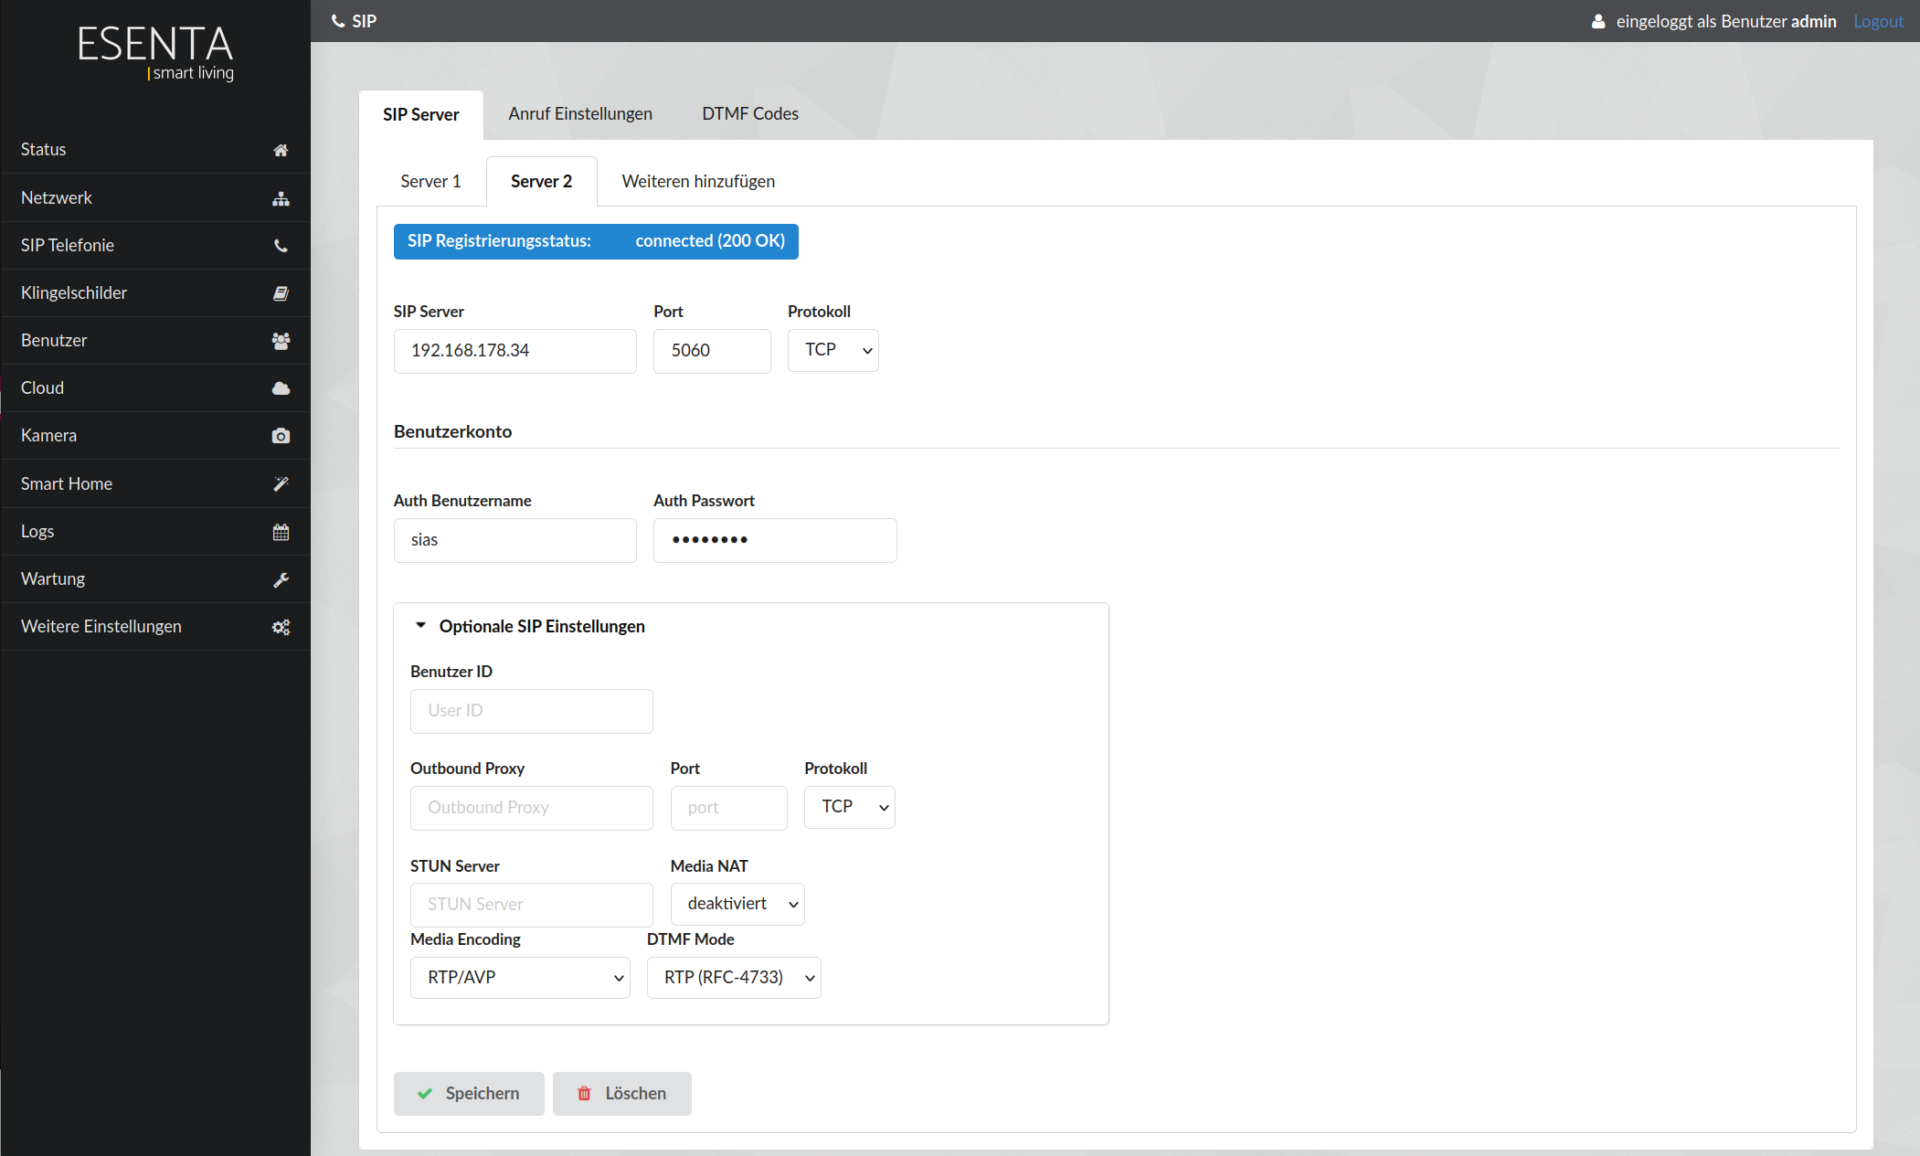
In the ESENTA Sias web interface, navigate to SIP Telephony.
- Under SIP Server, enter the IP address or DNS name of the innovaphone PBX, port 5060, protocol TCP
- As Auth Username, enter the value from innovaphone's Hardware Id field
- As Auth Password, enter the chosen password
- Set Media Encoding to RTP/AVP
- Select RTP (RFC-4733) as DTMF Mode
Using an innovaphone Reverse Proxy
If a reverse proxy is used, it must be entered in the Outbound Proxy field in addition to the settings shown in the image above.

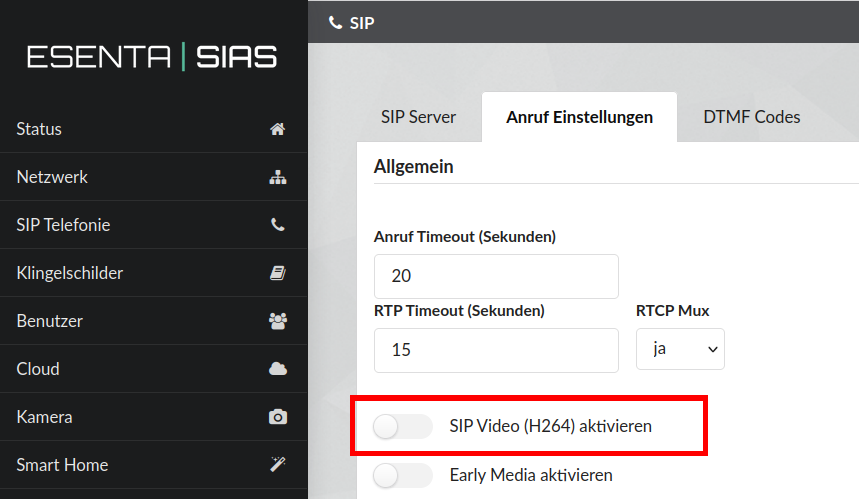
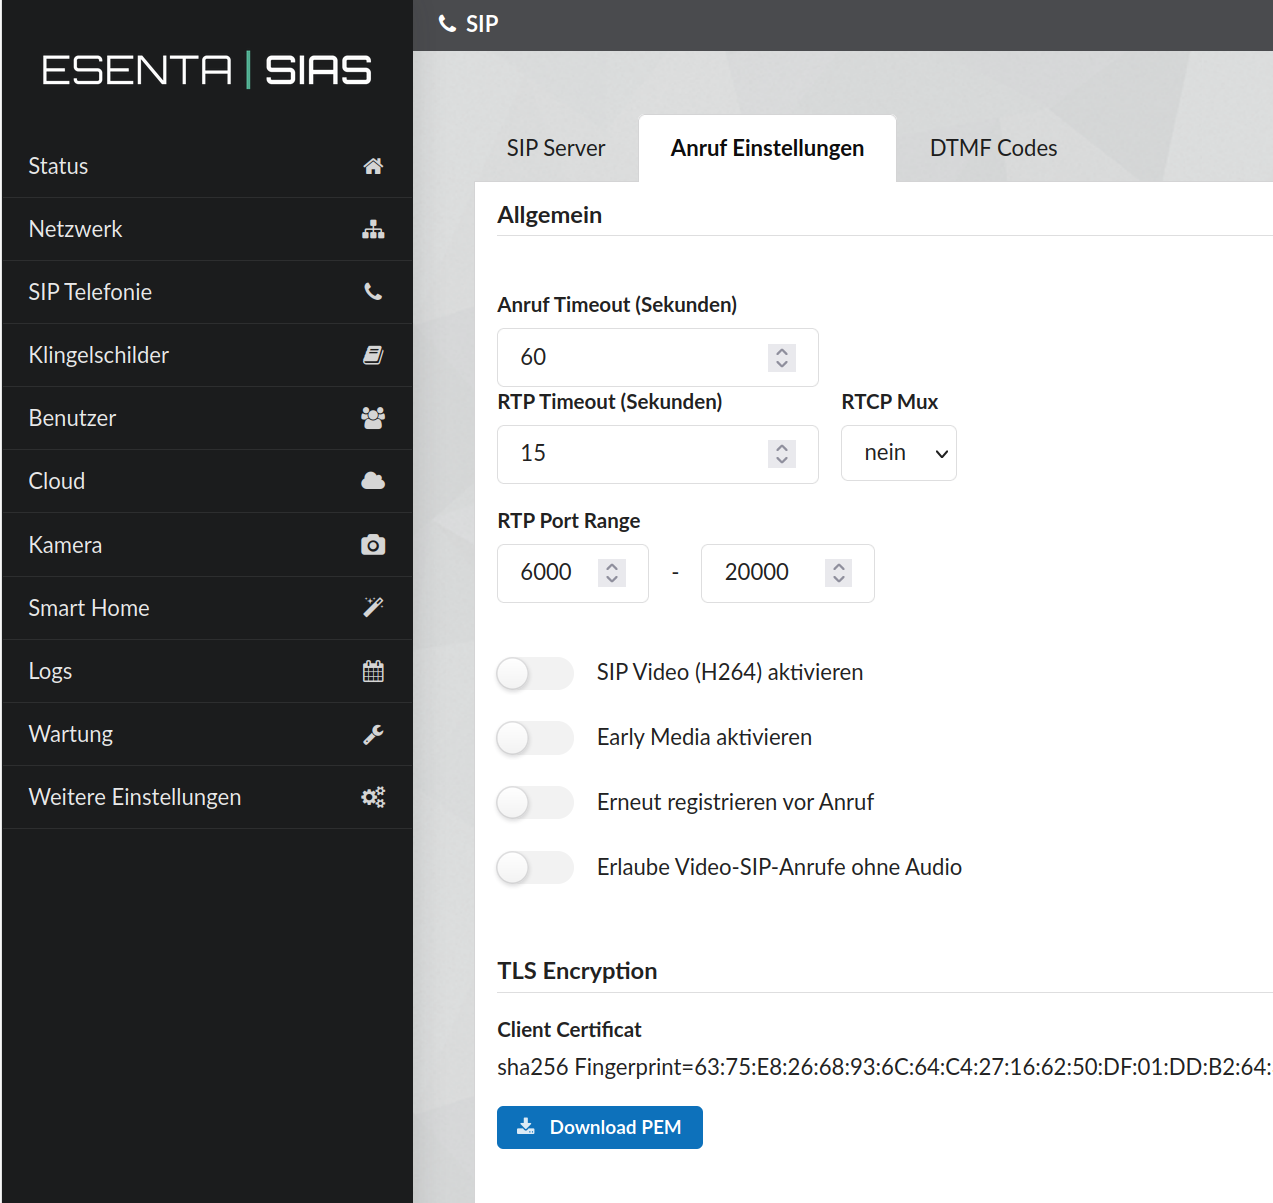
Also make sure that the SIP Video (H264) function under SIP Telephony > Call Settings is disabled, as otherwise connection drops can occur when establishing a connection via a reverse proxy.
Using an innovaphone Reverse Proxy with TLS
To connect to the reverse proxy via TLS, it must be entered under "Outbound Proxy". There, select port 5061 and protocol TLS.

Under "SIP Server", enter your own domain and leave the port at 5060 and the protocol at TCP.

Enter the login data under "Auth Username" and "Auth Password":

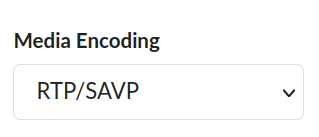
Change Media Encoding to RTP/SAVP:
Under "TLS Verification", you can configure whether all server certificates are accepted or whether the connection should only be established with valid certificates from the remote party. To do this, a CA certificate must be uploaded and selected in the "Required Valid Certificate" dropdown menu.

As described in the previous section, the SIP Video (H264) function under SIP Telephony > Call Settings must also be disabled when connecting via TLS through the reverse proxy.
Setting Up innovaphone IPVA for a TLS Client Certificate
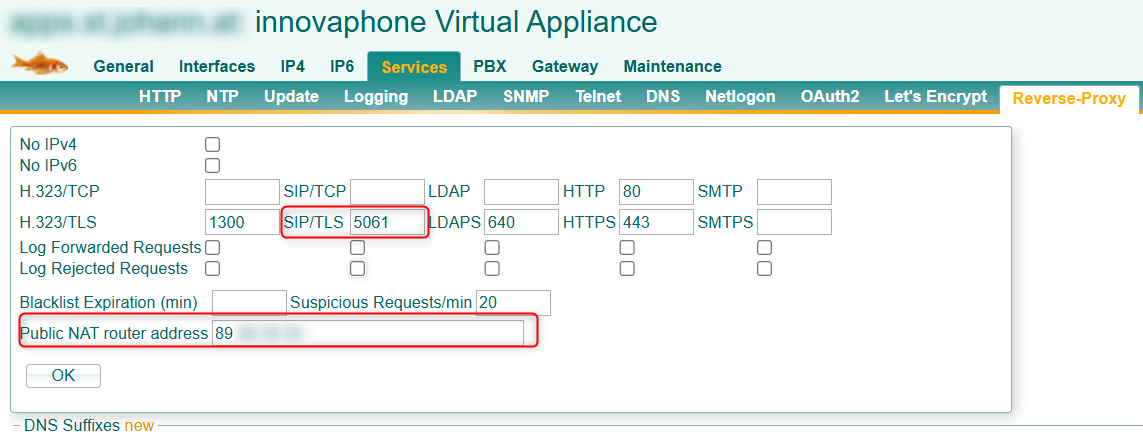
For the reverse proxy, under Services > Reverse Proxy, enter the SIP/TLS port 5061 and enter the public NAT router address in the corresponding field:
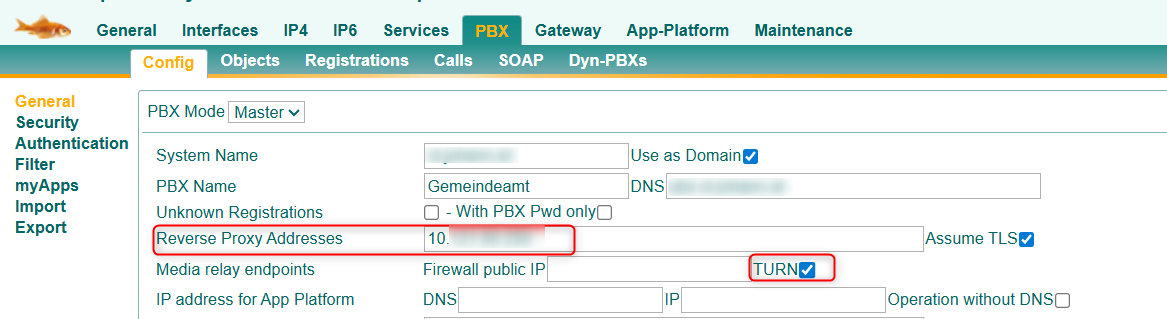
In the PBX, under PBX > Config, enter the IP of the reverse proxy in the "Reverse Proxy Addresses" field and enable the TURN checkbox:
To upload the TLS client certificate, it must first be downloaded from the Sias web interface under "SIP Telephony > Call Settings" via the "Download PEM" button:
Then upload it under "General > Certificates":
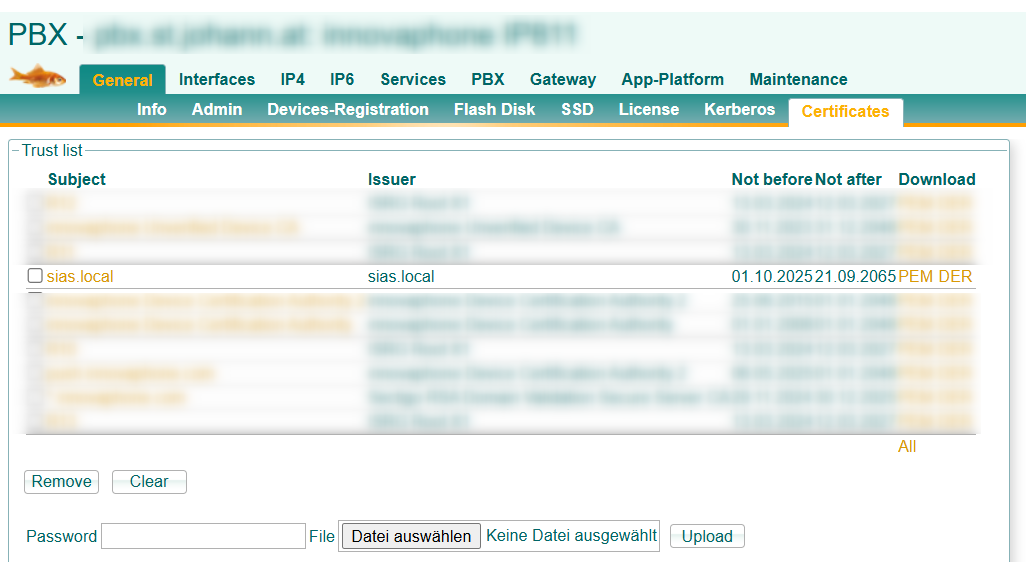
Enable the "Check Certificates" option:

Using a STUN/TURN Server
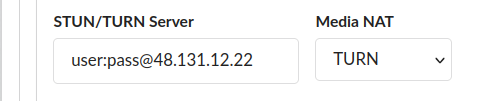
A STUN/TURN server can be entered in the STUN/TURN field. The corresponding type must be selected in the Media NAT field. If authentication is required, it can be specified in the format user:password@server.
Setting Up a Doorbell Button in ESENTA Sias
Navigate to the Doorbell Nameplates subpage and click Add Doorbell Nameplate.
Enter the SIP address in the form sip:[phone number]@[innovaphone server] (replace [phone number] with the destination number assigned to the user in the innovaphone PBX, and [innovaphone server] with the server IP).
Then save with Add.
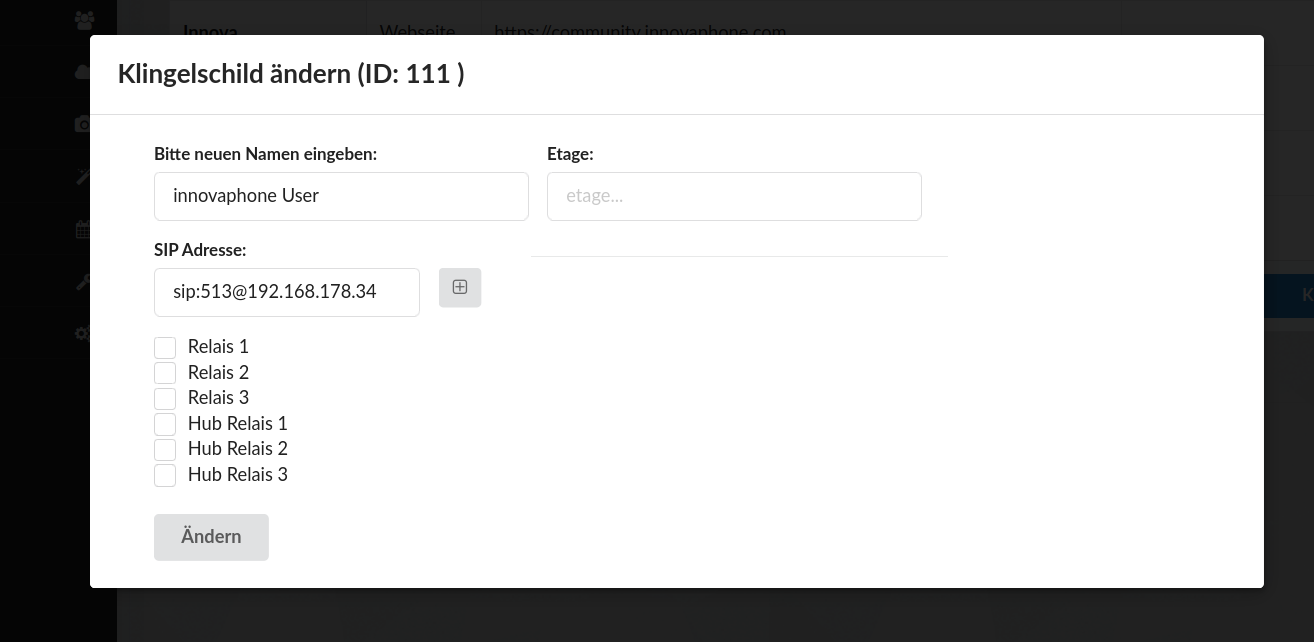
A test call can then be triggered via the display or the call button in the doorbell nameplate overview.
Camera Image on an innovaphone IP Phone
The camera image can be embedded on innovaphone IP phones (tested for IP111, IP112, IP232) using the following URL:
http://[ESENTA-IP-ADDRESS]/snapshot/480x272.jpg?refresh=1
To use this URL, camera authentication must be disabled in the SIAS web interface under Camera > Streams